A column is only as strong as its slenderness lets it be.
Yield strength alone never designs a real column — buckling does.
Chapter 5 covers concentrically loaded columns under AISC 360-22 Chapter E. Flexural buckling (§E3), effective length KL = Lc, elastic vs inelastic branches at Lc/r = 4.71·√(E/Fy), local buckling of slender elements (§E7), and the AISC Manual Table 4-1a design-strength look-ups.
Iconic steel structures built on engineering excellence
When λ = b/t > λr from Table B4.1a, use §E7 with an effective area, Aₑ, based on Fcr and the plate stress ratio.
Why it matters
Slender-element checks catch local buckling of thin HSS walls and slender flanges — missing this over-predicts strength.
Where it is used
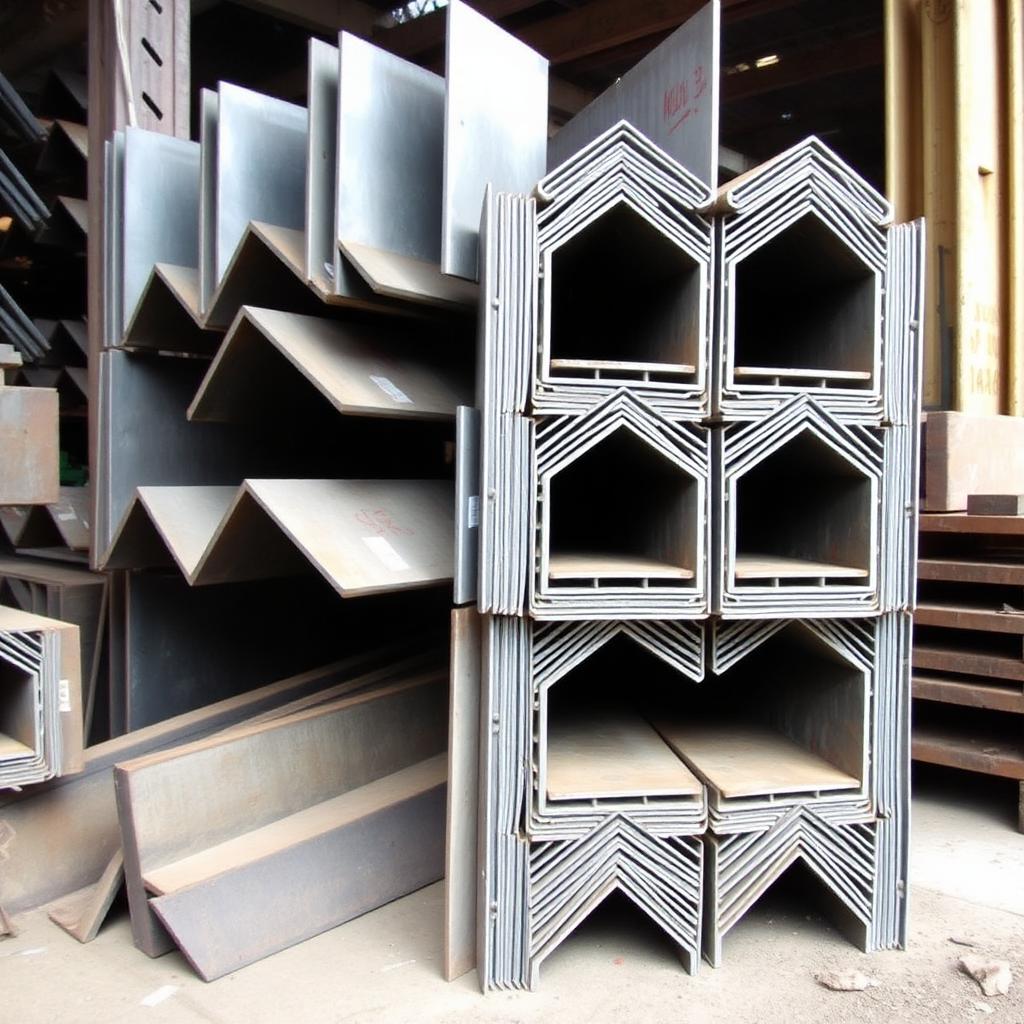
HSS with thin walls, built-up columns, unstiffened plate compression elements.
Connects to
AISC §E7 + Table B4.1a.
03
Engineering motivation
What each part of a steel-frame building actually does — and why it exists
Before you design any single member, you have to see the whole system. A steel-frame building is not a collection of independent shapes bolted together — it is a deliberate load path, engineered so that every kilonewton of gravity, wind, or seismic demand has a continuous route from where it starts to the ground where the earth can resist it.
The photograph below shows a typical steel framing detail. Drag each labelled chip onto the structural element it names — the drop is only accepted when it lands inside the correct element's outlined region. A correct answer locks in with a green outline and a short explanation; a wrong answer flashes the region red, tells you what you actually hit, and returns the chip so you can try again. Press Reveal expected placements to see the reference solution (that attempt is then marked as assisted).
Fig. 1.3 · Drop a chip inside the outlined element it names. Green = correct and locked; red flash = wrong element, chip returns.
04
Failure mechanisms
Why we design the way we do — six ways steel structures have failed, and what each disaster taught the profession
Every provision in AISC 360 is a scar. Behind each equation, load factor, and detailing rule is a bridge, a walkway, or a tower whose failure cost lives and rewrote the profession. The six case studies below trace the mechanisms that motivate the code you are about to learn.
Read each one as an engineer, not a spectator: identify the load, the limit state, the missing check, and the specific clause that exists today because that check was missed. When you meet those clauses again in Chapters 5–17, they will read as answers, not rules.
Case 01
Fig. 1.4.1 · Global flexural buckling
Failure mechanism
Global flexural buckling
A slender column bows laterally under axial load once the applied stress reaches Fcr, well below Fy.
Root cause
KL/r too high — Fe = π²E/(KL/r)² drops below Fy and the elastic branch governs.
Lesson learned
Screen KL/r first; if greater than 4.71·√(E/Fy), the elastic Fcr = 0.877 Fe applies.
§AISC 360-22 §E3
Case 02
Fig. 1.4.2 · Local plate / flange buckling
Failure mechanism
Local plate / flange buckling
A slender flange or HSS wall crinkles locally before global buckling can develop, cutting φcPn.
Root cause
λ = b/t > λr from Table B4.1a; the plate is a slender element.
Lesson learned
Use §E7 with the reduced effective area, Aₑ — do not rely on §E3 alone for slender-element shapes.
§AISC 360-22 §E7 + Table B4.1a
Case 03
1978
Fig. 1.4.3 · Hartford, CT, January 1978.
Failure mechanism
Hartford Civic Center roof (1978)
A space-truss roof collapsed under snow when slender top-chord compression members buckled before the truss reached its design load.
Root cause
As-built KL/r of top-chord compression struts was far above the assumed value used in design.
Historical case
Hartford, CT, January 1978.
Lesson learned
Buckling is unforgiving of construction tolerances — the as-built K matters, not the assumed K.
§AISC 360-22 §E3, §C2
Case 04
1907
Fig. 1.4.4 · Quebec City, 29 August 1907.
Failure mechanism
Quebec Bridge (1907)
Compression chord members of a cantilever bridge buckled during construction — 75 workers killed. Root cause: an unaccounted increase in dead load pushing slender chords past their buckling capacity.
Root cause
Latticed built-up compression chords with high effective slenderness were used at loads exceeding the buckling capacity assumed by the designer.
Historical case
Quebec City, 29 August 1907.
Lesson learned
Always verify actual dead load and effective length; slender built-up compression members demand extreme care.
§AISC 360-22 §E6 (built-up members)
How failure propagates
The five-stage failure progression
1Applied load
2Elastic shortening
3Bifurcation
4Lateral bow
5Collapse
Design codes intervene at the transition from yield to instability. Everything before yield is elastic and reversible; everything after instability is a race to collapse. LRFD keeps the demand well below the first transition.
05
Lecture notes
The full textbook chapter — figures, equations, and engineering narrative
Reflection · Think before you read
Two identical W-shapes carry the same axial load, but one is braced at mid-height about its weak axis and the other is not. Predict — before opening AISC §E3 — which one governs, and by roughly how much.
Chapter focus. Columns fail by buckling long before the steel yields — a slender pin-ended column at 30 ft can carry a small fraction of its A·Fy. This chapter turns Euler's classical result into AISC Chapter E: effective length KL, slenderness ratio KL/r, the inelastic Fcr curve, and the resulting φPn you look up in Manual Table 4-1a.
1. Behavior
Unlike tension, compression capacity is governed by stability — a slender member can fail at a stress well below Fy due to elastic buckling. The 1757 Euler solution is the theoretical benchmark:
Pe = π² · E · I / (K L)² ⇒ Fe = π² E / (K L / r)²
AISC modifies this classic result to account for residual stresses, initial crookedness, and inelastic behavior at intermediate slenderness.
Representative Structures
Where compression members carry the load in real structures. Each highlighted element is stressed primarily in axial compression — and its capacity is governed by stability (buckling), not by yielding.
Column
Willis Tower — Steel Building Columns
The bundled-tube frame collects every floor's gravity load into perimeter and interior columns. At the base, each column carries thousands of kips of pure compression. Slabs brace the weak axis at every floor, so KL is set by story height — a classic AISC E3 flexural-buckling design.
Arch rib (compression)
New River Gorge Bridge — Steel Arch Ribs
The twin steel arch ribs carry the entire deck load into the canyon walls as axial compression. In-plane buckling is prevented by cross-bracing between ribs; out-of-plane buckling drives the design — a real-world (KL/r)y problem.
Pier / abutment
Bridge Piers — Concrete Compression Members
Massive granite-faced concrete piers receive the horizontal thrust and vertical reaction of the steel arch. Concrete piers of this size are compression-dominated and typically governed by short-column crushing plus P–δ effects, not slender buckling.
Tower leg (column)
Transmission Tower Legs
Each of the four battered corner legs is a built-up angle column carrying the conductor and self-weight in compression. Diagonal lacing shortens the unbraced length between panel points — the reason a "slender" lattice tower is stable at all.
Perimeter columns
Petronas Towers — High-Rise Perimeter Columns
Ring of high-strength concrete-encased columns at each floor. The composite section increases both Ag and stiffness (EI), pushing the effective slenderness KL/r far below 4.71√(E/Fy) — well inside the inelastic range where Fcr ≈ Fy.
Column
Parking Garage — Repetitive Interior Columns
Regular grid of columns accumulates gravity load one floor at a time. Because slabs brace both axes at every level, the story-height unbraced length usually places these members in the inelastic buckling zone — Manual Table 4-1a is used directly.
2. Effective Length K L
Theoretical (recommended) K values for common end conditions
In real frames, K is computed from stiffness ratios (nomograph) or by rigorous stability analysis. For braced (non-sway) frames K ≤ 1.0; for unbraced (sway) frames K > 1.0.
3. Slenderness Ratio KL/r — the Single Number that Drives Everything
Once you have K L, divide by the radius of gyration r for each axis. The governing slenderness is the larger of (KL/r)x and (KL/r)y — that is the axis about which the column buckles first.
Slenderness
(1)
(KL/r)gov=max[(KL/r)x,(KL/r)y]
Important subtlety: the unbraced lengths about the two axes are often different (a slab may brace weak-axis at every floor while strong-axis only at the top and bottom of the column). Compute (KL)x and (KL)y with their own unbraced lengths before dividing by rx or ry.
Recommended limit (§E2): KL/r ≤ 200. Above 200 the column is too flexible for practical construction.
4. AISC Flexural-Buckling Equations (§E3)
Slenderness limit
(2)
KL/r≤4.71(E/Fy)⇔Fe≥0.44Fy(inelasticrange)
E3-2 Inelastic
(3)
Fcr=[0.658Fy/Fe]⋅Fy
E3-3 Elastic (long)
(4)
Fcr=0.877⋅Fe
Nominal strength
(5)
Pn=Fcr⋅Ag
ϕc=0.90
The 4.71√(E/Fy) boundary is the only decision you have to make: short/stocky → E3-2 (inelastic); long/slender → E3-3 (elastic Euler-like). Both formulas return Fcr, and Pn = Fcr·Ag. For A992 (Fy = 50 ksi) the boundary is KL/r ≈ 113.
5. Torsional & Flexural-Torsional Buckling (§E4)
Doubly-symmetric shapes rarely control on torsion. Singly-symmetric (e.g., tees, angles, channels) and cruciform sections require checking Fe from E4-2 through E4-5.
6. Slender-Element Sections (§E7)
If any element's b/t exceeds the λr limit in Table B4.1a, the section is slender. Nominal strength becomes Pn = Fcr · Ae, where Ae uses effective widths. Most rolled W-shapes at Fy = 50 ksi are non-slender.
7. Two Solution Methods — Companion Tables vs. AISC Specification Formulas
Every compression-member problem in this course can be solved by either of two equivalent routes. Learn both — the Specification route explains why the number is what it is, and the Manual (companion-table) route is what you use in practice and on the FE / PE exam.
Method A — AISC Specification Formulas (Chapter E, "the long way")
Compute effective length KL using the K from Table C-A-7.1 or the alignment charts (Fig. C-A-7.1 / C-A-7.2).
Compute slenderness (KL/r)x, (KL/r)y; keep the larger.
Compare KL/r to 4.71√(E/Fy) to decide inelastic (Eq. E3-2) or elastic (Eq. E3-3).
Compute Fe = π²E/(KL/r)² → Fcr → φcPn = 0.90·Fcr·Ag.
Use when: non-standard K, non-A992 steel, slender elements requiring E7, or when you must show every step in a report or on an exam. See Worked Examples 5.10 and 5.11.
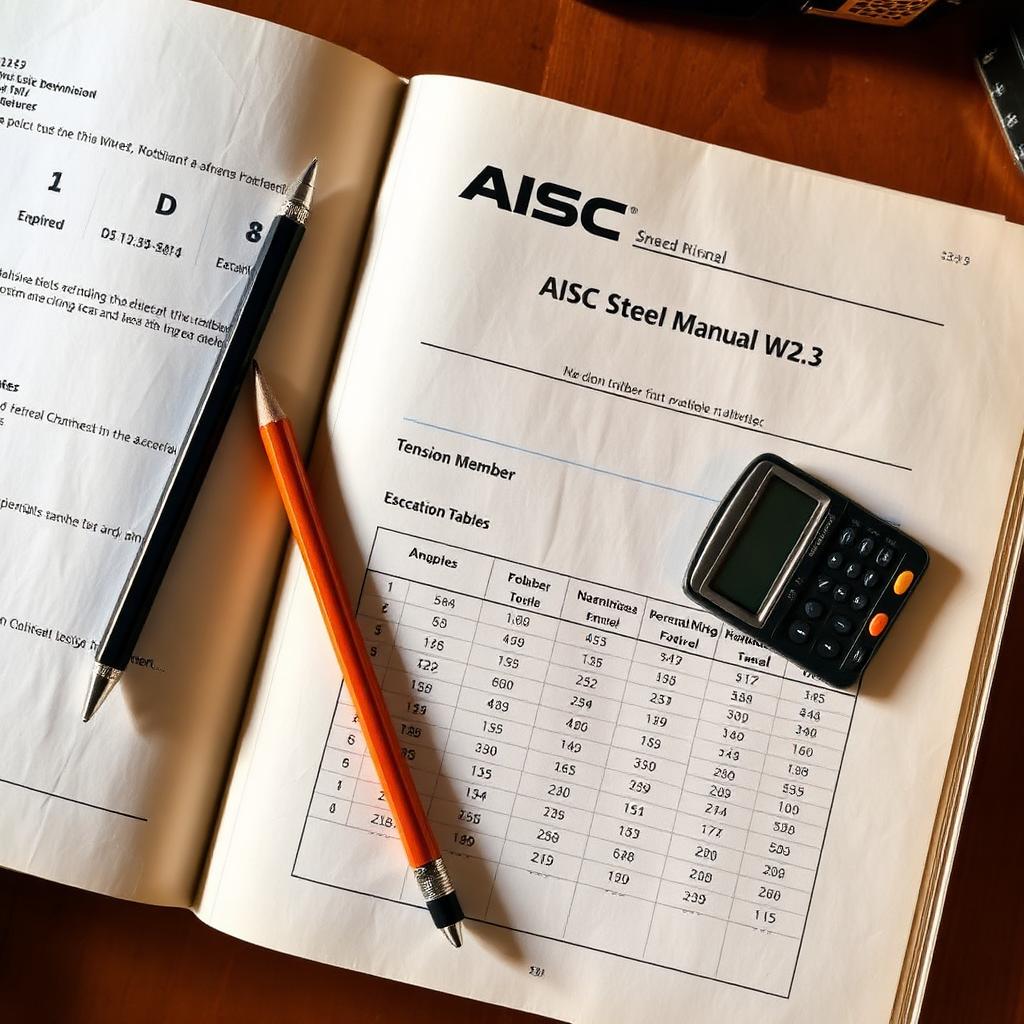
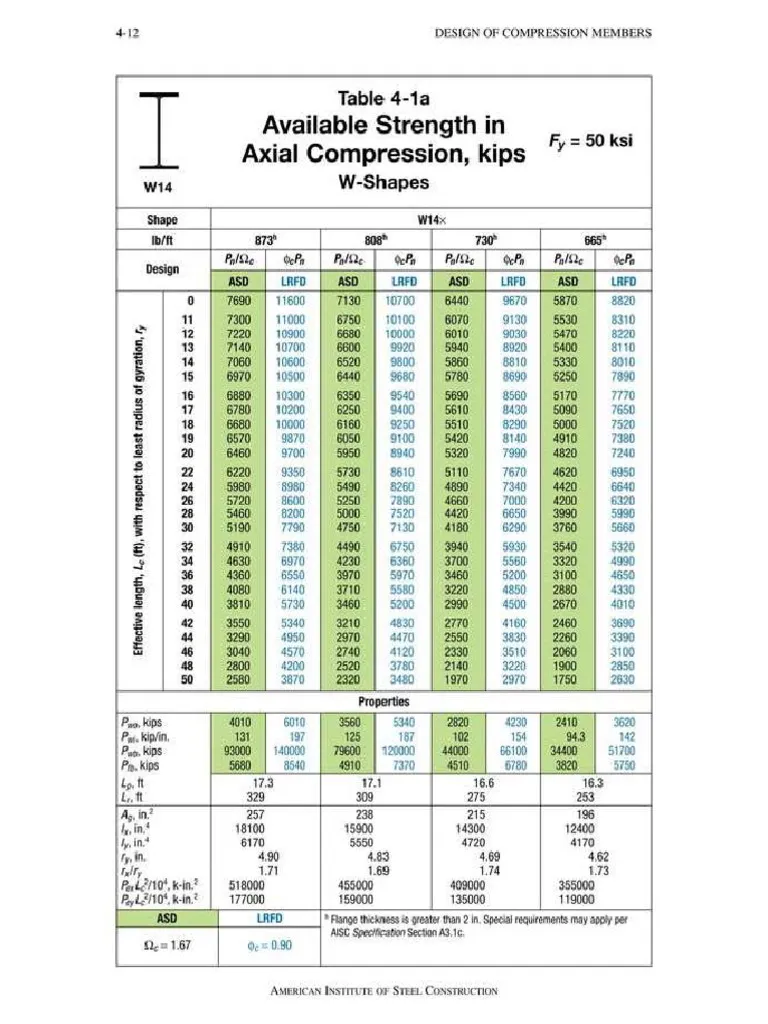
AISC Manual Table 4-1a — Available Strength in Axial Compression (W-shapes, Fy = 50 ksi). Enter with the effective length KL (ft); read φcPn (LRFD) or Pn/Ωc (ASD).
AISC Commentary Fig. C-A-7.1 / C-A-7.2 — nomograph for K
Mini-Examples — Reading Between the Two Methods
The following short examples show Method A (Chapter E formulas) and Method B (Manual Table 4-1a) side-by-side for realistic W and HSS columns. Each is a self-contained AISC 360-22 check.
Example 5-1 — Critical buckling load by Euler
Setup: W10×33 column, KL = 14 ft, A992 (Fy = 50 ksi), ry = 1.94 in. Compute Fe and classify. AISC §E3
FE trap. Memorize 4.71√(E/Fy) = 113 for Fy = 50 ksi — the most-missed transition slenderness in Chapter E.
Example 5-4 — Effective length factor by alignment chart
Setup: interior column of an unbraced frame with GA = 1.5, GB = 0.8. Use the sidesway-permitted nomograph. AISC App. 7, Fig. C-A-7.2
Reading the sidesway-permitted (unbraced) nomograph:
GA=1.5,GB=0.8
XXX⇒K≈1.4
Answer. K ≈ 1.4. For an unbraced frame K ≥ 1.0 always.
FE trap. Braced frames → Fig. C-A-7.1 (K ≤ 1); moment frames → Fig. C-A-7.2 (K ≥ 1).
Example 5-7 — Pick a W column for a given load (Method B)
Setup: Pu = 600 k, KL = 13 ft, A992. Find the lightest W12 that works. AISC Manual Table 4-1a
Enter Table 4-1a at KL = 13 ft and scan W12 shapes by increasing weight:
XXXW12×53:ϕcPn≈542 k
XXX<Pu=600 k⇒NG
XXXW12×58:ϕcPn≈605 k
XXX≥Pu=600 k⇒OK
Answer. Use W12×58 (lightest W12 with φcPn ≥ 600 k at KL = 13 ft).
FE trap. "Lightest" = smallest lb/ft, not smallest depth.
Example 5-9 — HSS column check (Method A)
Setup: HSS 6×6×3/8, A500 Gr. B (Fy = 46 ksi), KL = 12 ft, Ag = 7.58 in², ry = 2.28 in. Check φcPn. AISC §E3
XXXrKL=2.2812⋅12
XXX=63.2
XXX<4.714629000=118⇒inelastic
Fe=(63.2)2π2(29000)
XXX=71.6 ksi
Fcr=(0.658Fy/Fe)Fy
XXX=0.65846/71.6(46)
XXX=35.8 ksi
XXXϕcPn=0.90FcrAg
XXX=0.90(35.8)(7.58)
XXX=244 k
Answer. φcPn ≈ 244 k.
FE trap. HSS with slender walls (b/t > λr) trigger §E7 — check b/t before applying §E3.
FE Ex 1 — Effective length for a pinned–pinned column
Given: W10×49, L = 14 ft, K = 1.0, ry = 2.54 in. AISC Commentary Table C-A-7.1
XXXryLc=ryKL
XXX=2.541.0(14⋅12)
XXX=66.1
Answer. Lc/ry = 66.1.
FE trap. Convert L to inches before dividing by r (r is tabulated in inches).
Method B — AISC Manual Companion Tables (Part 4, "the fast way")
Determine the governing effective length. Manual Table 4-1a is tabulated on KL using ry (weak-axis). If the strong axis governs, enter with the equivalent length KLx/(rx/ry) instead.
Read φcPn directly from Table 4-1a (W-shapes, Fy = 50 ksi) or Table 4-1b (HSS, pipes, etc.). Interpolate linearly on KL.
Verify φcPn ≥ Pu. The table already embeds Fcr, φ, weak-axis check, and non-slender-element classification for standard rolled shapes.
Use when: rolled W or HSS in A992 (or Manual-listed grade), K ≈ 1.0 or you have an equivalent KL. See Worked Example 5.1 (Table 4-1a cross-check).
AISC Manual Table 4-1a (excerpt) — φ_c P_n vs. KL for common W-shapes, F_y = 50 ksi
Which method for which problem?
Braced/unbraced frame with alignment-chart K: Method A to get K, then either method for φcPn. When Kx ≠ Ky, convert to an equivalent KL before entering Table 4-1a.
Trial section for a known Pu: always start with Method B — it lets you scan many shapes in seconds. Then verify with Method A only if K, Fy, or slenderness is non-standard.
Exam problems: use whichever your reference allows. The FE Reference Handbook gives the Chapter E equations (Method A); the PE exam expects Manual tables (Method B).
The two methods agree to within round-off (~1 %) for standard cases — every worked example in this chapter cross-checks one against the other.
8. Design Procedure (put it all together)
Compute Pu from ASCE 7 combinations.
Estimate required φPn; enter AISC Manual Table 4-1a / 4-1b (KL vs. φPn) to pick a trial W-shape (Method B).
Compute (KL/r)x, (KL/r)y; take the larger. Verify KL/r ≤ 200.
Compare to 4.71√(E/Fy); compute Fe, then Fcr from E3-2 or E3-3 (Method A cross-check).
Verify φc Pn ≥ Pu; check flange & web slenderness (§E7) if the trial shape is not tabulated as non-slender.
⚠ Common mistakes
Using L instead of KL — always multiply by K.
Using rx when weak-axis (ry) governs.
Confusing braced vs unbraced length — bracing about y-axis may differ from x-axis.
Applying φ = 0.75 instead of 0.90 for compression.
Worked Example 5.1 — Interior Column, W14 (A992)
Method: AISC Specification (Chapter E, Eq. E3-2) — hand solution | Cross-check: AISC Manual Table 4-1a (Companion Table)
Given: Interior 1st-story column of the Cardinal Square 4-story braced-frame office. Factored axial Pu = 640 k. Story height 14 ft; braced in both directions at top & bottom (K = 1.0). Material A992 (Fy = 50 ksi, E = 29,000 ksi). Try W14×82: A = 24.0 in², rx = 6.05 in, ry = 2.48 in, bf/2tf = 5.92, h/tw = 22.4.
Check: φcPn = 772 k ≥ Pu = 640 k ✓ Demand/Capacity = 0.83. Use W14×82, A992.
Verify with AISC Manual Table 4-1a
For KLy = 14 ft the manual tabulates φcPn ≈ 770 k for W14×82 — matches within round-off. Table 4-1 columns already embed Fcr, φ, and the weak-axis check; use the hand solution above only to confirm the tabulated value or when K deviates from 1.0.
Worked Example 5.10 — Intermediate-Floor Column, Braced Frame (Alignment Chart)
Method: AISC Specification — alignment chart (Fig. C-A-7.1) for K + Eq. E3-2 for Fcr | Cross-check: Manual Table 4-1a at the equivalent KL
Given: Interior column on the 2nd story of a 4-story braced office frame. All stories 12 ft; typical bay 25 ft. All columns W12×72 (Ix = 597 in⁴, A = 21.1 in², rx = 5.31 in, ry = 3.04 in). Girders framing to the joint on both sides: W18×50 (Ix = 800 in⁴). Column loaded to Pu = 500 k. Beams provide weak-axis bracing at every floor (KyLy = 1.0·12 ft). A992 steel (Fy=50 ksi, E=29,000 ksi).
Figure 5.10a — Frame elevation. The highlighted red column is the design member; joints A (top) and B (bottom) each receive one column above/below and one beam on each side.
Step 1 — Alignment-chart G at each joint
Definition
(6)
G=Σ(Ic/Lc)÷Σ(Ig/Lg)
Formula first, then substitute per the drawing above.
Columns at joint A: one above (W12×72, 12 ft) + one below (W12×72, 12 ft).
Σ(Ic/Lc) = 2 · 597/(12·12) = 2 · 4.146 = 8.29 in³.
Beams at joint A: two W18×50 girders spanning 25 ft each side.
Σ(Ig/Lg) = 2 · 800/(25·12) = 2 · 2.667 = 5.33 in³.
GA = 8.29 / 5.33 = 1.55.
By symmetry the framing at joint B is identical → GB = 1.55.
Step 2 — K from the braced-frame (sidesway-inhibited) chart
Figure 5.10b — AISC Commentary Fig. C-A-7.1 (sidesway-inhibited). Mark GA = 1.55 on the left axis and GB = 1.55 on the right axis; draw a straight line between them. Where that line crosses the middle K axis, read K ≈ 0.83. The yellow dot shows the reading.
How to use the chart: (1) locate GA on the left G-scale, (2) locate GB on the right G-scale, (3) join the two points with a straight edge, (4) read K where the line intersects the central K-scale. Values increase upward (0 at the bottom, ∞ at the top).
Check: φcPn = 805 k ≥ Pu = 500 k ✓ (D/C = 0.62). Use W12×72. Cross-check: AISC Manual Table 4-1a at KLy = 12 ft gives φcPn ≈ 800 k for W12×72 — matches.
Worked Example 5.11 — Lowest-Floor Column, Unbraced Moment Frame (Pinned Base)
Method: AISC Specification — alignment chart (Fig. C-A-7.2, sidesway-uninhibited) for K + Eq. E3-2 | Cross-check: Manual Table 4-1a with equivalent KLx/(rx/ry)
Given: Interior column on the ground story of an unbraced (moment-resisting) 4-story frame. Story height 14 ft; typical bay 30 ft. Column W14×90 (Ix = 999 in⁴, A = 26.5 in², rx = 6.14 in, ry = 3.70 in). Column above at joint A is also W14×90, L=14 ft. Girders at joint A: W21×62 (Ix = 1330 in⁴), 30 ft each side. Base at joint B is pinned. Weak axis braced at each floor by the slab (KyLy = 1.0·14 ft). Pu = 750 k. A992 steel.
Figure 5.11a — Unbraced frame. Rigid joints shown as filled squares; the pinned column base is drawn as an open circle on a ground line. Sway freedom → use the sidesway-uninhibited chart.
Step 1 — Alignment-chart G at each joint
Definition
(12)
G=Σ(Ic/Lc)÷Σ(Ig/Lg)
Joint A (top, rigid): one column above + one column below, both W14×90 at 14 ft.
Σ(Ic/Lc) = 2 · 999/(14·12) = 2 · 5.946 = 11.89 in³.
Beams: two W21×62 girders, 30 ft each side.
Σ(Ig/Lg) = 2 · 1330/(30·12) = 2 · 3.694 = 7.39 in³.
GA = 11.89/7.39 = 1.61. Joint B (pinned base): AISC Commentary C-A-7.2 — a column truly pinned to the foundation is theoretically G = ∞; use GB = 10 for design (a truly fixed base uses G = 1).
Step 2 — K from the unbraced-frame (sidesway-uninhibited) chart
Figure 5.11b — AISC Commentary Fig. C-A-7.2 (sidesway-uninhibited). Mark GA = 1.61 on the left axis and GB = 10 on the right axis (pinned base → use 10, not ∞); connect with a straight edge. The line crosses the K-scale at K ≈ 2.0 — the yellow dot shows the reading. Notice that on the unbraced chart the K-scale runs from 1 (bottom) to ∞ (top), so K ≥ 1 always.
How to use the chart: same three-step procedure — plot GA, plot GB, connect, read K on the middle scale. Only the K-axis differs from the braced chart (K = 1…∞ here vs. K = 0.5…1.0 for braced).
Check: φcPn = 950 k ≥ Pu = 750 k ✓ (D/C = 0.79). Use W14×90. Cross-check: AISC Manual Table 4-1a with the equivalent KLx/(rx/ry) = 342.7/(6.14/3.70) = 206.5 in / ry-basis → interpolate on the W14×90 column at KL ≈ 17.2 ft to confirm ≈ 950 k.
⚠ Common student mistakes on the alignment chart
Using the braced chart when the frame can sway (or vice versa). Look at the drawing first: diagonal braces or shear walls → braced; only moment joints → unbraced.
Forgetting to add the column above to Σ(Ic/Lc) at an interior joint.
Using G = 0 for a pinned base or G = ∞ for a fixed base — the recommended design values are G = 10 (pinned) and G = 1 (fixed).
Applying the strong-axis K to the weak-axis slenderness. Track Kx, Ky separately.
06
Professional practice, safety & ethics
Compression member practice
Professional practice
•The effective length KL is a judgment call — state the assumed end conditions and bracing for every column on the drawings.
•Verify the brace actually exists in the architectural layout; a 'braced' column with no wall or beam framing to it is unbraced.
•Coordinate column splices: splice location changes the unbraced length for the segment above.
Safety in design & construction
•Buckling is sudden and unforgiving; unlike yielding, it gives no warning and no ductility.
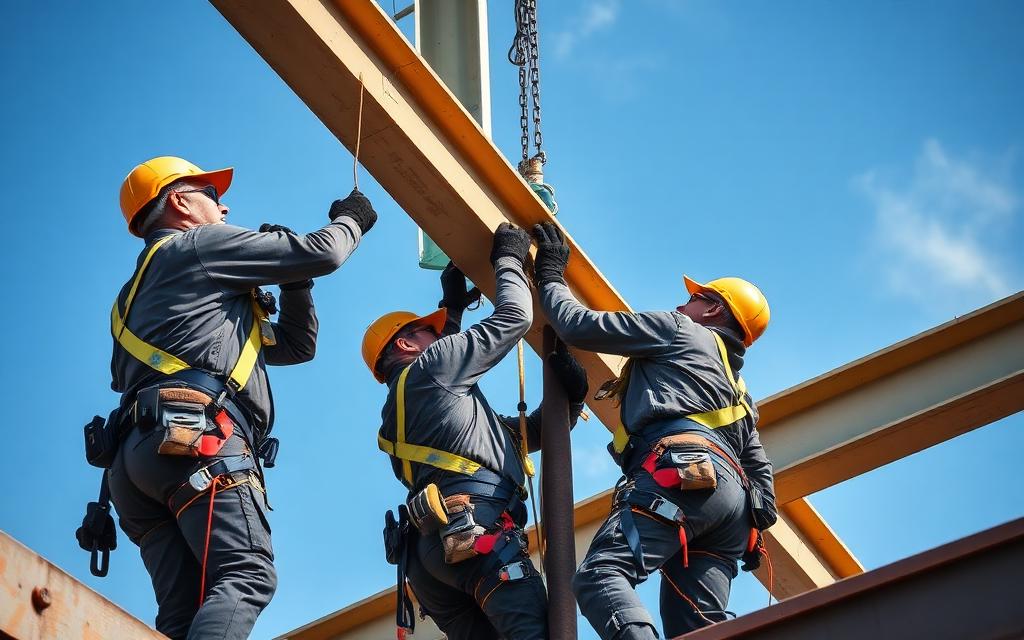
•During erection, columns are far more slender than the final condition — require temporary guys until the diaphragm is complete.
•Never allow field modification (coping, cutting) of a compression member without recheck.
Engineering ethics
•Do not assume K = 0.5 or 0.7 to make a column work unless the restraint is real and detailed.
•Report to the client any column found overloaded during a renovation survey.
•Hyatt Regency (1981) began as an unreviewed connection change — always re-analyze the whole load path after a change request.
Erection safety: OSHA Subpart R fall protection and stable temporary bracing.Design review: documenting assumptions before the drawings are sealed.
ABET / licensure link. These points map to ABET Student Outcomes 2 and 4 — engineering design within realistic constraints, and recognition of ethical and professional responsibilities. Expect NCEES FE and PE exam questions on the NSPE Code of Ethics, OSHA construction requirements, and the engineer's standard of care.
07
Cost analysis
Column cost and slenderness
Approach
•Column cost is nearly linear in weight, so reducing KL by adding bracing is often cheaper than upsizing the column.
•Keep column sizes constant over 2–3 stories — splices cost more than the steel saved by resizing every level.
•Include fireproofing: it is priced per surface area, so a heavy compact column can be cheaper to protect than a light spread one.
Worked cost example — Add a brace vs upsize the column
Basis: Pu = 500 kip, story height 26 ft unbraced
Line item
Qty
Rate
Cost
Option A — W14×109 unbraced, 26 ft
1.42 ton
$2,700
$3,834
Option B — W14×74 braced at mid-height
0.96 ton
$2,700
$2,592
Option B added brace + connections
1 ls
$1,400
$1,400
Estimated total
$7,826
Takeaway. Bracing beats upsizing here by roughly $100 — essentially a wash, so choose on constructability and floor-plan impact.
Unit rates are representative US averages for teaching purposes. On a real project, price with current local rates (RSMeans, fabricator quotes, or contractor pricing) and state the estimate date.
08
Animated concepts
Key mechanics visualised — watch the strain profile, stress block, or buckled shape evolve
Full-page reference diagrams — the visual vocabulary you will use for the rest of the course
§5.6.1
Column erection
Fig. 5.1W-shape column being set on baseplate
Gravity columns transfer beam reactions vertically into the base. Concentric alignment is essential for §E3 to apply.
§5.6.2
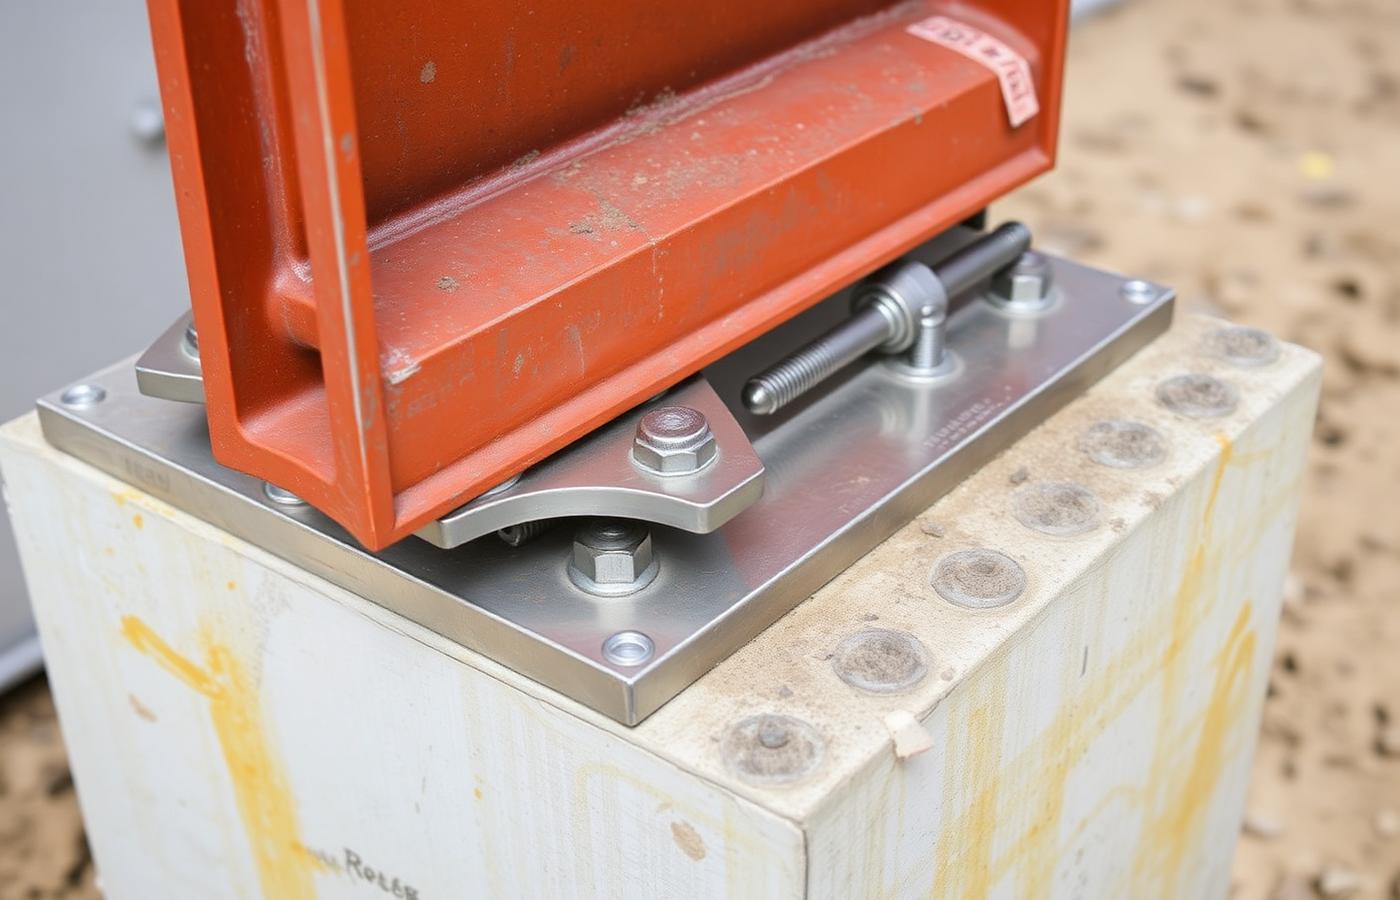
Base condition
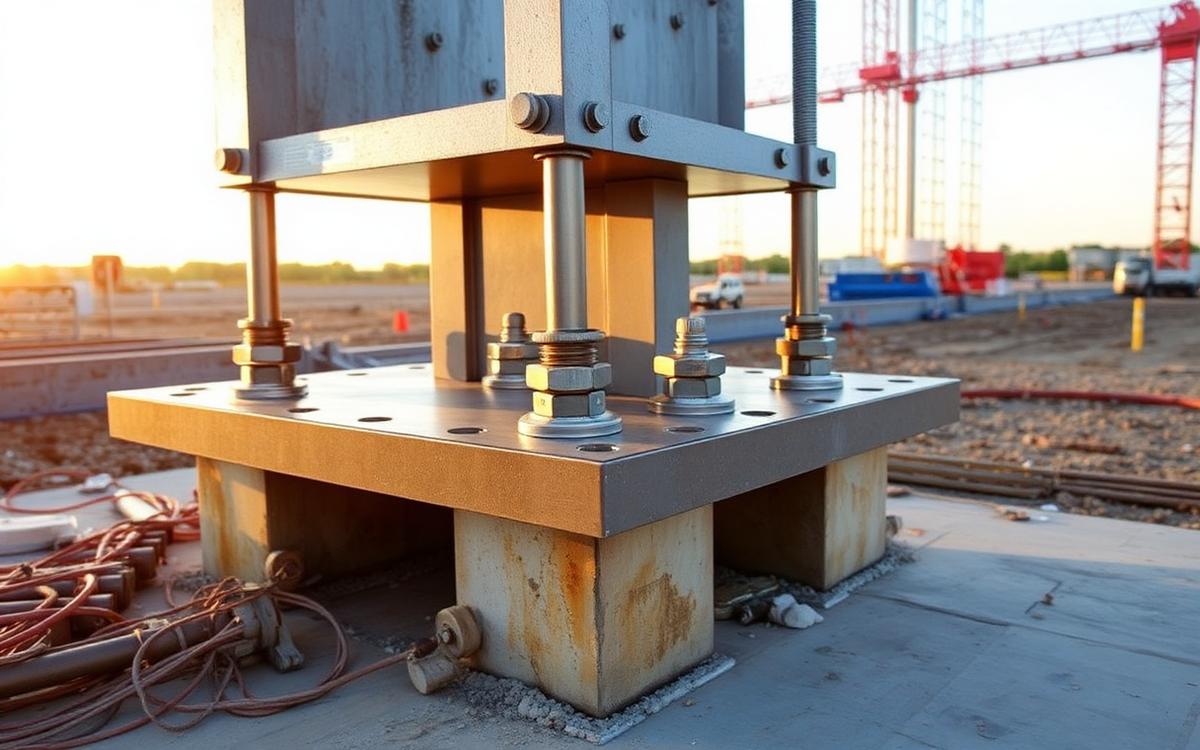
Fig. 5.2Base plate + anchor rods
The fixity of the base sets K. A grouted, fully-detailed base can approach K = 0.65; a poorly detailed base is closer to K = 1.0.
§5.6.3
Global buckling
Fig. 5.3Slender column — Euler mode
First-mode buckling of a pinned-pinned column: single half-sine wave, peak lateral displacement at mid-height.
§5.6.4
Local buckling
Fig. 5.4Local flange / wall crinkle
Slender plate elements buckle locally before global flexural buckling can develop — §E7 territory.
10
Worked examples
Full textbook solutions — problem, theory, step-by-step, verification, interpretation
Example 5.1
Interior gravity column — φcPn per AISC §E3
An interior gravity column of a mid-rise steel-framed building is a W10×49, A992 steel, pinned–pinned, unbraced length 14 ft. Compute φcPn using AISC §E3.
Problem statement
An interior gravity column is a W10×49 (A992), pinned at both ends, with unbraced length L = 14 ft in both axes. Compute the design axial compressive strength φcPn using AISC 360-22 §E3 and verify against Manual Table 4-1a.
FIG. 5.1 — Wide-flange gravity column typical of the W10×49 in this example.
Floor plan
3-D isometric
Element detail
DIMFloor plan locates the interior gravity column, isometric shows its story, detail carries the axial load — φcPn per §E3.
Given
W10×49: Ag = 14.4 in², ry = 2.54 in, rx = 4.35 in
A992 steel: Fy = 50 ksi, E = 29,000 ksi
K = 1.0 (pinned–pinned)
L = 14 ft = 168 in (both axes)
Find
φcPn per §E3
Governing axis (rx vs ry)
Assumptions
Concentric axial load — no bending
Non-slender section (verify against Table B4.1a)
No slender-element reduction (§E7 not triggered)
Code references
AISC 360-22 §E1 — φc = 0.90
AISC 360-22 §E3 — flexural buckling
AISC Commentary Table C-A-7.1 — K values
AISC Manual Table 4-1a — φcPn table
Theory & approach
§E3 uses Fe = π²E/(Lc/r)² and a piecewise Fcr equation. Below Lc/r = 4.71·√(E/Fy) (inelastic) the curve fits residual-stress-affected test data; above, elastic Euler controls with a 0.877 knock-down.
A W10×49 gravity column at 14 ft is a textbook example of the inelastic branch — Lc/r sits well below the 113 transition. If the unbraced length grew past ~24 ft the same column would cross into the elastic branch and lose more than half its capacity.
Common mistakes
Using rx (strong axis) instead of ry when there is no weak-axis bracing.
Applying the elastic 0.877·Fe branch when Lc/r is below 113 for A992.
Forgetting to check Table B4.1a for slender elements before invoking §E3.
Engineering insight
Weak-axis bracing at mid-height reduces Lc/ry from 66 to ~33, driving Fe up by a factor of 4 and pushing Fcr close to Fy. A single kicker brace can lift φcPn by 25–35% at essentially no material cost.
References
· AISC 360-22 Chapter E
· AISC Manual 16th ed., Part 4 & Table 4-1a
11
Guided practice
Compute the governing variables — hints unlock as you need them
A W8×24 (A992) pinned–pinned column has KL = 12 ft. Compute Lc/ry (ry = 1.61 in), classify (elastic vs inelastic vs the 113.4 limit), and estimate φcPn using §E3 with Ag = 7.08 in².
Your turn
Hints
1.Lc/ry = KL(in)/ry.
12
Independent practice
Solve the chapter's design task — compute each governing variable
Design task
A W10×49 (A992) column has KL = 14 ft about the weak axis. Compute the slenderness KL/ry, the critical stress Fcr, and the design axial strength φc Pn. Verify whether the column is in the elastic or inelastic buckling range.
Given
Fy = 50 ksi, E = 29,000 ksi
W10×49: Ag = 14.4 in², ry = 2.54 in
KL = 14 ft = 168 in
Transition: 4.71·√(E/Fy) = 113.4
Approach
Compute KL/ry and compare to 4.71·√(E/Fy) — inelastic if less.
These questions reference AISC Steel Construction Manual (16th ed.) — sections, equations, and tables are cited explicitly. Use a calculator. Each question offers a clue you may reveal before answering. Submissions are recorded to your account once signed in.
C5-01AISC 360-22 §E3FE Ref · Design of Steel Components → Columns: (KL/r)max — larger of x- and y-axis
1. W14×82 (A992): rx = 6.05, ry = 2.48 in. Kx = Ky = 1.0, L = 15 ft (unbraced both axes). Which axis governs and what is (KL/r)max?
11. Design a W12×65 (A = 19.1 in², ry = 3.02) column with KL = 14 ft, A992. Estimate φcPn using AISC Manual Table 4-1a.
C5-12AISC 360-22 §E6AISC 360-22 §E6 built-up members (beyond FE Ref core equations)
12. Built-up double-angle strut 2L4×3×⅜ (LLBB) with intermediate connectors at spacing a. Per §E6, the effective slenderness (KL/r)m depends on which additional parameter?
C5-13AISC 360-22 §E3FE Ref · Columns: cutoff 4.71√(E/Fy); Fy = 46 for HSS Gr. B
13. HSS 8×8×½ (Fy = 46, A = 13.5, ry = 3.04). KL = 16 ft. Compute KL/r and identify regime.
16. Sway (unbraced) frame, interior column A-B (W14×82, Ic = 881 in⁴, Lc = 15 ft). At joint A two girders frame in (each W21×62, Ib = 1330 in⁴, Lb = 30 ft). Joint B is a fully-fixed base (theoretical G = 1.0). Compute GA.
C5-17AISC 360-22 Comm. Fig. C-A-7.2AISC Comm. Fig. C-A-7.2 (sway) → K, then FE Ref Columns: KL/r + Fcr
17. Same column. With GA = 0.66 and GB = 1.0 (fixed base), use the SWAY alignment chart (Fig. C-A-7.2) to estimate K, then compute KL and (KL/r).
Attach your handwritten or typed step-by-step solution for this chapter's graded quiz. The instructor can download every submission. PDF only, up to 25 MB.
How your upload will be graded
Your file — PDF, Word document, scanned handwriting or a photo — is read page by page like an experienced structural engineering instructor would. The scan is validated first, then your reasoning, structural model, calculations, diagrams, code basis and final answers are graded on process, not just the final number. Design work is additionally reviewed against AISC 360-22 and ACI 318-19. Partial credit applies, and one early mistake carried correctly forward is only penalized once.
Before you attach the file
Include every page, in order and right way up — a missing page cannot earn credit.
Keep margins in frame: nothing cropped at the edges, especially boxed final answers.
Scan or photograph in good, even light — no shadows, glare or blur; 300 dpi or a steady phone scan.
Write in dark pen; faint pencil is the most common 'UNREADABLE — INSTRUCTOR REVIEW REQUIRED' flag.
Include all diagrams, FBDs, shear/moment diagrams and section sketches — label them.
Number each question the same way the assignment does, and note anything you skipped.
Show units on every line and box your final answers.
Combine everything into ONE file (PDF preferred; Word, JPG or PNG accepted) under 20 MB.
Sign in to upload your worked solution.
16
FE exam preparation
NCEES-style practice with timer, equation sheet, and mastery tracking
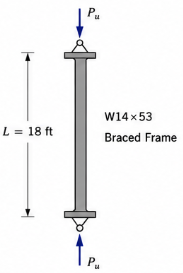
A W14×53 steel column in a braced frame has pinned connections at both ends and an unsupported length of 18 ft. Determine the effective length factor K and effective length KL.
◆ EasyAISC 360-22 Commentary Table C-A-7.1 / NCEES FE Handbook
 Objective 01