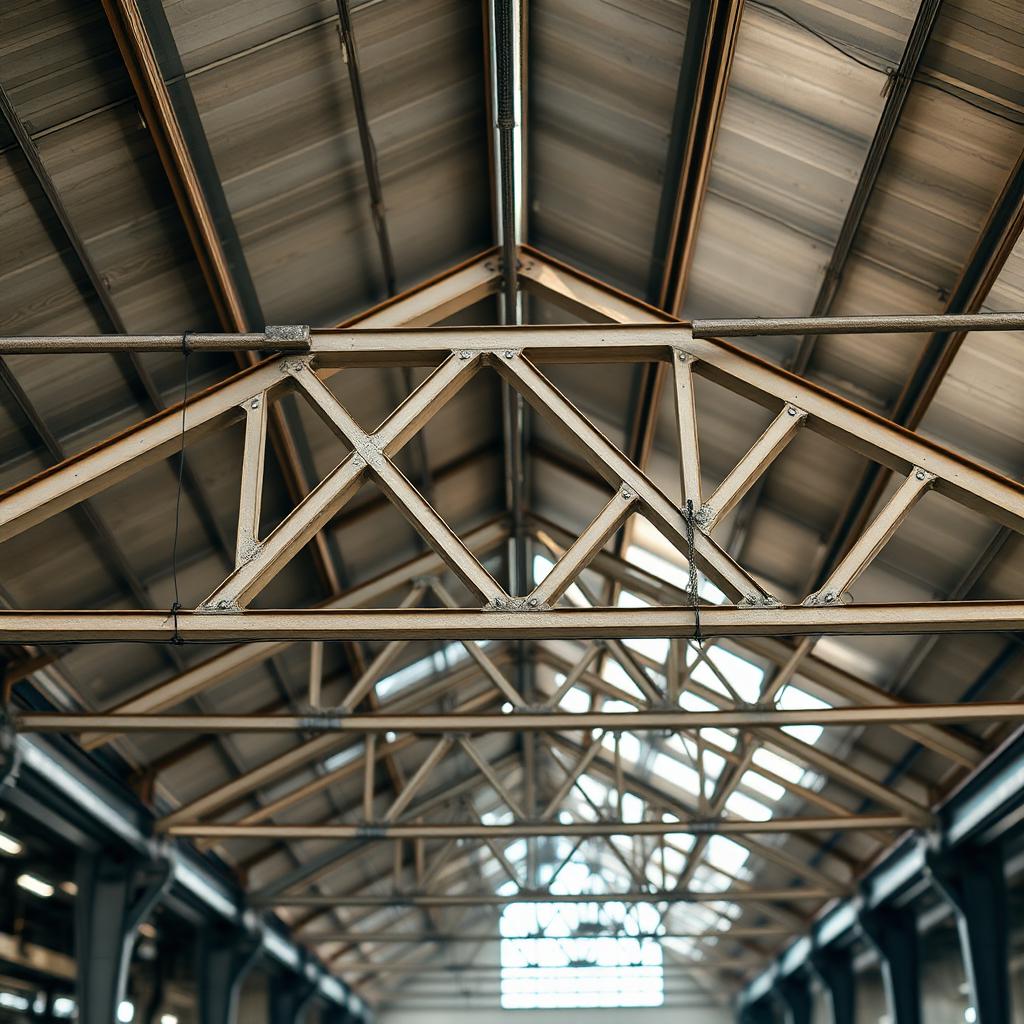
The simplest structural action, and the least forgiving.
Tension members either hold — or they let go, all at once.
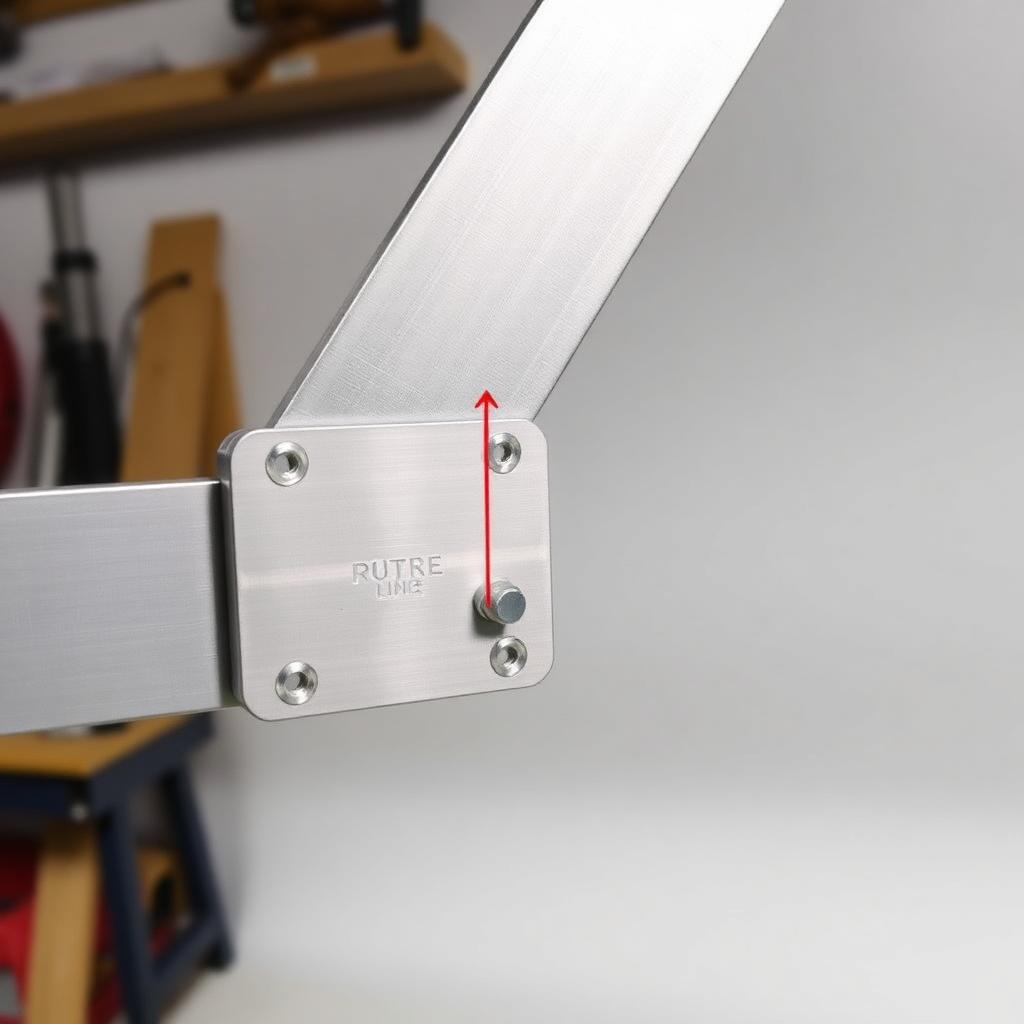
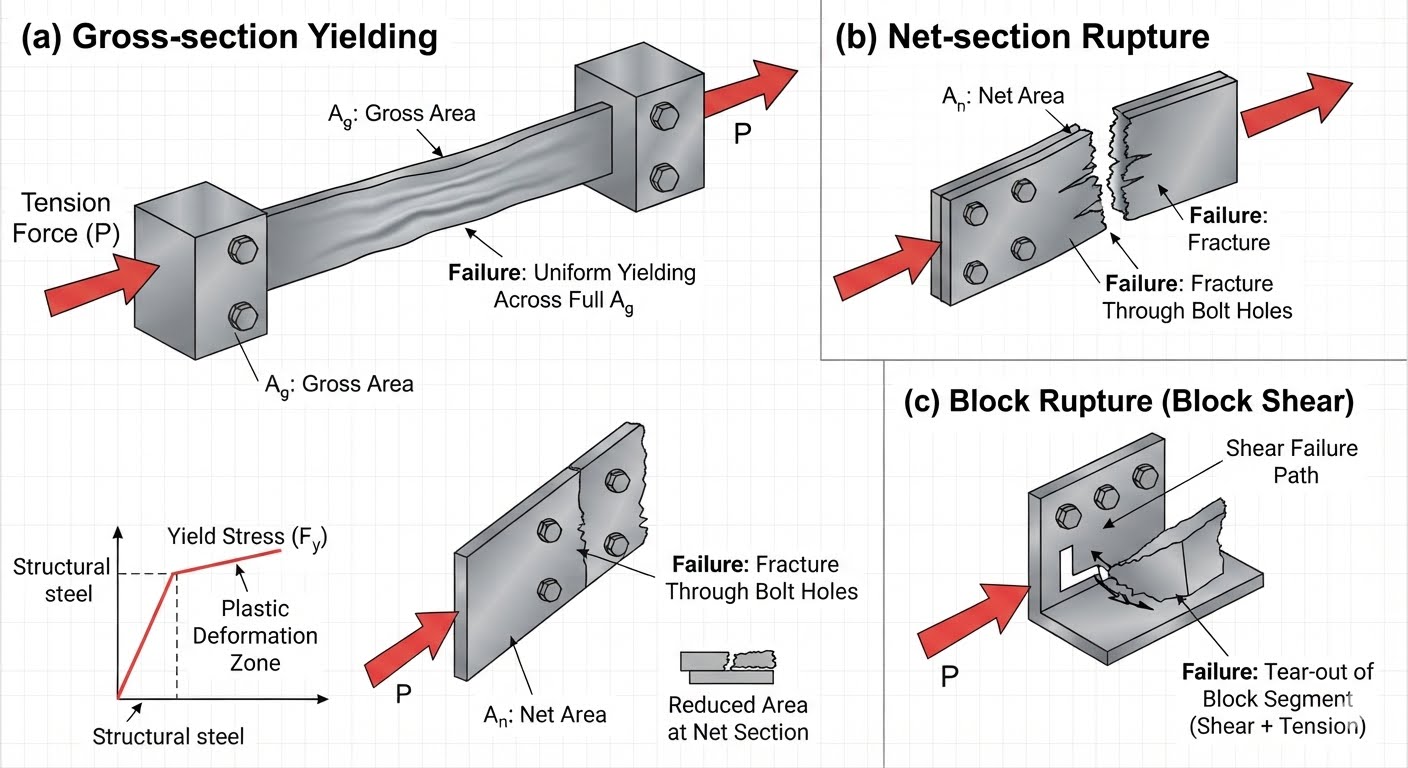
Tension diagonals, hangers, and bracing carry axial pull directly along their axis. Chapter D of AISC 360-22 governs yielding on the gross section, rupture on the effective net section, block shear at the connection, and slenderness for handling — the four checks that keep a tension member safely in service.
Iconic steel structures built on engineering excellence
What you will be able to do after finishing Chapter 1 — and why each objective matters in practice
Objective 01
Check yielding on the gross section
Apply φt Pn = 0.90 · Fy · Ag as the ductile limit that governs away from the connection.
Why it matters
Yielding is the ductile limit — it warns before it breaks. Missing this check means you never verify that the member has the warning behaviour AISC expects.
Where it is used
Every tension diagonal, hanger, bracing chord, and truss element you will ever design.
Connects to
AISC 360-22 §D2(a); the same φ = 0.90 recurs for flexure and shear yielding.
Objective 02
Check rupture on the effective net area
Compute the net area, Aₙ = Ag − Σ(dh·t), then apply the shear-lag factor, U, from Table D3.1 to obtain the effective area, Aₑ, and φt Pn = 0.75 · Fu · Aₑ.
Why it matters
Rupture is brittle and sudden. A member that passes yielding but fails rupture will still tear at the bolt holes with no warning.
Where it is used
Any bolted or welded end connection where holes or partial connection reduce the effective area.
Connects to
AISC §D2(b) + §D3; shear lag reappears in Chapter J connection design.
Objective 03
Compute block-shear capacity
Rn = 0.60 Fu Anv + Ubs Fu Ant ≤ 0.60 Fy Agv + Ubs Fu Ant, with φ = 0.75.
Why it matters
Short end connections often let block shear govern — and the block-shear plane is missed by every non-D2 check. Skipping it is the classic first-year mistake.
Recognise which limit state controls, and pick the correct φ, area, and stress at a glance.
Why it matters
Tension members are a high-frequency FE Structural topic — direct, testable, and unforgiving.
Where it is used
FE Civil / FE Structural, PE Structural, plan-check reviews.
Connects to
The FE Prep panel at the end of this chapter drills these directly.
03
Engineering motivation
What each part of a steel-frame building actually does — and why it exists
Before you design any single member, you have to see the whole system. A steel-frame building is not a collection of independent shapes bolted together — it is a deliberate load path, engineered so that every kilonewton of gravity, wind, or seismic demand has a continuous route from where it starts to the ground where the earth can resist it.
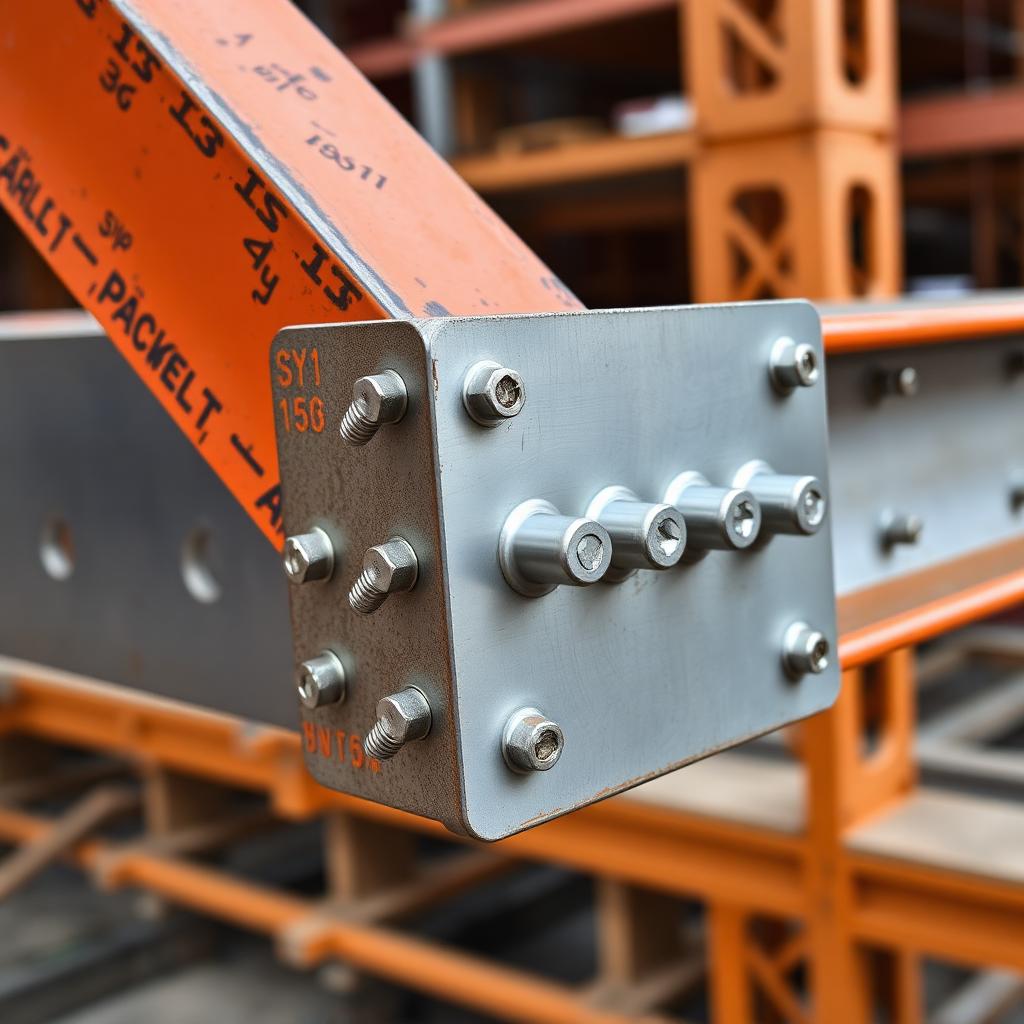
The photograph below shows a typical steel framing detail. Drag each labelled chip onto the structural element it names — the drop is only accepted when it lands inside the correct element's outlined region. A correct answer locks in with a green outline and a short explanation; a wrong answer flashes the region red, tells you what you actually hit, and returns the chip so you can try again. Press Reveal expected placements to see the reference solution (that attempt is then marked as assisted).
Fig. 1.3 · Drop a chip inside the outlined element it names. Green = correct and locked; red flash = wrong element, chip returns.
04
Failure mechanisms
Why we design the way we do — six ways steel structures have failed, and what each disaster taught the profession
Every provision in AISC 360 is a scar. Behind each equation, load factor, and detailing rule is a bridge, a walkway, or a tower whose failure cost lives and rewrote the profession. The six case studies below trace the mechanisms that motivate the code you are about to learn.
Read each one as an engineer, not a spectator: identify the load, the limit state, the missing check, and the specific clause that exists today because that check was missed. When you meet those clauses again in Chapters 5–17, they will read as answers, not rules.
Case 01
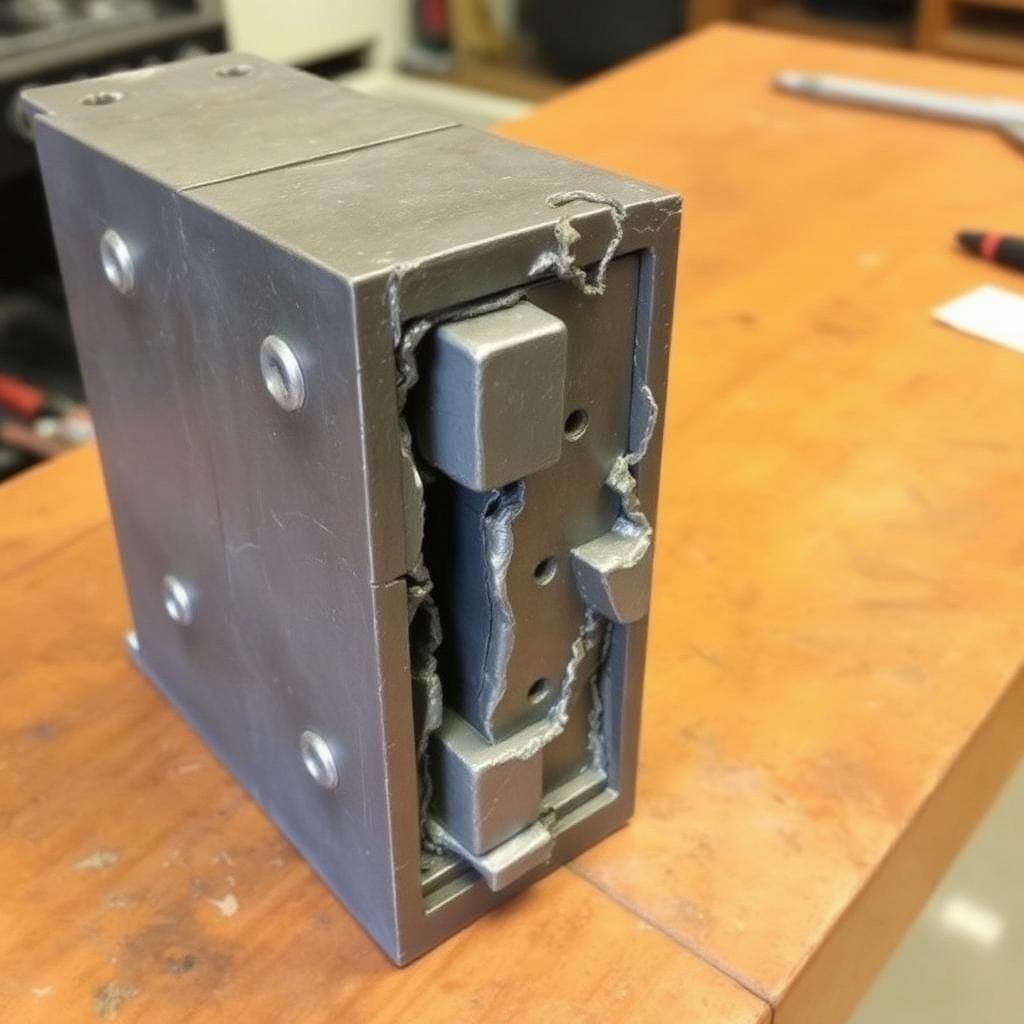
Fig. 1.4.1 · Block shear tear-out
Failure mechanism
Block shear tear-out
A rectangular block of the connection plate or angle leg tears out through a combination of shear on the bolt lines and tension across the end row.
Root cause
Short connections concentrate demand on a few bolts. Rn = 0.60 Fu Anv + Ubs Fu Ant becomes small when the bolt group is compact.
Lesson learned
Always evaluate block shear per §J4.3 — it commonly governs for angles bolted through one leg with few bolts.
§AISC 360-22 §J4.3
Case 02
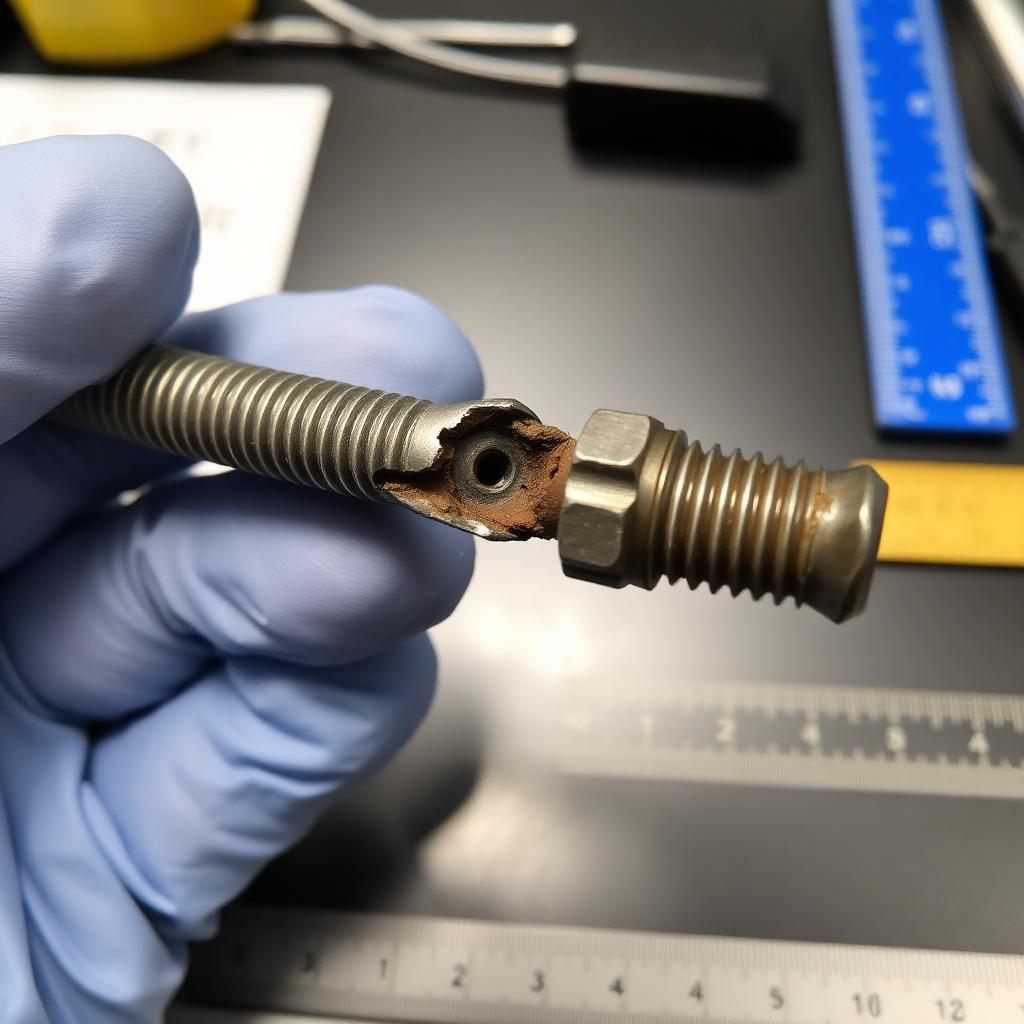
Fig. 1.4.2 · Threaded-rod rupture
Failure mechanism
Threaded-rod rupture
A hanger rod snaps at the threads where the net (root) area is smallest and the stress is amplified by the stress concentration in the thread.
Root cause
Designers sometimes use the nominal gross area to check the rod, forgetting that the effective area, Aₑ, carries the tensile force at the threads.
Lesson learned
Use the tensile stress area (root area) for threaded rods; check both yielding of the shank and rupture at the threads.
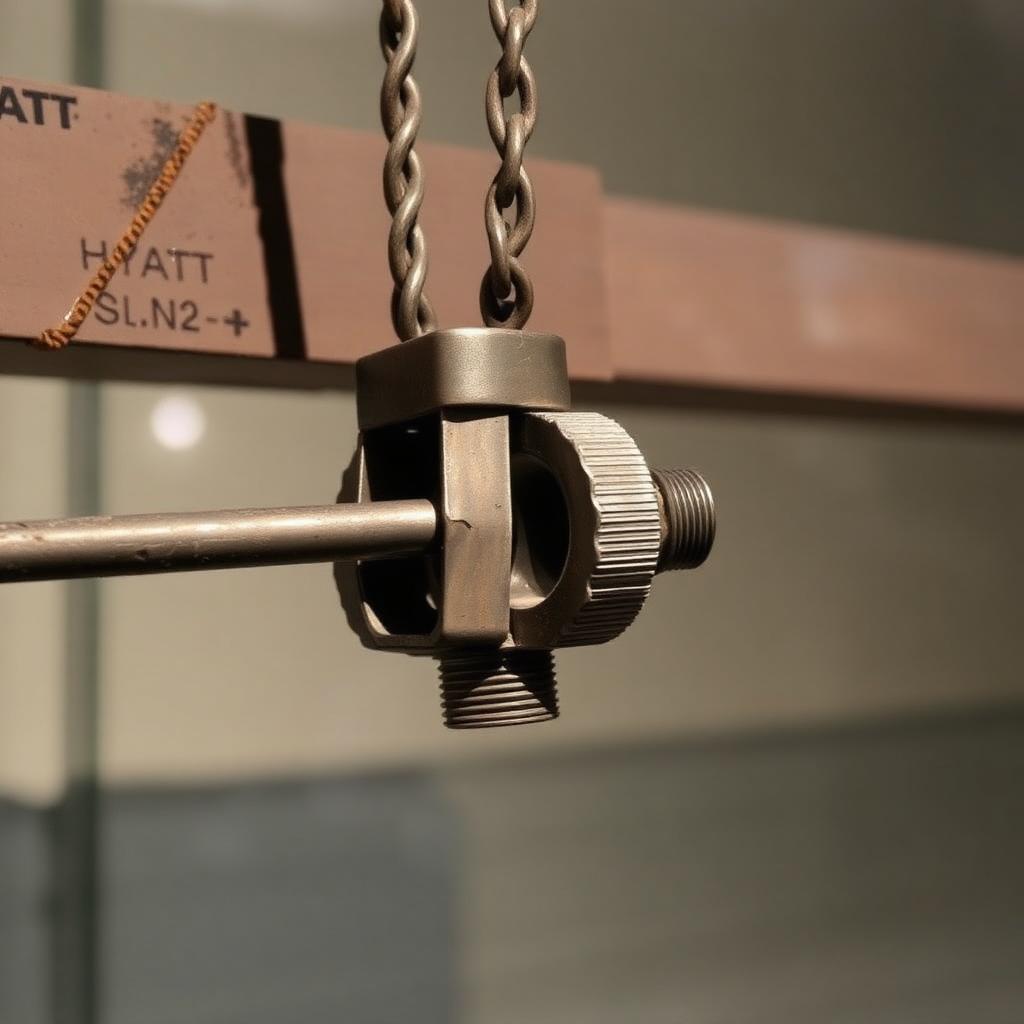
A field change doubled the demand on a single hanger-rod nut. The nut punched through the box beam under service load, dropping two walkways and killing 114 people.
Root cause
The as-built detail transferred twice the design load through a single bolted joint — a tension-connection error, not a member error.
Historical case
Kansas City, 17 July 1981.
Lesson learned
Every tension member must be traced to its connection. A rod is only as strong as the plate, nut, and bearing surface at each end.
§AISC 360-22 §J4 (connecting elements) · Engineering ethics case study
Case 04
Fig. 1.4.4 · Fatigue cracking at bolt holes
Failure mechanism
Fatigue cracking at bolt holes
Cyclic load ranges propagate a hairline crack from a drilled bolt hole edge through the net section until the remaining ligament fractures suddenly.
Root cause
Sharp-edged holes are stress raisers. Under cyclic tension the crack grows one Paris-law increment per cycle.
Lesson learned
For cyclically loaded tension members, apply AISC Appendix 3 fatigue provisions and prefer reamed / clean-drilled holes.
§AISC 360-22 Appendix 3 (Fatigue)
How failure propagates
The five-stage failure progression
1Applied load
2Elongation
3Yielding
4Rupture
5Fracture
Design codes intervene at the transition from yield to instability. Everything before yield is elastic and reversible; everything after instability is a race to collapse. LRFD keeps the demand well below the first transition.
05
Lecture notes
The full textbook chapter — figures, equations, and engineering narrative
Reflection · Think before you read
A single-angle tension member is bolted through only one leg. Why is the full gross area not effective, and how would you redesign the connection to recover the lost capacity?
Chapter 4 — Tension Members (AISC 360-22 Chapter D)
Chapter focus. Tension members — truss diagonals, hanger rods, cross-bracing — carry pure axial pull. They can fail two ways: gradual yielding over the full cross-section (ductile, φ = 0.90) or sudden rupture through the bolt holes (brittle, φ = 0.75). This chapter shows how to compute the effective area, Ae, with the shear-lag factor U, size a section against both limit states, and check block shear on the connection plates.
1. Behavior of Tension Members
A tension member transmits an axial pulling force along its longitudinal axis. Typical members: truss chords/webs, hangers, diagonal bracing in braced frames, sag rods. Because tension members do not buckle, their strength is governed purely by cross-section capacity, connection details, and stress concentrations near holes.
Load flows in tension members along a nearly uniform stress field except near bolt/weld connections, where load must funnel through fewer elements — producing the classic three limit states below.
Representative Structures
Where tension members appear in real engineering practice. In each photograph, the highlighted element carries essentially pure axial tension — its slender geometry is efficient because tension members do not buckle.
Tension rod → hanger
Golden Gate Bridge — Suspender Ropes
Each vertical wire rope hangs the deck from the main cable. The deck weight flows straight up through the hanger as pure axial tension, then into the main catenary, then into the anchorages. Wire rope is the ideal geometry: enormous cross-sectional efficiency with no buckling concern.
Stay cable (tension)
Pont de Normandie — Cable-Stayed Bridge
Inclined stay cables run directly from each pylon to the deck. Every stay carries pure axial tension proportional to the deck load it supports. The pylon collects the horizontal components of the stays as compression — a clean separation of tension (stays) and compression (mast).
Truss diagonals (tension)
Sydney Harbour Bridge — Truss Diagonals
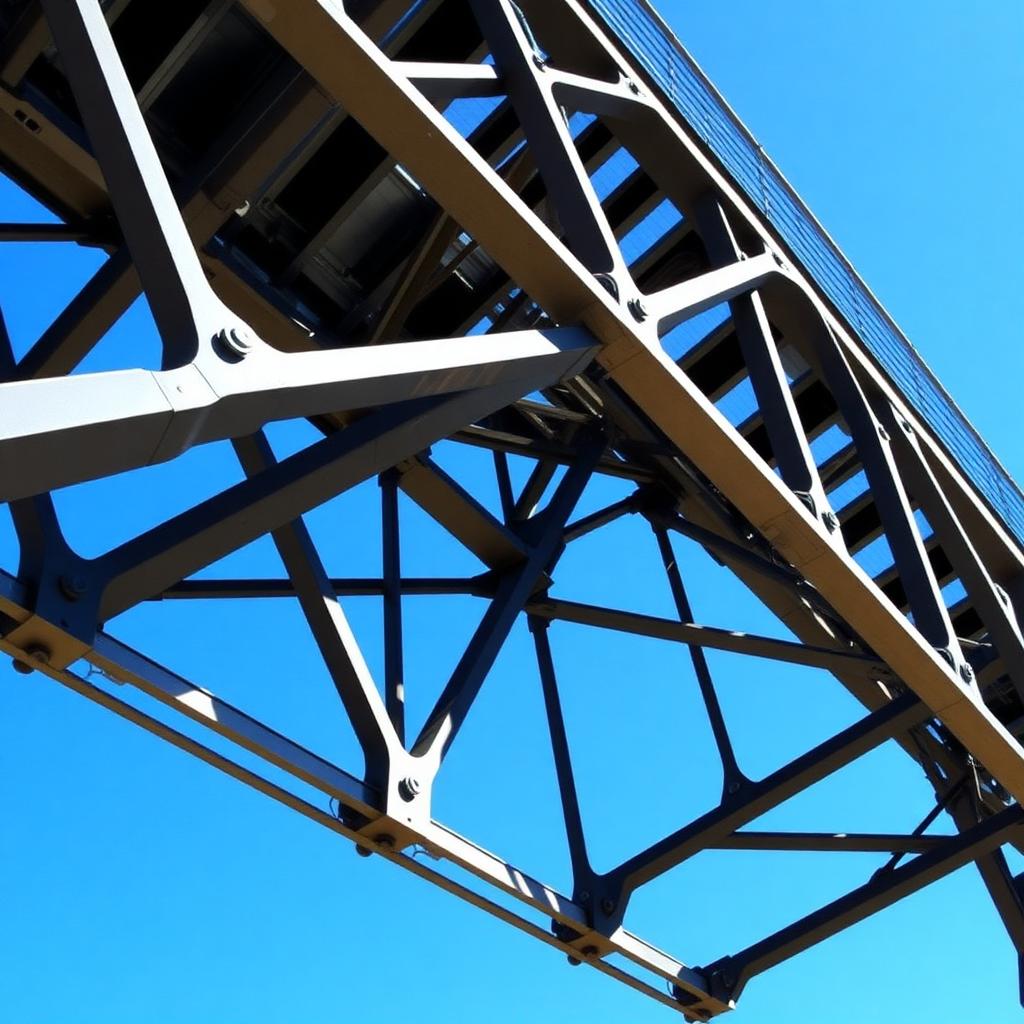
In the steel through-arch truss, alternating diagonals resist shear as tension while their neighbors act in compression. The lighter, slenderer members are typically the tension diagonals — sized by Ag·Fy (yielding) and the bolt-hole net section (rupture).
Brace / diagonal
Lattice Transmission Tower — Tension Diagonals
Single-angle steel diagonals stitch the four tower legs together against wind and conductor pull. Under a given load direction roughly half the diagonals go into tension. These are the canonical bolted single-angle tension members — governed by shear-lag (U < 1) and block shear at the gusset plates.
Tension rod
Stadium Roof — Tension Rod Suspension
Long-span stadium roofs suspend the outer edge from raking masts through slender high-strength tension rods. Because rods do not buckle, their diameter is set by yielding (Fy·Ag) and by the threaded net area at the clevis end — a textbook tension design.
Guy (tension)
Guyed Communication Tower — Guy Cables
Pretensioned steel guy cables triangulate the mast against wind, letting a very slender central column reach 300+ m. Each guy is a pure tension element — sized by yielding of the wire rope and by the swaged/threaded end fittings.
2. LRFD Design Inequality
φt · Pn ≥ Pu
Pu is the largest factored axial tension from ASCE 7 combinations. Pn is the smallest of three nominal capacities — gross yielding, net-section rupture, and block shear.
3. The Three Governing Limit States — Overview
Before we compute anything, tour the three failure modes side-by-side. Each has its own physics, its own AISC clause, and its own φ. The remainder of the chapter builds the tools you need (net area, shear-lag U, block-shear planes) and then applies each limit state in turn.
Tension-member failure modes and resistance factors
(b) Tensile rupture on the effective net section — fracture tears across the bolt holes at the end connection. Brittle. φt = 0.75 (§D2-b).
(c) Block shear — a chunk of steel around the bolt group tears out along combined shear + tension planes. φ = 0.75 (§J4.3).
Sections 4–8 build these three checks in the order you must compute them: yielding first (needs only Ag), then rupture (needs An and U — Sections 5 and 6 build them), then block shear (Section 8 identifies the failure planes).
4. Limit State 1 — Gross-Section Yielding (AISC D2-a)
Nominal strength
(1)
Pn=Fy⋅Ag
ϕt=0.90
This is the simplest check. Away from the end connections the full gross area Ag resists load and the member stretches ductilely as stress reaches Fy. Ductility is why φ = 0.90 (larger than the 0.75 used for brittle limit states).
Where it governs: long, unconnected regions of the member — away from holes and welds. It rarely controls when connections are heavy on holes; rupture usually does. But you must always check it.
Mini-Example 4A — Design Yield Strength of an A36 Channel Truss Chord
Problem. A structural-steel tension member in a roof truss consists of an A36 channel with gross area Ag = 8.0 in². Determine the LRFD design tensile yielding strength φPn.
where Pn is the nominal tensile strength, φ = 0.90 is the LRFD resistance factor for yielding, Fy is the minimum yield stress, and Ag is the gross cross-sectional area.
Mini-Example 4B — Minimum Required Gross Area (A992 Diagonal, Pu = 180 k)
Problem. Method-of-joints analysis gives a factored tension of Pu = 180 k in a diagonal truss member fabricated from A992 steel. Based on the LRFD limit state of tensile yielding on the gross section, find the minimum required gross area Ag. Options: (A) 3.24 in², (B) 3.60 in², (C) 4.00 in², (D) 4.44 in².
✅ Answer: C — Ag,min = 4.00 in² for tensile yielding on the gross section.
Interpretation. Any A992 shape with Ag ≥ 4.00 in² satisfies yielding; rupture and block-shear (Sections 5 – 6) still have to be checked at the end connection.
5. Limit State 2 — Tensile Rupture on the Effective Net Section (§D2-b)
Nominal strength
(2)
Pn=Fu⋅Ae
Ae=U⋅An
ϕt=0.75
Fracture tears across the bolt holes at the end connection. Uses the ultimate stress Fu (not Fy) because the failure is brittle; the lower φ = 0.75 compensates for the loss of ductility.
Two ingredients feed the effective area Ae: the net area An (gross area minus bolt-hole material, §5.1) and the shear-lag factor U (fraction of the net area that actually engages, §5.2). The two are multiplied in §5.3 to give Ae, then φPn is compared to Pu.
5.1 Net Area An — Hole Deduction and Staggered Holes (§D3)
Before we can check rupture (this limit state) or block shear (§6), we need the net area — the gross area minus the material removed by bolt holes on the critical failure path.
Hole size rule (D3.2): the actual punched hole is db + 1/16″, but AISC adds another 1/16″ for damage around the hole edge, so deduct dh = db + 1/8″ when computing An.
Straight failure path: An = Ag − Σ(dh · t) over the holes the path crosses.
Staggered holes: when the failure path must zig-zag diagonally between offset holes, add s²/(4g) for every diagonal segment (see below).
Governing net area: when multiple failure paths are possible, compute An for each and take the smallest.
5.1.1 Staggered Holes — the s²/4g Rule (D3.2)
When bolt holes are offset row-to-row (staggered), the failure path can zig-zag from one hole to the next diagonal one. That diagonal segment is partly in the shear direction, so a straight subtraction over-penalizes the net area. AISC D3.2 credits the diagonal path by adding s²/4g for every diagonal segment:
Two candidate failure paths — check both; smaller An governs.
Procedure:
Sketch every possible tear path from one edge of the plate to the other, going through as many holes as physically possible.
Compute the length of each path along the width (perpendicular to load) by adding straight and staggered segments.
For each hole crossed, subtract (db + 1/8″).
Add s²/4g for every diagonal segment between two holes offset by pitch s and gage g.
Multiply the resulting net width by t. The smallest An from all candidate paths governs.
5.1.2 Worked Mini-Example — Net Area of a Staggered-Bolt Plate
Given. 8″ wide plate, t = ½″, three ¾″ bolt holes on two gage lines with gage g = 3″ and pitch s = 2″. Two of the holes (A on Row 1 and B on Row 2) are vertically aligned across the two rows at the same x, and the third hole (C) is offset by the pitch s along Row 1. Find the governing An.
Holes A and B are vertically aligned across the two gage lines (same x); hole C is offset from A by the pitch s along Row 1. Path 1 is a straight cut at x=220 crossing the aligned pair A–B (2 holes, no s²/4g). Path 2 zig-zags through all 3 holes: A→B is straight (aligned, no diagonal credit) and B→C is the single diagonal segment (one s²/4g credit).
Why U exists: when only part of a cross-section is bolted (e.g. only the flanges of a W-shape, or one leg of an angle), the load must "shear-lag" its way into the unconnected part. Stress is non-uniform across the section near the connection, so the effective area is less than the full net area. AISC Table D3.1 gives U for the eight most common configurations.
Understanding Shear Lag and Its Impact
What is shear lag? Shear lag is a phenomenon that occurs when some, but not all, parts of a structural-steel cross-section are directly connected to a gusset plate or adjoining member. For instance, if only one leg of an angle — or only the web of a channel — is bolted down, the tensile force cannot distribute instantly across the entire profile. The stress must "flow" from the connected parts into the unconnected parts through longitudinal shear. Because the steel transitions this load over a finite length (the connection length), the stress "lags behind" in the unconnected components.
How does it impact net-section rupture? Near the connection, the stress distribution across the net area is non-uniform, producing highly localized stress concentrations around the fasteners. This non-uniformity reduces the cross-section's effectiveness at resisting fracture. To account for the inefficiency, the AISC Specification introduces the reduction factor U — the shear-lag factor — which modifies the physical net area An to give a smaller effective net area Ae:
Ae = An · U
The standard formulation for U is based on the connection geometry:
U = 1 − x̄ / L
x̄ — the distance from the connection plane to the centroid of the member segment resisting the force (the connection eccentricity).
L — the length of the connection along the line of load (distance from the first bolt to the last bolt, or the average weld length).
A shorter connection length (L) or a larger eccentricity (x̄) yields a smaller U, which reduces the calculated net-section rupture capacity. Long, well-distributed connections drive U toward 1.0; short, eccentric ones penalize it.
Case
Member / Connection
U
1
Tension load transmitted directly to all cross-sectional elements by fasteners or welds.
1.0
2
Tension transmitted to some but not all elements. General case — use when no simpler case applies.
1 − x̄/L
3
Members with transverse welds only.
1.0 (An = connected elements only)
4
Plates / tongue plates with longitudinal welds along both edges, length L, width w.
L≥2w: 1.0; 1.5w≤L<2w: 0.87; w≤L<1.5w: 0.75
5
Round HSS with single concentric gusset, L ≥ 1.3D.
1.0 (else 1 − x̄/L)
6
Rectangular HSS with single concentric gusset.
1 − x̄/L
7
W, M, S, HP, or T — flange connected, ≥ 3 bolts/line, bf/d ≥ 2/3.
0.90
7
Same, but bf/d < 2/3.
0.85
7
Same shapes, web connected, ≥ 4 bolts in load direction.
0.70
8
Single & double angles, ≥ 4 bolts in line.
0.80
8
Single & double angles, exactly 3 bolts in line.
0.60
How to pick U — decision flowchart:
Is the entire cross-section connected? → Case 1, U=1.0. Done.
Plate with longitudinal edge welds? → Case 4, use L/w ratio.
W, M, S, HP or T? → Case 7 (flange vs web, count bolts, check bf/d).
Single or double angle? → Case 8 (count bolts in line).
HSS with gusset plate? → Case 5 (round) or 6 (rectangular).
Anything else → Case 2 general formula U = 1 − x̄/L. x̄ = distance from connection plane to centroid of connected element (tabulated in Manual); L = distance between first & last bolt (or average weld length).
5.3 Putting It Together — Compute Ae and φPn
How to compute rupture capacity, in order:
Find the governing An across all candidate failure paths (§5.1).
Pick U from Table D3.1 using the decision flowchart (§5.2).
Ae = U · An.
φtPn = 0.75 · Fu · Ae — must be ≥ Pu.
Where it governs: almost always the critical check for bolted end connections, especially angles/tees/channels where U < 1.0 amplifies the hole penalty.
6. Limit State 3 — Block Shear (§J4.3)
Nominal strength (J4-5)
(10)
Rn=min[0.60FuAnv,0.60FyAgv]+Ubs⋅Fu⋅Ant
ϕ=0.75
A block of material at the connection tears out via shear on one or two planes plus tension on a perpendicular plane. Ubs = 1.0 for uniform tension across the tension plane (single bolt row perpendicular to load), or 0.5 for non-uniform tension (two rows, unequal edge distances).
6.1 How to Find Agv, Anv, Ant — the Four-Step Procedure
Block shear is the single biggest source of confusion in tension-member design because you must identify failure planes, not just cross-sections. The block that tears out has a physical outline you can trace with a pencil directly on the connection sketch. Follow this four-step procedure every time:
The tear-out block (yellow) with two red shear planes and one blue tension plane.
Step 1 — Draw the tear-out block. Start at the loaded edge of the plate. Follow the bolt line toward the load through the outermost bolts on top and bottom rows, then jump across between the innermost bolts to close the block. The interior of that polygon is the material that would fall out if the connection failed.
Step 2 — Identify the planes.
Shear planes (red, dashed) = the sides of the block parallel to the applied load. There are 1 or 2 shear planes depending on the connection geometry.
Tension plane (blue, solid) = the side of the block perpendicular to the applied load, at the far end (the "back wall" of the block).
Step 3 — Compute the three areas. Multiply each plane's linear length by the plate thickness t.
Area
What it is
Formula (per plane; sum both planes if 2)
Agv gross shear
Full shear-plane length × t. No hole deductions.
Agv = [Lev + (n−1)·s] · t
Anv net shear
Shear-plane length minus the shear-plane portion of holes crossed (typically n − 0.5 holes; the last hole is half in the shear plane and half in the tension plane).
Anv = Agv − (n − 0.5)·(db+1/8″)·t
Ant net tension
Tension-plane length minus the tension-plane portion of hole(s) crossed (usually 1 hole for two shear planes, 0.5 hole for one shear plane).
Ant = [g − nt·(db+1/8″)]·t
n = bolts along one shear plane; s = bolt spacing; Lev = edge distance from last bolt to loaded edge; g = gage (perpendicular distance between rows); db = bolt diameter; db+1/8″ = deducted hole width per D3.2.
Step 4 — Plug into J4-5 and take the smaller shear term:
(11)
Rn=min[0.60FuAnv,0.60FyAgv]+UbsFuAnt
The bracket compares shear rupture (Fu·Anv) with shear yielding (Fy·Agv) — smaller governs. The tension term is always full rupture (Fu·Ant). Then apply φ = 0.75.
6.2 Worked Mini-Example — Block Shear on a 3/8″ Gusset Plate
Given. 3/8″ gusset plate, single row of three ¾″ A325 bolts, Fy = 36 ksi, Fu = 58 ksi, pitch s = 3″, edge Lev = 1.5″, tension-side edge Leh = 1.5″, one shear plane (gusset edge on one side of the row).
Failure block: red dashed = shear plane (Agv, Anv); blue = tension plane (Ant).
Step 1 — Hole width and shear-plane length.
(12)
dh=db+1/8″
dh = 3/4 + 1/8 = 0.875 in
(13)
Lgv=Lev+(n−1)⋅s
Lgv = 1.5 + 2·3 = 7.5 in
Step 2 — Gross shear area Agv.
(14)
Agv=Lgv⋅t
Agv = 7.5 · 0.375 = 2.81 in²
Step 3 — Net shear area Anv. Shear plane crosses (n − 0.5) = 2.5 holes.
Limits vibration and sag during shipping/erection. Applies to rods and slender rolled members; does not apply to rods in tension-only bracing where sag rods are provided.
8. Design Procedure (put it all together)
Compute Pu from ASCE 7 combinations.
Required Ag ≥ Pu/(0.90 Fy); required Ae ≥ Pu/(0.75 Fu).
Estimate An ≈ 0.85 Ag, U from Table D3.1 → required Ag for rupture.
Select trial section from AISC Manual, satisfy L/r ≤ 300.
Verify all three limit states (yielding, rupture, block shear).
⚠ Common mistakes
Using φ = 0.90 for rupture — it is 0.75.
Deducting only db + 1/16″ instead of db + 1/8″ for the hole width.
Forgetting to apply U to An.
Skipping block shear when only 2–3 bolts are present.
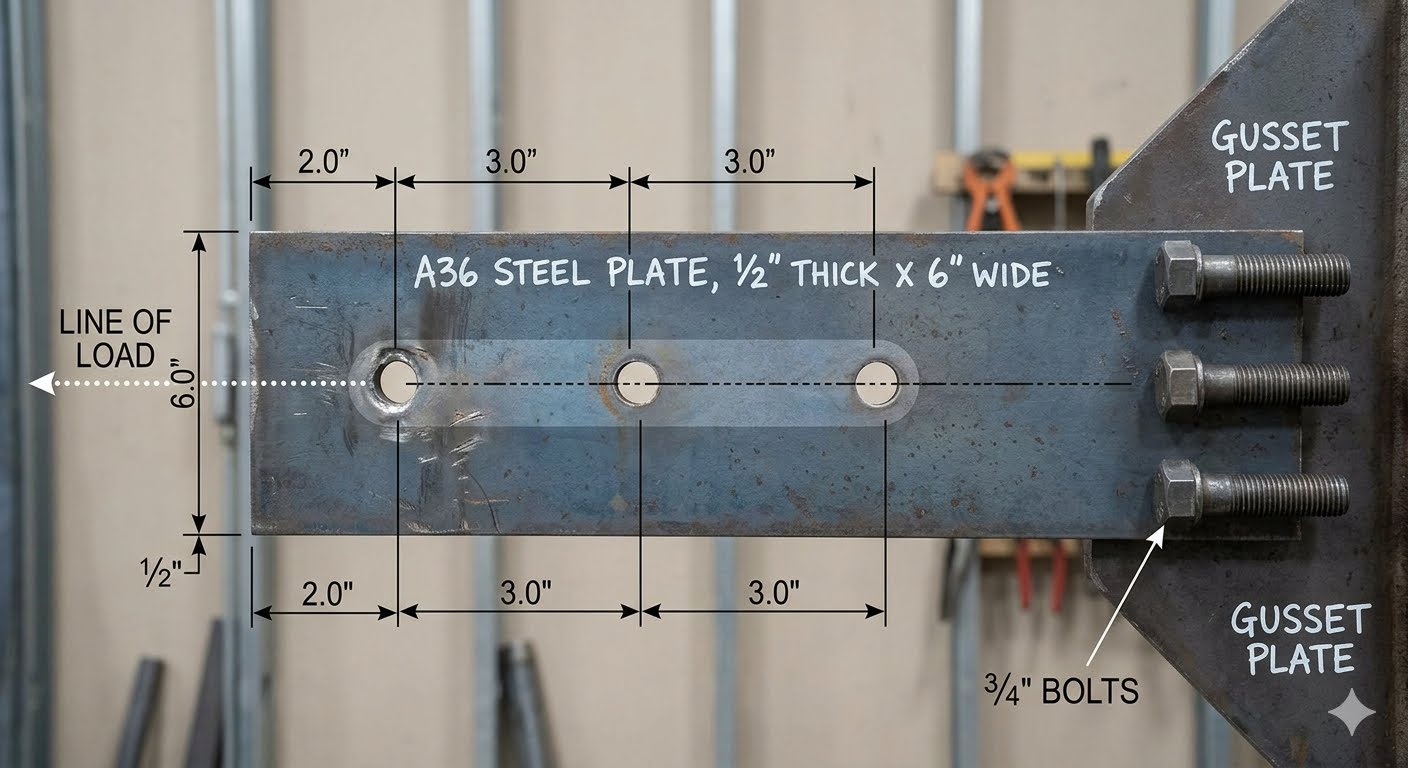
Worked Example 4.1 — Single-Plate Tension Member (LRFD, All Three Limit States)
Given — connection parameters.
Member: A36 steel plate, 1/2 in. thick × 6 in. wide (t = 0.5 in., w = 6.0 in.).
Worked Example 4.2 — Tension Diagonal in a Braced Frame
Given: Diagonal brace of the Cardinal Square 4-story building. Service loads PD = 30 k, PL = 70 k. Steel: A36 (Fy = 36 ksi, Fu = 58 ksi). Connection: two rows of 7/8″ A325 bolts on the long leg of an angle; pitch s = 2.5″, gage g = 2.5″, stagger 1.25″. Trial: L6×4×1/2 (Ag = 4.75 in², x̄ = 1.03″), connection length L = 5″.
φt Pn = 0.75 · 58 · 3.22 = 140.1 k < 148 k ✗ — rupture governs and section is inadequate. Try L6×4×5/8: Ag = 5.86 in², t = 0.625.
An = 5.86 − 2(1.0)(0.625) + (2.5²/10)(0.625) = 5.86 − 1.25 + 0.391 = 5.00 in²; Ae = 0.794 · 5.00 = 3.97 in².
φtPn = 0.75 · 58 · 3.97 = 172.7 k ≥ 148 k ✓
Step 5 — Block shear (J4.3)
Given Lev = 1.5″, Leh (end distance to first bolt, in load direction) = 1.5″, t = 0.625″, dh = 0.875 + 0.125 = 1.0″, n = 3 bolts per row, s = 2.5″, g = 2.5″, Fy = 36, Fu = 58 ksi, Ubs = 1.0.
Failure block for the long-leg connection: two red-dashed shear planes (top & bottom of the block) plus one blue tension plane across the gage g.
Brace length L = 14 ft = 168 in; rmin ≈ 0.86 in → L/r = 195 < 300 ✓
DESIGN: L6×4×5/8 (A36), long leg connected with two rows of three 7/8″ A325 bolts, pitch s = 2.5″, gage g = 2.5″, edge Lev = Leh = 1.5″. Governing limit state: tensile rupture with φtPn = 172.7 k; block-shear φRn = 171.3 k; both ≥ Pu = 148 k ✓.
06
Professional practice, safety & ethics
Tension member practice
Professional practice
•Show all hole patterns, edge distances, and gage lines on the drawing — shear lag and net area depend on the detailer's layout, not yours.
•State the shear-lag factor U and the assumed connection length in the calculation; the fabricator may change the bolt count.
•Coordinate turnbuckles / rod bracing pretension with the erector; slack rods are not tension members.
Safety in design & construction
•Tension members fail suddenly by rupture — there is no plastic warning at the net section. Treat rupture as a brittle, non-redundant limit state.
•Block shear governs surprisingly often in angles and gusset plates; never skip it.
•Field-drilled holes reduce An — require EOR approval before any hole is added.
Engineering ethics
•The 2007 I-35W collapse traced to undersized gusset plates: reviewing your own connection assumptions is an ethical duty, not optional QA.
•Do not accept 'it worked last time' details for a new load level.
•Document any reliance on a fabricator's standard connection in writing.
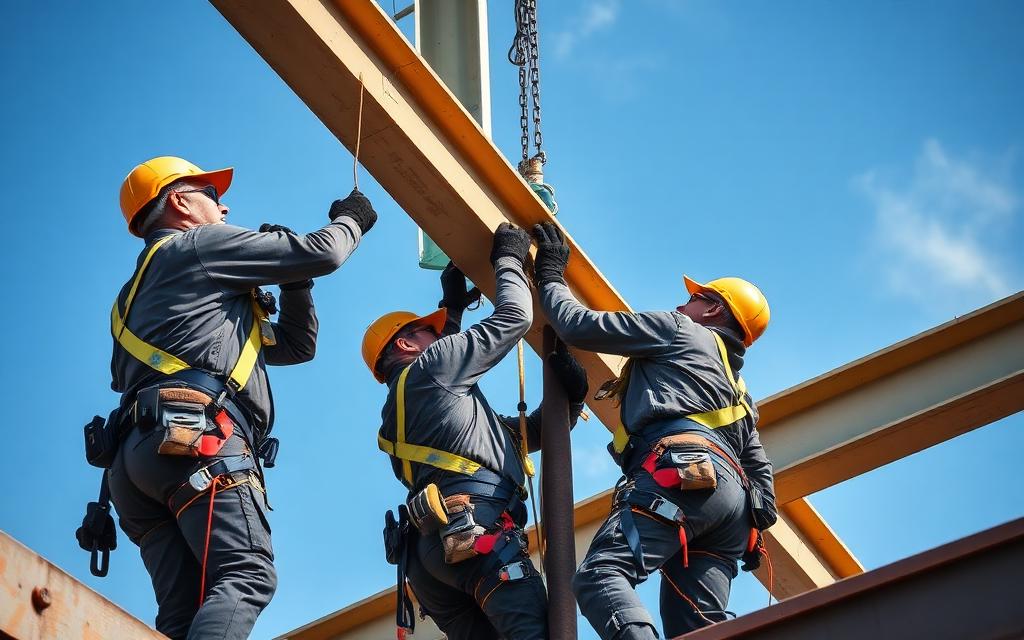
Erection safety: OSHA Subpart R fall protection and stable temporary bracing.Design review: documenting assumptions before the drawings are sealed.
ABET / licensure link. These points map to ABET Student Outcomes 2 and 4 — engineering design within realistic constraints, and recognition of ethical and professional responsibilities. Expect NCEES FE and PE exam questions on the NSPE Code of Ethics, OSHA construction requirements, and the engineer's standard of care.
07
Cost analysis
Tension member and connection cost
Approach
•The member is cheap; the connection is not. Count bolts, holes, and gusset plate area — each hole is a shop operation.
•Reducing bolts to save cost can push the governing limit state to rupture or block shear — re-check before accepting.
•Rod/cable bracing is cheap in material but expensive in end fittings and field adjustment.
Worked cost example — WT hanger with a bolted end connection
Basis: Tu = 120 kip, 3/4-in A325 bolts
Line item
Qty
Rate
Cost
WT member, 22 lb/ft × 14 ft
0.154 ton
$1,150
$177
Gusset plate 1/2″ × 10″ × 14″
1 ea
$85
$85
Punched holes
12 holes
$7
$78
Field bolting labor
6 bolts
$18
$108
Estimated total
$448
Takeaway. Connections dominate: doubling bolt count to ‘be safe’ costs more than upsizing the member one section.
Unit rates are representative US averages for teaching purposes. On a real project, price with current local rates (RSMeans, fabricator quotes, or contractor pricing) and state the estimate date.
08
Animated concepts
Key mechanics visualised — watch the strain profile, stress block, or buckled shape evolve
Shear lag around bolt holes
Tensile stress detours around holes, so not all of An is fully effective — hence Ae = U·An in D3.
09
Engineering figures
Full-page reference diagrams — the visual vocabulary you will use for the rest of the course
§4.6.1
End connections
Fig. 4.1Bolted gusset connection
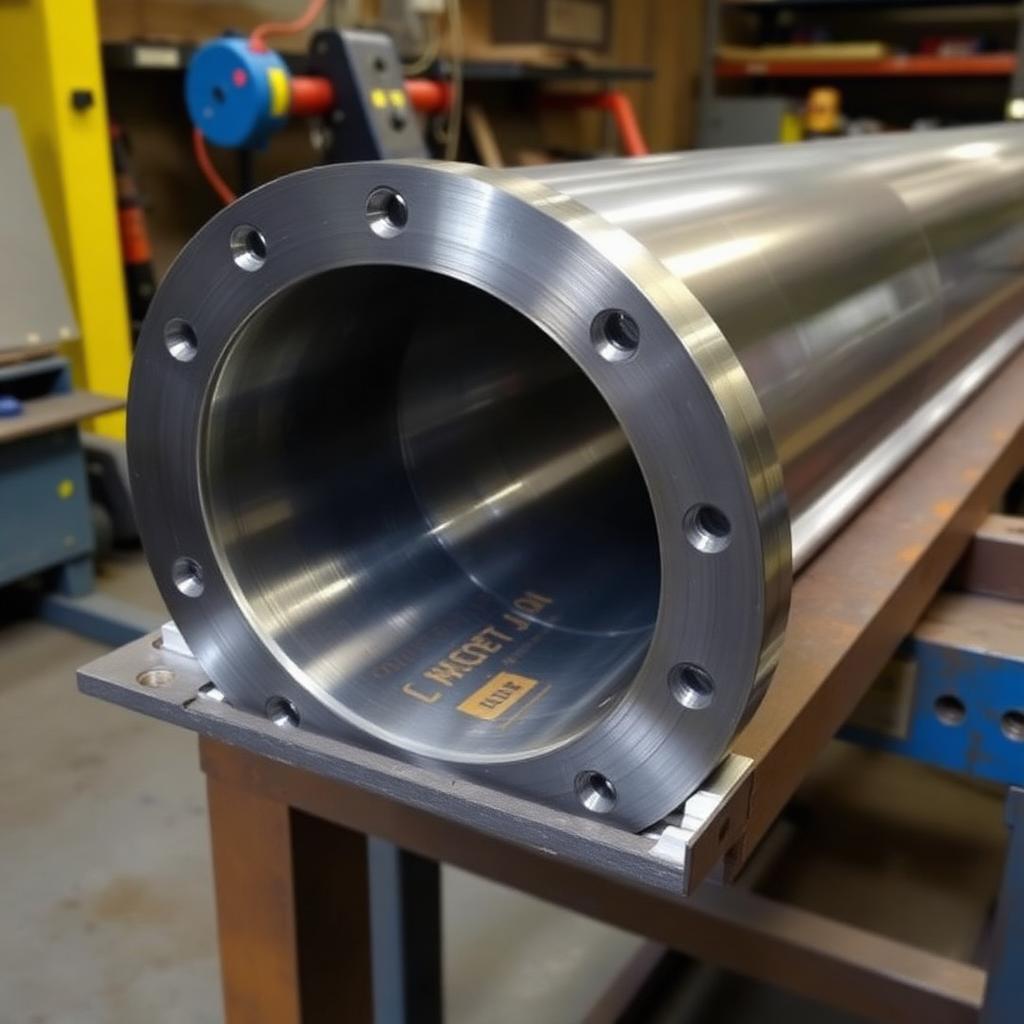
High-strength bolts arranged in staggered rows on a gusset plate — the geometry that controls the net area, Aₙ; effective area, Aₑ; and block-shear planes.
§4.6.2
Shear-lag geometry
Fig. 4.2Single-leg connection
Angle connected by one leg only. The offset between bolt line and section centroid is the length x̄ used to compute U = 1 − x̄/L in Table D3.1 Case 2.
§4.6.3
Net section
Fig. 4.3Bolt-hole pattern at the end of a W-shape
Rows of drilled holes reduce the gross area, Ag, to the net area, Aₙ = Ag − Σ(dh·t). Hole diameter dh = bolt diameter + 1/16″ + 1/16″ per AISC §B4.3.
§4.6.4
Hanger application
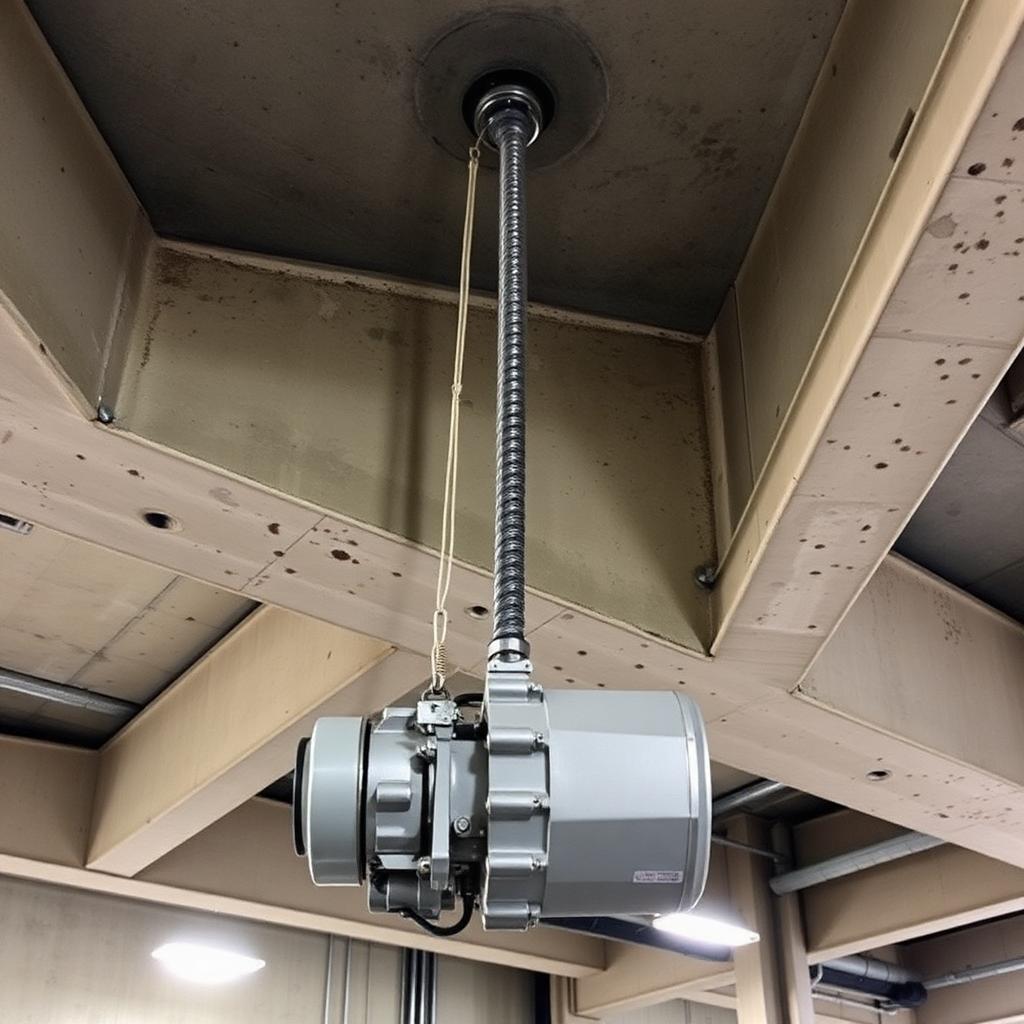
Fig. 4.4Threaded rod hanger for MEP equipment
Classic tension application: a threaded rod hangs a mechanical unit from a slab. Check rupture on the tensile stress area of the threaded portion.
10
Worked examples
Full textbook solutions — problem, theory, step-by-step, verification, interpretation
Example 4.1
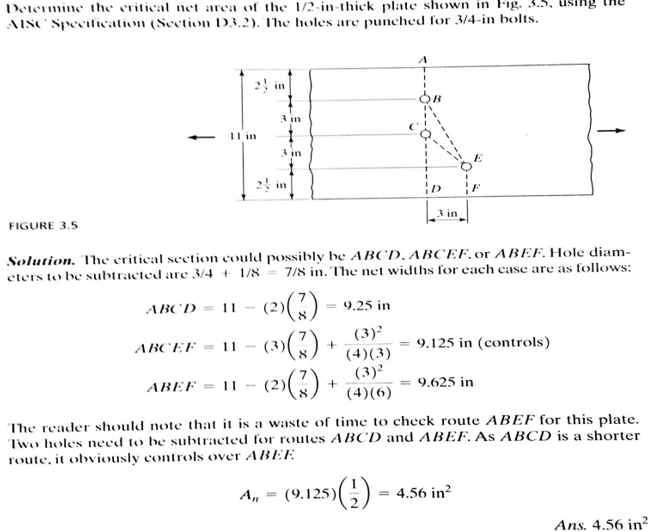
Critical net area — ½″ plate with staggered 3/4″ bolts
Determine the critical net area of the ½-in-thick plate (11 in wide) shown in Fig. 3.5 using AISC Specification §D3.2. Holes are punched for 3/4-in bolts (dh = 3/4 + 1/8 = 7/8 in).
Problem statement
Determine the critical net area of the ½-in-thick × 11-in-wide plate shown in Fig. 3.5 using the AISC Specification (§D3.2). The holes are punched for 3/4-in-diameter bolts. Investigate paths ABCD, ABCEF, and ABEF.
Bolt pattern: two vertical gages 3 in apart between top pair and 3 in between the third and fourth rows, outer edge distances 2½ in top & bottom; staggered pitch s=3 in and gageg=3 in.
Fig. 3.5 (Salmon & Johnson) — staggered bolt pattern in a ½-in plate.DIMStaggered pattern — s = 3″ along load, g = 3″ perpendicular. Route ABCEF crosses three holes with two diagonal segments.
Given
Plate ½ in × 11 in (Ag = 5.50 in²)
Bolts: 3/4 in punched → dh = 3/4 + 1/8 = 7/8 in (§B4.3b)
Pitch s = 3 in, gage g = 3 in
Three candidate paths: ABCD, ABCEF, ABEF
Find
Critical (minimum) net width and net area An
Assumptions
Punched holes → deduct db + 1/8 in for damage (AISC §B4.3b).
s²/(4g) credit applied once for every diagonal segment on the failure path.
Tension is uniform across the plate width.
Code references
AISC 360-22 §B4.3b — Effective hole diameter
AISC 360-22 §D3 — Effective net area
Step-by-step solution
1
Effective hole diameter (AISC §B4.3b)
dh=db+81
X=43+81=87 in
2
Route ABCD — two holes, no stagger
Formula§B4.3b
wn = wg − Σ dh
wABCD=11−(2)(87)
X=11−1.75=9.25 in
3
Route ABCEF — three holes, one diagonal segment (C→E)
Formula§B4.3b
wn = wg − Σ dh + Σ s²/(4g)
wABCEF=11−(3)(87)+(4)(3)(3)2
X=11−2.625+0.750
X=9.125 in(controls)smallest w_n
4
Route ABEF — two holes, one diagonal segment (B→E)
wABEF=11−(2)(87)+(4)(6)(3)2
X=11−1.75+0.375=9.625 in
5
Critical net area
An=wn,min⋅t
X=(9.125)(21)
X=4.56 in2
Verification
Only two holes lie on ABCD and ABEF, while ABCEF loses three; even with twos2/4g credits, ABCEF still governs because the third hole dominates the two small stagger credits. As Salmon & Johnson note, checking ABEF is a waste of time once ABCD is known (both routes cut two holes but ABCD is straight and therefore shorter).
Final answer
An = 4.56 in² — route ABCEF controls.
Design interpretation
Each stagger buys back s2/(4g) of net width, but never enough to erase the loss of an entire extra hole unless s is very large or g is very small. Always check every zig-zag path that crosses the section — the controlling route is not always visually obvious.
Common mistakes
Deducting db instead of dh = db + 1/8 in (punched holes) — under-predicts hole loss.
Adding one s²/(4g) credit for the whole group instead of one per diagonal segment.
Skipping paths that seem 'obviously worse' — always tabulate every candidate.
11
Guided practice
Compute the governing variables — hints unlock as you need them
A 1″ diameter A36 threaded hanger rod (Fy = 36 ksi, Fu = 58 ksi, effective area Aₑ ≈ 0.606 in²) supports a service dead load PD = 8 kip and live load PL = 12 kip. Compute the LRFD demand Pu and the design strength φt Pn (rupture on threaded section, φ = 0.75). Is the rod adequate?
Your turn
Hints
1.LRFD combination 2 governs for gravity: Pu = 1.2 PD + 1.6 PL.
12
Independent practice
Solve the chapter's design task — compute each governing variable
Design task
An A36 plate PL½″ × 6″ (Fy = 36 ksi, Fu = 58 ksi) is connected by two transverse rows of two ¾″ bolts (hole diameter dh = ⅞″). Shear-lag factor U = 1.0. Compute the net area, Aₙ, and design tensile strength, φt Pn; identify whether yielding or rupture governs.
Given
Plate: b = 6 in, t = 0.5 in → Ag = 3.00 in²
2 bolt holes per critical section, dh = 7/8 in
U = 1.0, φy = 0.90, φr = 0.75
Approach
An = Ag − n·dh·t on the critical (transverse) section.
Select the option that satisfies every code and serviceability requirement in the brief
Brief
Select the lightest single-angle A36 tension diagonal for a brace: Pu = 120 kips, connected by 4 bolts of ¾″ in one leg. Verify yielding, rupture (with shear-lag U from Table D3.1), and slenderness L/r ≤ 300 for L = 14 ft.
Requirements
Factored demand Pu = 120 kips
A36 steel (Fy = 36 ksi, Fu = 58 ksi)
Bolted through one leg — expect U ≈ 0.85 (Case 8, four bolts in line)
Slenderness L/r ≤ 300 over L = 14 ft = 168 in → rmin ≥ 0.56 in
Lightest AISC-listed angle satisfying all three checks wins
These questions reference AISC Steel Construction Manual (16th ed.) — sections, equations, and tables are cited explicitly. Use a calculator. Each question offers a clue you may reveal before answering. Submissions are recorded to your account once signed in.
C4-01AISC 360-22 §D3.1FE Ref · Tension Members: Ag = bg · t (gross area)
1. Tension plate PL 8 in × ½ in (A36). Compute the gross area Ag used for the yielding limit state.
8. 3 staggered holes: PL 10 in × ½ in, A572 Gr.50, ¾-in Ø bolts (dh + 1/16 = 7/8 in). The zig-zag path 1→2→3 crosses 3 holes with 2 staggers (each s = 2 in, g = 3 in). Compute the net width, wₙ, along path 1-2-3.
C4-09AISC 360-22 §B4.3bFE Ref · Tension Members: An = wn · t on governing zig-zag path
9. Same 3-hole plate. Compute the net area, Aₙ, on the governing zig-zag path.
C4-10AISC 360-22 Eq. D2-2FE Ref · Tension Members · Rupture: φPn = 0.75·Fu·Ae (compare to yielding φPn = 0.90·Fy·Ag)
10. Same 3-hole plate. Assuming U = 1.0 (plate connected through full section), compute φt·Pn for tensile rupture.
11. 4 staggered holes: PL 12 in × ½ in, A572 Gr.50, ¾-in Ø bolts (dh + 1/16 = 7/8). The path 1→2→3→4 crosses 4 holes with 3 staggers (each s = 1.5 in, g = 3 in). Compute the net width, wₙ.
C4-10cAISC 360-22 Eq. D2-2FE Ref · Tension Members · Rupture: φPn = 0.75·Fu·An (U = 1.0)
12. Same 4-hole plate. Compute the net area, Aₙ, on the governing path and φt·Pn for rupture (U = 1.0).
C4-11AISC 360-22 Table D3.1 Case 2FE Ref · Tension Members · Angles (bolted): U = 1 − x̄/L; Ae = U·An
13. L 4×4×½ (A36, Ag = 3.75 in²) connected through ONE leg with (4) ¾-in Ø bolts along the axis. From Table D3.1 Case 2, x̄ = 1.18 in and connection length L = 3(3) = 9 in. Compute the shear-lag factor, U, and then the effective area, Aₑ. (The net area, Aₙ, across one hole is 3.31 in².)
C4-12AISC 360-22 §D2FE Ref · Tension Members · Limit states: Yielding φy=0.90, Rupture φf=0.75 — min governs
14. Same L 4×4×½. Compute φt·Pn for yielding AND rupture (Fy=36, Fu=58), and state which governs.
Attach your handwritten or typed step-by-step solution for this chapter's graded quiz. The instructor can download every submission. PDF only, up to 25 MB.
How your upload will be graded
Your file — PDF, Word document, scanned handwriting or a photo — is read page by page like an experienced structural engineering instructor would. The scan is validated first, then your reasoning, structural model, calculations, diagrams, code basis and final answers are graded on process, not just the final number. Design work is additionally reviewed against AISC 360-22 and ACI 318-19. Partial credit applies, and one early mistake carried correctly forward is only penalized once.
Before you attach the file
Include every page, in order and right way up — a missing page cannot earn credit.
Keep margins in frame: nothing cropped at the edges, especially boxed final answers.
Scan or photograph in good, even light — no shadows, glare or blur; 300 dpi or a steady phone scan.
Write in dark pen; faint pencil is the most common 'UNREADABLE — INSTRUCTOR REVIEW REQUIRED' flag.
Include all diagrams, FBDs, shear/moment diagrams and section sketches — label them.
Number each question the same way the assignment does, and note anything you skipped.
Show units on every line and box your final answers.
Combine everything into ONE file (PDF preferred; Word, JPG or PNG accepted) under 20 MB.
Sign in to upload your worked solution.
16
FE exam preparation
NCEES-style practice with timer, equation sheet, and mastery tracking
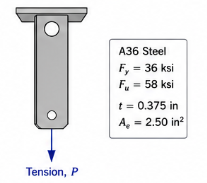
An ASTM A36 steel hanger bar (Fy=36 ksi, Fu=58 ksi) is used as a tension link. The plate has a thickness of 0.375 in and an effective net area Ae=2.50 in2. Determine the LRFD design tensile rupture strength ϕPn.
 Objective 01