A beam does not fail at Mp — it fails where Mp cannot be reached.
Compactness and bracing decide whether the plastic moment is available.
Chapter 6 covers laterally supported and laterally unsupported flexural members under AISC 360-22 Chapter F: compact I-shape flexure (F2) with Mp = Fy*Zx, the three lateral-torsional buckling zones (plastic, inelastic, elastic) delimited by Lp and Lr, non-compact flange penalties (F3), and the deflection serviceability check L/360.
Iconic steel structures built on engineering excellence
Cb rewards varying-moment segments (typical gravity beams) and is often 1.14-1.32.
Where it is used
Every inelastic/elastic LTB check.
Connects to
AISC F1(3), Eq. F1-1.
Objective 04
Read Manual Tables 3-2 and 3-10
Table 3-2 gives phi_b*Mp, phi_b*Mr, Lp and Lr for every W. Table 3-10 plots Mn vs Lb.
Why it matters
One table read replaces four Chapter F equations for standard sections.
Where it is used
Every design office; every FE flexure question.
Connects to
AISC Manual Part 3.
Objective 05
Check deflection L/360 (LL) and L/240 (Total)
For a UDL: Delta_max = 5*w*L^4 / (384*E*Ix).
Why it matters
Serviceability often governs long-span filler beams, not strength.
Where it is used
Every floor beam serviceability check.
Connects to
AISC L; ASCE 7 App. C.
Objective 06
Classify flange & web (Table B4.1b)
lambda vs lambda_p and lambda_r. Non-compact flange triggers F3 with a linear penalty on Mp.
Why it matters
Non-compact flanges cap Mn below Mp; ignoring this over-predicts strength.
Where it is used
Heavy built-up girders, some rolled W's at high Fy.
Connects to
AISC Table B4.1b; F3.
03
Engineering motivation
What each part of a steel-frame building actually does — and why it exists
Before you design any single member, you have to see the whole system. A steel-frame building is not a collection of independent shapes bolted together — it is a deliberate load path, engineered so that every kilonewton of gravity, wind, or seismic demand has a continuous route from where it starts to the ground where the earth can resist it.
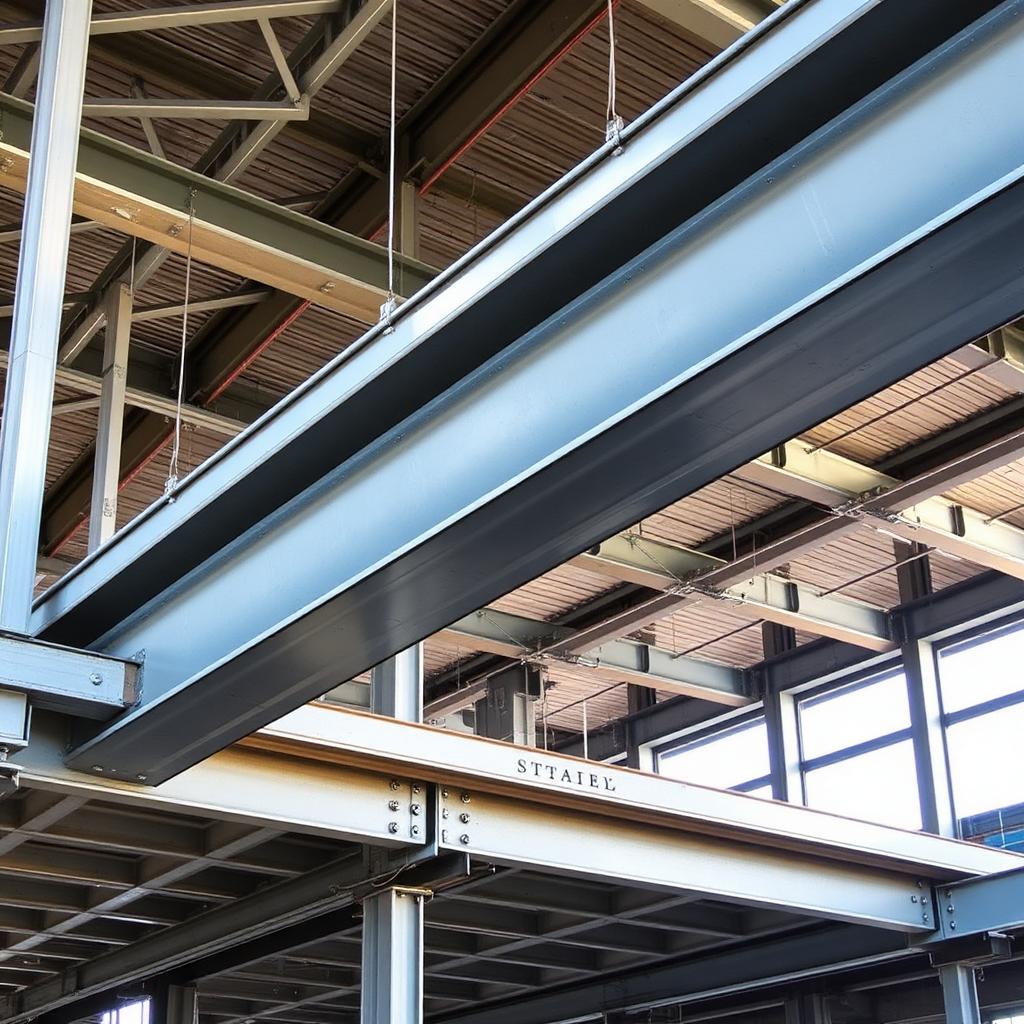
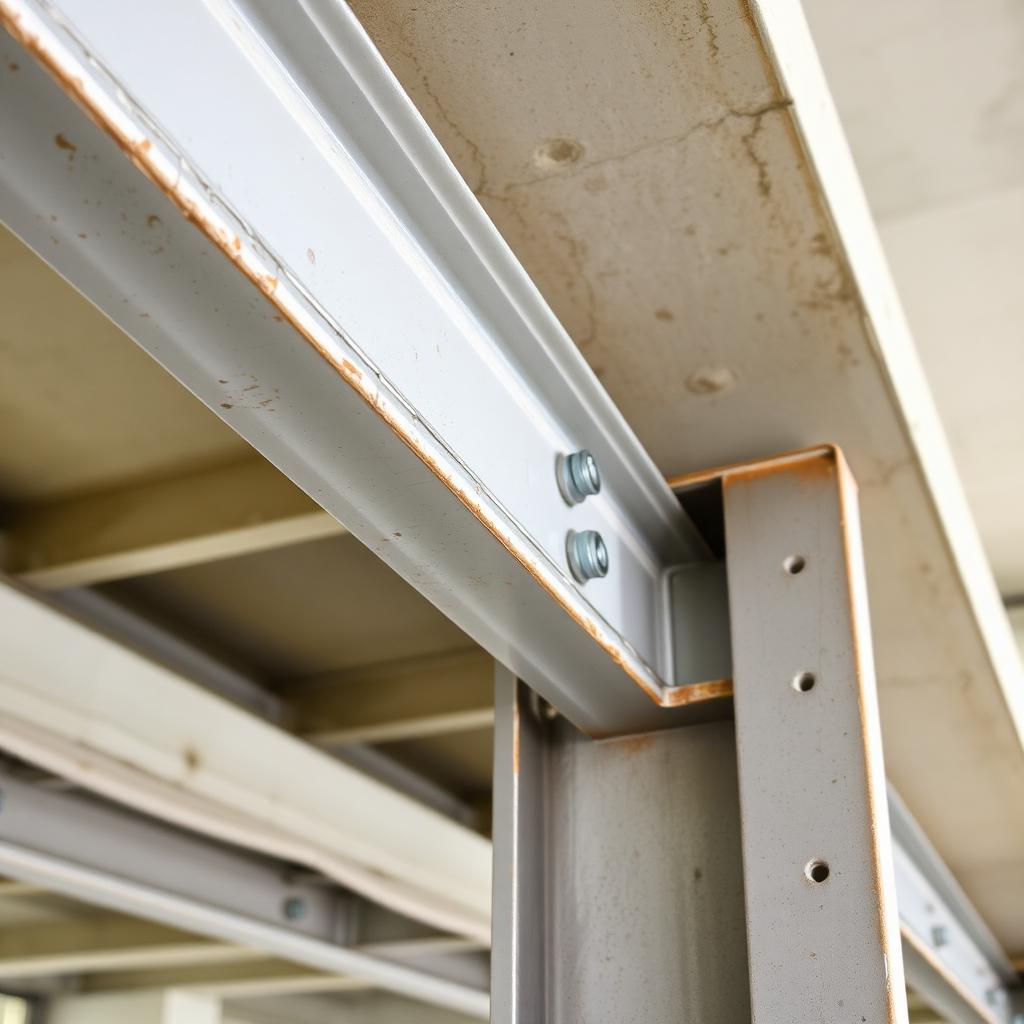
The photograph below shows a typical steel framing detail. Drag each labelled chip onto the structural element it names — the drop is only accepted when it lands inside the correct element's outlined region. A correct answer locks in with a green outline and a short explanation; a wrong answer flashes the region red, tells you what you actually hit, and returns the chip so you can try again. Press Reveal expected placements to see the reference solution (that attempt is then marked as assisted).
Fig. 1.3 · Drop a chip inside the outlined element it names. Green = correct and locked; red flash = wrong element, chip returns.
04
Failure mechanisms
Why we design the way we do — six ways steel structures have failed, and what each disaster taught the profession
Every provision in AISC 360 is a scar. Behind each equation, load factor, and detailing rule is a bridge, a walkway, or a tower whose failure cost lives and rewrote the profession. The six case studies below trace the mechanisms that motivate the code you are about to learn.
Read each one as an engineer, not a spectator: identify the load, the limit state, the missing check, and the specific clause that exists today because that check was missed. When you meet those clauses again in Chapters 5–17, they will read as answers, not rules.
Case 01
Fig. 1.4.1 · Lateral-torsional buckling
Failure mechanism
Lateral-torsional buckling
The compression flange bows sideways and the section twists before the plastic moment can develop.
Root cause
Lb > Lp — the unbraced length exceeds the plastic-limit length.
Lesson learned
Brace the compression flange at Lb <= Lp, or accept a reduced Mn per F2.2.
§AISC 360-22 F2.2
Case 02
Fig. 1.4.2 · Flange local buckling (FLB)
Failure mechanism
Flange local buckling (FLB)
A slender or non-compact compression flange crinkles locally at high moment.
Root cause
bf/2tf > lambda_p (non-compact) or > lambda_r (slender).
A slender web can buckle in shear (G) or in flexural compression, reducing capacity below Mp.
Root cause
h/tw > lambda_r for web compact/non-compact limits.
Lesson learned
Rolled W-shapes almost always have compact webs; built-up girders may not.
§AISC 360-22 F4/F5, G
Case 04
1981
Fig. 1.4.4 · Kansas City, 17 July 1981 — 114 killed.
Failure mechanism
Hyatt Regency walkway (1981)
Suspended walkway beams and hanger rods failed at the box-beam/rod connection. Standard cautionary case for flexural-member connection detailing.
Root cause
A shop-change doubled the load on the upper box-beam/rod connection; the detail could not develop the demand.
Historical case
Kansas City, 17 July 1981 — 114 killed.
Lesson learned
Flexural design is not just Mp; the connections that deliver load into the beam must be checked separately.
§AISC 360-22 J
How failure propagates
The five-stage failure progression
1Applied load
2Elastic bending
3First yield
4Lateral bow / twist
5Collapse
Design codes intervene at the transition from yield to instability. Everything before yield is elastic and reversible; everything after instability is a race to collapse. LRFD keeps the demand well below the first transition.
05
Lecture notes
The full textbook chapter — figures, equations, and engineering narrative
Reflection · Think before you read
Why can a compact, fully-braced beam reach Mp while an identical beam laterally unbraced over the same span may fail at less than half that moment? What physically changes between those two cases?
Chapter focus. Beams bend. If they are laterally supported and compact, they reach the full plastic moment Mp = Fy·Zx (φ = 0.90). If they are unbraced, the compression flange twists sideways — lateral-torsional buckling — and capacity drops with unbraced length Lb. This chapter walks the three flexural zones (plastic, inelastic LTB, elastic LTB), the Cb modifier for non-uniform moment, and how to enter Manual Table 3-10.
1. Behavior of a Beam under Bending
A beam resists transverse loads by developing internal bending moment M and shear V. For a compact, fully braced doubly-symmetric section, the section can reach its plastic moment Mp = Fy · Zx. If the compression flange is not braced, the beam may fail by lateral-torsional buckling (LTB) — a coupled lateral deflection and twist.
Representative Structures
Where flexural members appear in real engineering practice. Each highlighted element carries transverse load primarily by bending — its capacity is set by Mp = Fy·Zx when fully braced, or by lateral-torsional buckling when the compression flange is unsupported over a long Lb.
Girder
Highway Bridge — Steel Plate Girders
Parallel steel plate girders carry the deck slab and live load in pure flexure between piers. The composite deck braces the top flange continuously (Lb ≈ 0 in service), so capacity approaches Mp. During construction — before the slab cures — the bare girder must still be checked against LTB.
Deck girder
Pedestrian Bridge — Deck Beams
Longitudinal edge beams span between suspension cables and take pedestrian live load in bending plus a fatigue-critical serviceability check. Pedestrian bridges are routinely governed by deflection (L/360) rather than strength.
Floor beam
Truss Bridge — Transverse Floor Beams
Floor beams span between the truss panel points and carry the deck load in flexure into the truss chords. They are typically compact rolled W-shapes with short Lb, so Mn = Mp controls.
Floor beam / girder
Steel Building — Floor Beams & Girders
A W-shape floor system: filler beams frame into larger girders which frame into columns. Once the composite slab is placed, the top flange is fully braced — the classic Manual Table 3-10 design region where Mn = Mp.
Beam
Parking Garage — Long-Span Beams
Long clear spans (25–35 ft column-free bays) with heavy live load push these beams into deflection-controlled design. Precambering is common — a purely serviceability, not strength, decision.
Roof beam
Cellular Roof Beams
Cellular (castellated) beams are the roof-girder version of a deep W-shape — the web openings let mechanical ductwork pass through without increasing floor-to-floor height. Bending governs at the tee-section between openings; web-post buckling adds a new local limit state.
2. Section Classification (Table B4.1b)
Compact: λ ≤ λp — reaches Mp.
Non-compact: λp < λ ≤ λr — reduced capacity between Mp and 0.7 Fy Sx.
Slender: λ > λr — elastic local buckling controls.
(1)
Flange:λp=0.38(E/Fy)
λr=1.0(E/Fy)
(2)
Web:λp=3.76(E/Fy)
λr=5.70(E/Fy)
3. Unbraced Length Lb — the Distance that Sets LTB Capacity
Lateral-torsional buckling (LTB) is a stability failure of the compression flange. A composite floor slab attached to the top flange braces it continuously (Lb ≈ 0). A bare beam with kicker braces at the ends and one at midspan has Lb = L/2. A cantilever tip is unbraced by definition unless a stub or tie is provided.
Lb = distance between points that prevent lateral movement and twist of the compression flange.
A framing beam / joist attached to the top flange counts as a brace only if it can carry the small stabilizing force (~2 % of the flange force) per AISC Appendix 6.
Composite-slab beams: assume Lb = 0 during service, but check the beam bare during construction (before slab hardens).
4. Lateral-Torsional Buckling (§F2) — Three Zones
Nominal-moment curve for compact I-shapes
The nominal moment Mn depends on where Lb lands on the curve above:
Always use unfactored (service) loads when computing deflections. Strength design uses factored loads; serviceability does not.
7. Two Solution Methods — Companion Tables vs. AISC Specification Formulas
Flexural design in AISC 360-22 Chapter F can be executed by either hand-calculating with the F2 equations or reading straight from the Manual companion tables and charts. Master both: the Spec route explains the mechanics; the Manual route is faster and is what you use on the FE / PE exam.
Method A — AISC Specification Formulas (Chapter F, "the long way")
Compute the limiting lengths Lp (Eq. F2-5) and Lr (Eq. F2-6) from ry, rts, J, Sx, ho.
Determine the region from Lb:
Lb ≤ Lp → plastic: Mn = Mp = FyZx (Eq. F2-1).
Lp < Lb ≤ Lr → inelastic LTB (Eq. F2-2), with Cb from F1-1.
Lb > Lr → elastic LTB (Eq. F2-3, F2-4).
φbMn = 0.90 · Mn.
Use when: non-A992 steel, built-up plate girders, singly-symmetric sections, or when a report or exam requires every substitution shown. See the Cb derivation in Worked Example 6.2.
Method B — AISC Manual Companion Tables & Charts (Part 3, "the fast way")
Table 3-2 (Zx-sorted): tabulates φbMp, φbMr (= 0.7FySx), φbBF, Lp, and Lr for every W-shape. Enter with the required Zx (from Mu/(0.9Fy)) to pick the lightest section.
In the inelastic-LTB region, use the "BF" shortcut for Eq. F2-2:
(10)
ϕbMn=Cb⋅[ϕbMp−ϕbBF⋅(Lb−Lp)]≤ϕbMp
where φbBF is read directly from Table 3-2 — no need to compute (Mp−0.7FySx)/(Lr−Lp) by hand.
Table 3-10 (Available Moment vs. Unbraced Length): plots φbMn vs. Lb for Cb=1. Enter with Lb and read φbMn directly; the plateau (Lb ≤ Lp), the sloped inelastic segment, and the elastic tail are all embedded.
Table 1-1 (Dimensions and Properties) — enter with a required Ix for deflection-controlled design; pick the lightest W with Ix ≥ Ireq.
Table 3-23 (Shears, Moments & Deflections): closed-form Mmax and δmax for common load cases (uniform, point at mid-span, two symmetric point loads, cantilevers, etc.).
Use when: rolled W-shape in A992, standard load cases, or trial-section selection. See Worked Example 6.1 (Table 3-2 look-up of Lp, Lr, φbMp).
Which method for which problem?
Trial-section selection from Mu: Method B, Table 3-2 sorted by Zx.
Deflection-controlled beam: Method B, Table 1-1 sorted by Ix (then confirm strength).
Given Lb, find φbMn: classify the region (Lb vs. Lp, Lr) with Table 3-2, then either read Table 3-10 (Method B) or plug into Eq. F2-1/F2-2/F2-3 (Method A). The BF shortcut bridges the two.
Compute Mu for a given loading: Method B, Table 3-23 for closed-form Mmax; or Method A by statics.
Cb for non-uniform moment: Method A only — always compute with Eq. F1-1 from the bending-moment diagram.
Numerical agreement between the two methods is within round-off (~1 %). Every worked example in this chapter states which method it uses and cross-checks against the other.
8. Design Procedure (put it all together)
Compute Mu from ASCE 7 combinations.
Assume compact and fully braced; required Zx ≥ Mu/(0.9 Fy). Enter Manual Table 3-2 to pick the lightest W-shape (Method B).
Determine Lb from the bracing layout; compare to Lp and Lr from Table 3-2. Enter Table 3-10 (or Eq. F2-1/F2-2/F2-3) for φbMn.
Compute Cb from the moment diagram (§F1-1) if the moment is non-uniform between brace points; multiply through and cap at φbMp.
Verify shear Vu ≤ φv Vn (Ch. 7).
Check deflection with unfactored service loads.
⚠ Common mistakes
Using Sx instead of Zx for plastic capacity.
Forgetting Cb when non-uniform moment increases capacity.
Checking deflection with factored loads.
Ignoring section classification when using Fy > 50 ksi.
Worked Example 6.1 — Interior Floor Beam, W-shape (A992)
Method: AISC Manual Companion Table 3-2 for section pick (Zx, Lp, Lr, φMp) | Formula check: Eq. F2-1 (Lb ≤ Lp plateau) and Table 1-1 for Ix in the deflection check
Given: Simply-supported interior floor beam, span L = 30 ft, tributary width 10 ft. Slab dead D = 75 psf + SDL 15 psf; live L = 80 psf (office corridor). Compression flange continuously braced by composite metal deck (Lb ≈ 0). Steel A992, Fy = 50 ksi. Deflection limit L/360 (live).
Vu = wu L / 2 = 3.06·30/2 = 45.9 k; φVn (W18×50) = 192 k ≫ ✓
DESIGN: W18×50, A992. φbMn = 379 k·ft ≥ Mu = 344 k·ft ✓; ΔL = 0.78 in ≤ L/360 ✓.
Worked Example 6.2 — Computing Cb from the Bending Moment Diagram (Four-Point Load Test Beam)
Method: AISC Specification only — Eq. F1-1 from the BMD (no companion table gives Cb). Support tables: Table 3-23 Case 9 for Mmax; Table 3-2 for φbBF when Cb is later plugged into F2-2.
Given: A simply-supported W-shape spans L = 30 ft and carries two equal concentrated loads P = 20 kip at the third points (a = 10 ft from each support). The compression flange is unbraced along the full span (Lb = 30 ft). Compute the AISC moment-modification factor Cb (Eq. F1-1) so it can be used in the F2-2 inelastic-LTB equation.
Loading, dimensions, and bending moment diagram (BMD) with the four Cb ordinate stations
Step 3 — Draw the BMD (values needed to sketch it)
M(0) = 0 • M(a) = P·a = 20·10 = 200 k·ft • M(L−a) = 200 k·ft • M(L) = 0
Shape: two straight ramps (0 → 200 k·ft over 0–10 ft), a flat plateau at 200 k·ft (10–20 ft), then a mirror ramp back to zero. Peak moment Mmax = 200 k·ft.
Step 4 — Read the four Cb ordinates from the BMD
AISC Eq. F1-1 evaluates the moment at four fixed stations of the unbraced segment: the two ends (only their maximum matters), the quarter-point, midspan, and three-quarter point. Here Lb = L, so:
(10)
MA=∣M(L/4)∣,MB=∣M(L/2)∣,MC=∣M(3L/4)∣
x = L/4 = 7.5 ft → Segment ① ⇒ MA = R₁·x = 20·7.5 = 150 k·ft
x = L/2 = 15 ft → Segment ② (plateau) ⇒ MB = P·a = 200 k·ft
x = 3L/4 = 22.5 ft → Segment ③ ⇒ MC = R₂·(L−x) = 20·(30 − 22.5) = 150 k·ft
Mmax = 200 k·ft (anywhere on the plateau)
Cb = 1.14 > 1.0 → the non-uniform moment shape is less critical than uniform moment; the beam's LTB capacity may be scaled up by ~14 %.
If Lp < Lb ≤ Lr, plug this Cb into F2-2: Mn = Cb·[Mp − (Mp − 0.7FySx)(Lb−Lp)/(Lr−Lp)] ≤ Mp.
If lateral braces were added at the two load points (three 10-ft segments), the center segment has uniform moment → Cb = 1.0, while the end segments have a triangular BMD → Cb ≈ 1.67. Always compute Cb segment-by-segment and use the lowest φMn that results.
⚠ Common mistakes with Cb
Reading MA, MB, MC at the load points instead of at L/4, L/2, 3L/4 of the unbraced segment.
Using signed moments — Eq. F1-1 uses absolute values.
Applying Cb when Lb ≤ Lp — Cb only helps in the LTB range and is still capped at Mp.
Forgetting to recompute Cb for each unbraced segment when lateral braces divide the span.
•Specify Lb on the drawings, or specify the bracing (joists, deck, kickers) that creates it — LTB capacity is meaningless without it.
•Note whether the deck is attached to the beam and how; only a positively attached deck counts as continuous bracing.
•Camber must be called out with a tolerance and never used to compensate for a strength deficiency.
Safety in design & construction
•During deck placement, the top flange may be unbraced — check the construction-stage Lb, not the final one.
•Cb > 1.0 is a real benefit but must reflect the actual moment diagram, including construction loading.
•Web openings for MEP cut after fabrication can destroy flexural and shear capacity; require EOR review of every penetration.
Engineering ethics
•Do not use Cb to rescue a beam if the moment diagram assumption is not documented.
•Serviceability complaints (bouncy floors) are an ethical as well as a technical issue — disclose vibration limitations up front.
•Refuse to certify a beam whose bracing depends on work by others not shown in the contract documents.
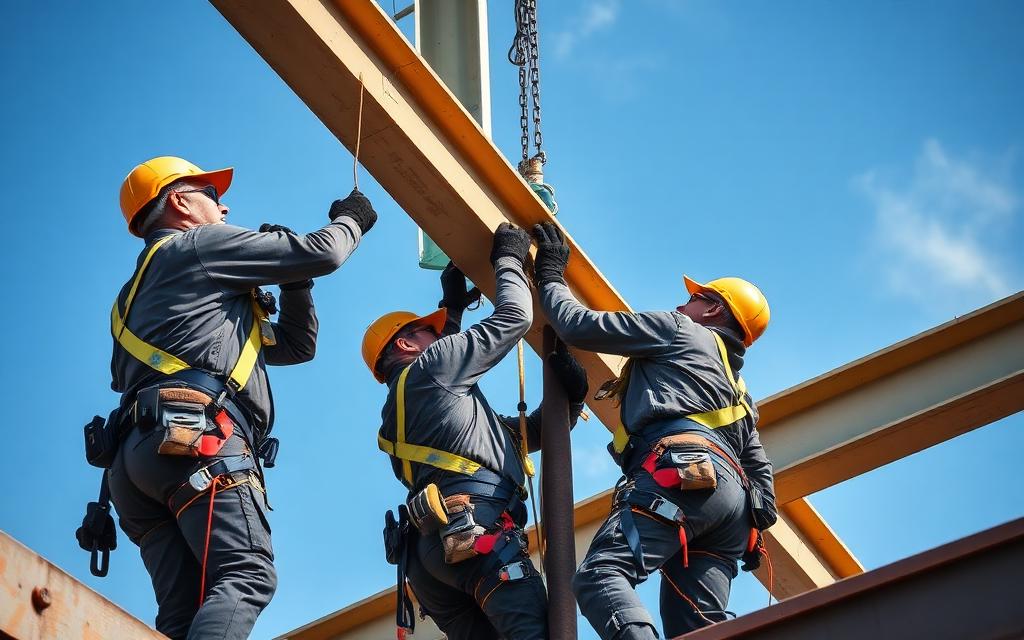
Erection safety: OSHA Subpart R fall protection and stable temporary bracing.Design review: documenting assumptions before the drawings are sealed.
ABET / licensure link. These points map to ABET Student Outcomes 2 and 4 — engineering design within realistic constraints, and recognition of ethical and professional responsibilities. Expect NCEES FE and PE exam questions on the NSPE Code of Ethics, OSHA construction requirements, and the engineer's standard of care.
07
Cost analysis
Beam economy and depth
Approach
•Deeper is cheaper: for the same Mu, a deeper beam weighs less. Depth is limited by floor-to-floor height, not by strength.
•Camber costs ~$60–100 per beam; sometimes a heavier uncambered beam is cheaper than a cambered light one.
•Bracing (joists/deck) increases capacity for free — make sure you take credit for real bracing before upsizing.
Worked cost example — W18 vs W21 for the same moment
Basis: Mu = 320 k-ft, Lb fully braced, 30 ft span
Line item
Qty
Rate
Cost
W18×55 — 55 lb/ft × 30 ft
0.825 ton installed
$2,700
$2,228
W21×50 — 50 lb/ft × 30 ft
0.75 ton installed
$2,700
$2,025
Camber (W21 option)
1 ea
$80
$80
Estimated total
$4,333
Takeaway. Going one nominal depth deeper saves ~$120 per beam — multiply by 60 beams per floor before dismissing it.
Unit rates are representative US averages for teaching purposes. On a real project, price with current local rates (RSMeans, fabricator quotes, or contractor pricing) and state the estimate date.
08
Animated concepts
Key mechanics visualised — watch the strain profile, stress block, or buckled shape evolve
Lateral-torsional buckling
Between braces, the compression flange deflects laterally and the section twists. Lb vs Lp / Lr sets the flexural regime (F2-1 / F2-2 / F2-3).
09
Engineering figures
Full-page reference diagrams — the visual vocabulary you will use for the rest of the course
Filler beam under composite deck — the deck provides continuous lateral bracing to the compression flange.
§6.6.2
Beam-to-girder connection
Fig. 6.2Bolted double-angle shear tab
Shear connections transfer beam reaction into the girder without moment.
§6.6.3
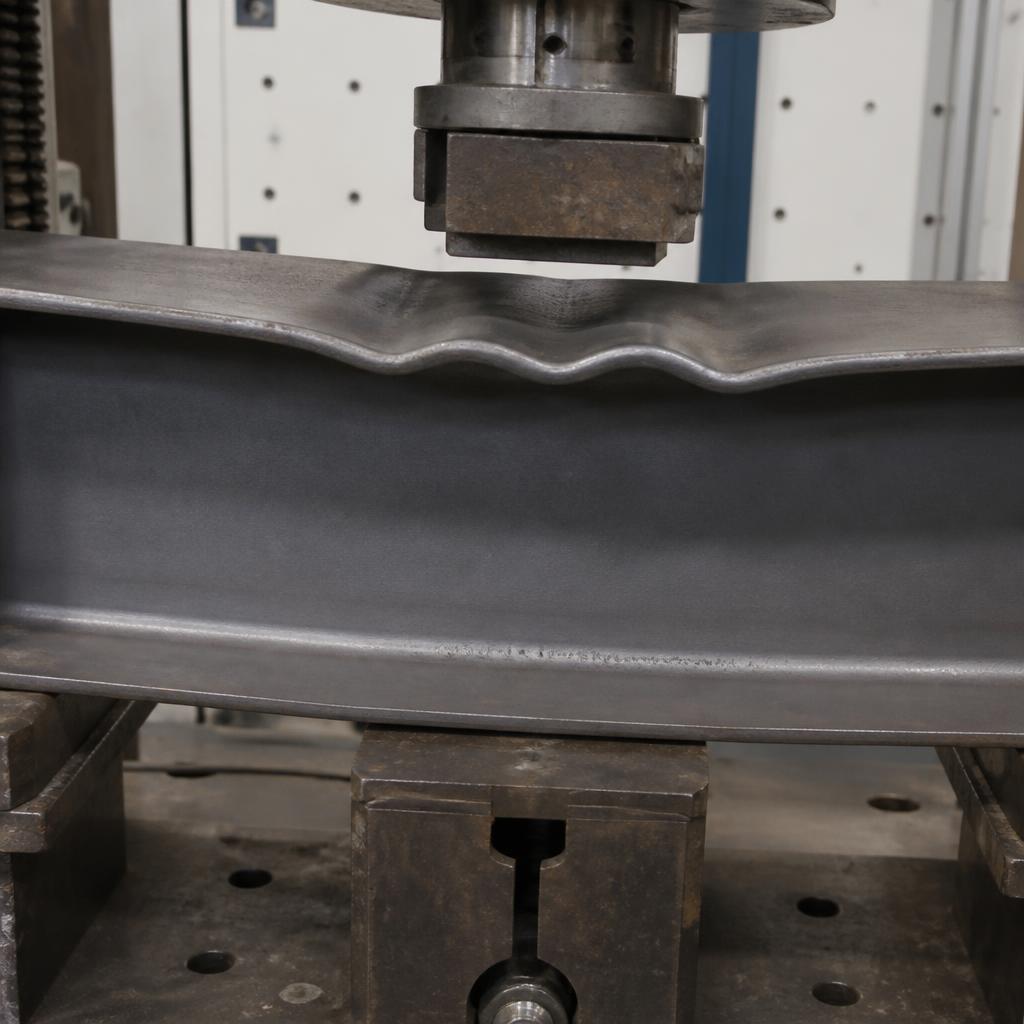
Lateral-torsional buckling
Fig. 6.3LTB test specimen
The compression flange bows out laterally and the section twists — the F2.2 mode.
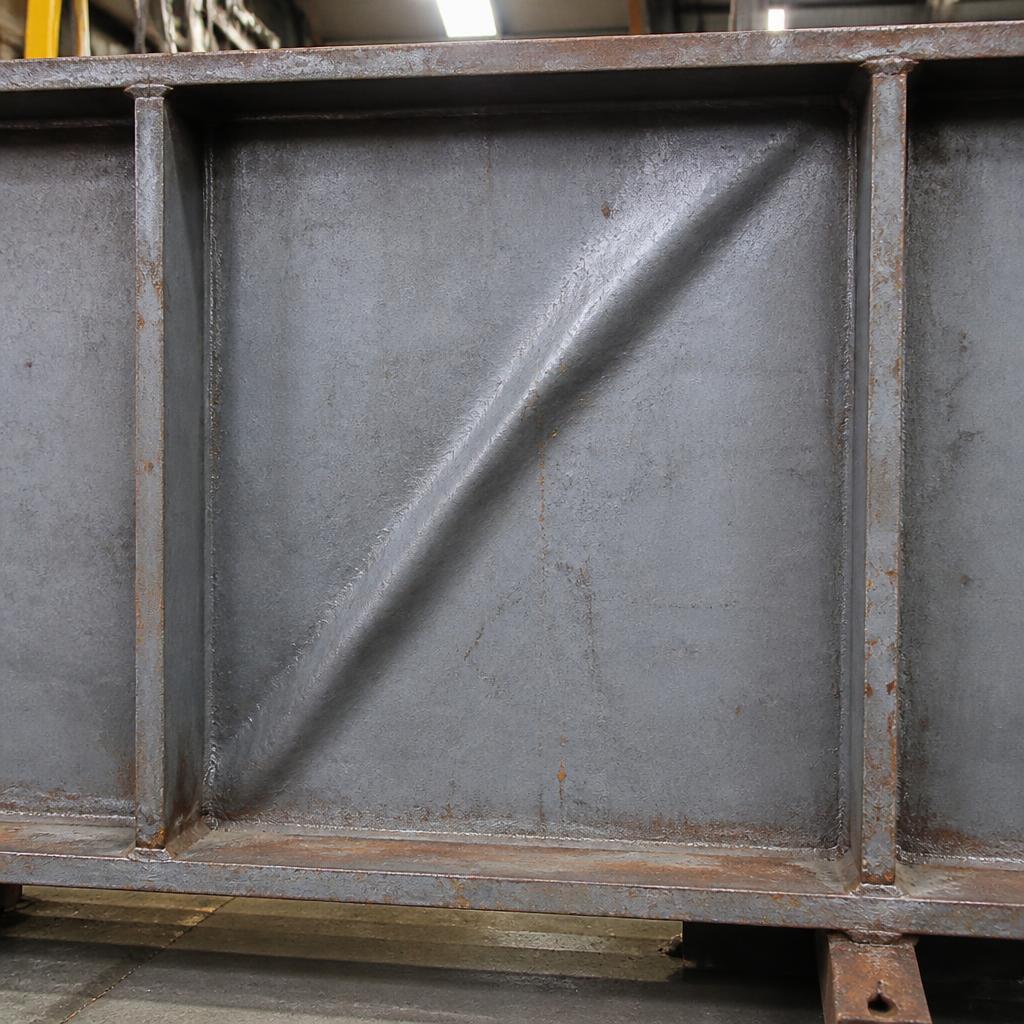
§6.6.4
Flange local buckling
Fig. 6.4Non-compact flange after test
Local flange buckling — F3. Preceded by bf/2tf > lambda_p.
10
Worked examples
Full textbook solutions — problem, theory, step-by-step, verification, interpretation
Example 6.1
W18x50 floor beam — phi_b*Mn per F2 (fully braced)
A W18x50 (A992) filler beam spans 30 ft simply supported and carries a composite deck that provides continuous lateral bracing. Compute phib*Mn per F2 and check L/360 live-load deflection.
Problem statement
A W18x50 (A992) filler beam spans 30 ft, simply supported, with the compression flange continuously braced by a composite deck. Compute phib*Mn per AISC 360-22 F2 and verify live-load deflection under wLL = 0.80 klf against L/360.
FIG. 6.1 — Deck-braced W18x50 filler beam typical of this example.
Floor plan
3-D isometric
Element detail
DIMPlan locates the filler beam, isometric shows the floor framing, detail carries the factored UDL — φbMn per §F2/F3.
Given
W18x50: Zx = 101 in^3, Sx = 88.9 in^3, Ix = 800 in^4, ry = 1.65 in
A992 steel: Fy = 50 ksi, E = 29,000 ksi
L = 30 ft = 360 in, simply supported
Lb ~ 0 (deck brace) => plastic zone
wLL = 0.80 klf (service)
Find
phib*Mn per F2
Mid-span DeltaLL vs L/360
Assumptions
Compact section (verify vs Table B4.1b)
Full lateral bracing (Lb = 0)
Simple supports; no continuity
Code references
AISC 360-22 F1 — phib = 0.90
AISC 360-22 F2 — compact I-shape flexure
AISC Manual Table 3-2
ASCE 7 Table C.C.1.1
Theory & approach
For a compact, laterally braced I-shape bent about the strong axis, the entire section can reach Fy. F2.1 gives Mn = Mp = Fy*Zx. With Lb <= Lp the plastic zone applies. Deflection is a serviceability check independent of the strength calculation.
Step-by-step solution
1
Section & regime
FormulaAISC F2
Compact + Lb <= Lp → Mn = Mp
Deck brace: Lb ~ 0 → plastic zone.
2
Plastic moment Mp
FormulaF2.1
Mp = Fy * Zx
Mp = 50 * 101 = 5,050 kip*in = 421 kip*ft
3
phi_b*Mn
FormulaF1
phib*Mn = 0.90 * Mn
phib*Mn = 0.90 * 421 = 379 kip*ft
Manual Table 3-2: phib*Mp (W18x50) = 379 kip*ft OK
4
Live-load deflection
Formula
Delta = 5*w*L^4 / (384*E*I)
w = 0.80/12 = 0.0667 kip/in; L = 360 in
Delta = 5*0.0667*(360)^4 / (384*29,000*800) = 0.62 in
5
Deflection check
Formula
L/360 = 360/360 = 1.00 in
0.62 in < 1.00 in → OK
Verification
phib*Mn = 379 kip*ft matches Manual Table 3-2 exactly. DeltaLL = 0.62 in is 62% of the L/360 limit.
Final answer
phib*Mn = 379 kip*ft and DeltaLL = 0.62 in < 1.00 in.
Design interpretation
The deck brace lets the beam reach Mp. Remove the deck brace (Lb = 30 ft, beyond Lr ~ 17 ft for W18x50) and Mn drops into elastic LTB — roughly 40-50% of Mp. Bracing is often free.
Common mistakes
Using Sx (elastic) in place of Zx.
Applying phi = 0.75 (rupture) instead of 0.90 (flexure).
Running deflection with factored loads — deflection uses service loads.
Engineering insight
For 25-35 ft filler beams under office LL, deflection usually governs before strength. Screen deflection first with Delta = 5*w*L^4/(384*E*I).
References
· AISC 360-22 Chapter F
· AISC Manual 16th ed., Tables 3-2 and 3-10
· ASCE 7-22 App. C
11
Guided practice
Compute the governing variables — hints unlock as you need them
W16x40 (A992) has Zx=73.0, Sx=64.7, Lp=5.55 ft, Lr=15.9 ft. Cb=1.0. Estimate phi_b*Mn at Lb=10 ft via F2.2 linear interpolation.
Your turn
Hints
1.Mp = Fy*Zx; Mr = 0.7*Fy*Sx.
12
Independent practice
Solve the chapter's design task — compute each governing variable
Design task
A W16×26 (A992) simply-supported beam is fully braced along the compression flange (Lb ≤ Lp). Verify it is compact, then compute the plastic moment Mp and the design flexural strength φb Mn.
Given
Fy = 50 ksi
W16×26: Zx = 44.2 in³, Sx = 38.4 in³
Lb ≤ Lp → plastic-yielding limit state (F2.1)
Compact section (flange & web OK)
Approach
For a compact, fully-braced I-shape: Mn = Mp = Fy·Zx.
Cap: Mp ≤ 1.5·My (My = Fy·Sx). Check the cap is not active.
Design: φb Mn = 0.90·Mn. Report in k-ft (÷12 from k-in).
Submit your answer
13
Mini design challenge
Select the option that satisfies every code and serviceability requirement in the brief
Brief
Select the lightest W18 A992 filler beam for a 30 ft simply-supported floor. Factored wu = 1.6 klf, service w_LL = 0.80 klf. Deck bracing.
These questions reference AISC Steel Construction Manual (16th ed.) — sections, equations, and tables are cited explicitly. Use a calculator. Each question offers a clue you may reveal before answering. Submissions are recorded to your account once signed in.
2. Same beam: from Table 1-1, Zx = 101 in³ (A992). Compute Mp and φbMp.
C6-03AISC 360-22 §F2FE Ref · Beams · LTB regions: compare Lb to Lp and Lr
3. Same beam. Braces at supports and midspan → Lb = 15 ft. Given Lp = 5.83 ft and Lr = 16.9 ft, which LTB region applies?
C6-04AISC 360-22 Eq. F1-1FE Ref · Beams · Cb table (Values of Cb for Simply Supported Beams) or Eq. F1-1
4. For a simply supported beam with uniform load and braced only at supports and midspan (each half-span symmetric with peak M at midspan), Cb for each half is:
12. Cb for a moment diagram with Mmax = 100 (at end), MA (1/4) = 100, MB (1/2) = 50, MC (3/4) = 75:
C6-13AISC Manual Table 3-10AISC Manual Table 3-10 (enter with Mu/Cb; FE Ref gives the Cb definition)
13. Design problem: pick the lightest W (A992) for Mu = 337.5 k·ft, Lb = 10 ft, Cb = 1.14, using AISC Manual Table 3-10. Required φbMn (equivalent Cb = 1.0):
C6-14AISC 360-22 Eq. F1-1FE Ref · Beams · Cb: F1-1 with MA, MB, MC, Mmax read from BMD
14. BMD shown for a simply-supported beam with UDL, braced only at the two supports (Lb = L). Read Mmax, MA, MB, MC from the diagram and compute Cb (AISC F1-1).
C6-15AISC 360-22 Eq. F1-1FE Ref · Beams · Cb: same F1-1, half-span segment (cross-check with FE Ref Cb table row: UDL, brace at midpoint → Cb = 1.30)
15. Same beam is now braced at both supports AND at midspan. For EACH half-span (the outer segment governs), the BMD ordinates within the half are shown. Compute Cb.
C6-16AISC 360-22 Eq. F1-1FE Ref · Beams · Cb table: P at midpoint, no interior bracing → Cb = 1.32 (or use F1-1)
16. Simple beam with a concentrated point load P at midspan, braces at supports only (Lb = L). Compute Cb from the BMD.
C6-17AISC 360-22 §F1(2)FE Ref · Beams: for cantilever unbraced at free end, Cb = 1.0 (AISC §F1(2))
17. Cantilever (fixed at LEFT support, free at RIGHT) with UDL. Braced at the fixed end only. The BMD is triangular with peak at the wall. Compute Cb.
20. Continuous-beam segment between an interior brace at the support (peak −Mmax) and an interior brace where M ≈ 0. BMD across the segment shown. Compute Cb (F1-1).
C6-21AISC 360-22 Eq. F2-1 · Manual Table 3-2FE Ref · Beams · Region 1 (Lb ≤ Lp): LTB does not apply; φbMn = φbMp
21. Region 1 (Lb ≤ Lp). W16×36 (A992), fully braced compression flange: Lb = 4 ft. From Table 3-2: Zx = 64.0 in³, Lp = 5.37 ft, Lr = 15.2 ft, φbMp = 240 k·ft. Which region applies and what is φbMn?
C6-24IBC 1604.3 / Statics · Manual Table 1-1AISC Manual Table 3-2 + Table 1-1 Ix for deflection; FE Ref: Mp = FyZx
24. Section selection by Ix for deflection.
Given: Simple beam, L = 30 ft, unfactored wLL = 1.0 k/ft. IBC limit ΔLL ≤ L/360. Which is the LIGHTEST W-shape that satisfies the deflection limit?
Candidates (Manual Table 1-1):
(a) W16×45 · Ix = 586 in⁴
(b) W18×40 · Ix = 612 in⁴
(c) W21×44 · Ix = 843 in⁴
(d) W18×50 · Ix = 800 in⁴
C6-25AISC Manual Table 3-23 · Loading Case 9FE Ref · Beams: statics for two point loads at L/3; Mu from moment diagram
25. Compute Mu from AISC Manual Table 3-23 loading case. Simple beam, L = 24 ft, loaded with TWO equal factored concentrated loads Pu = 12 k applied at the third-points (a = L/3 = 8 ft), no distributed load. From Table 3-23 Case 9: Mmax = P·a. What is Mu at midspan?
Attach your handwritten or typed step-by-step solution for this chapter's graded quiz. The instructor can download every submission. PDF only, up to 25 MB.
How your upload will be graded
Your file — PDF, Word document, scanned handwriting or a photo — is read page by page like an experienced structural engineering instructor would. The scan is validated first, then your reasoning, structural model, calculations, diagrams, code basis and final answers are graded on process, not just the final number. Design work is additionally reviewed against AISC 360-22 and ACI 318-19. Partial credit applies, and one early mistake carried correctly forward is only penalized once.
Before you attach the file
Include every page, in order and right way up — a missing page cannot earn credit.
Keep margins in frame: nothing cropped at the edges, especially boxed final answers.
Scan or photograph in good, even light — no shadows, glare or blur; 300 dpi or a steady phone scan.
Write in dark pen; faint pencil is the most common 'UNREADABLE — INSTRUCTOR REVIEW REQUIRED' flag.
Include all diagrams, FBDs, shear/moment diagrams and section sketches — label them.
Number each question the same way the assignment does, and note anything you skipped.
Show units on every line and box your final answers.
Combine everything into ONE file (PDF preferred; Word, JPG or PNG accepted) under 20 MB.
Sign in to upload your worked solution.
16
FE exam preparation
NCEES-style practice with timer, equation sheet, and mastery tracking
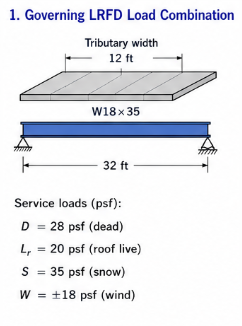
A 32-ft simply supported W18×35 roof beam with a 12-ft tributary width supports service loads of D=28 psf, Lr=20 psf, S=35 psf, and W=±18 psf. Determine the governing factored uniform load wu using ASCE 7-22 LRFD combinations.
◆◆ MediumASCE 7-22 §2.3.1
Fig. W18×35 roof beam — 12 ft tributary width, 32 ft span.
 Objective 01


.jpg?width=640)