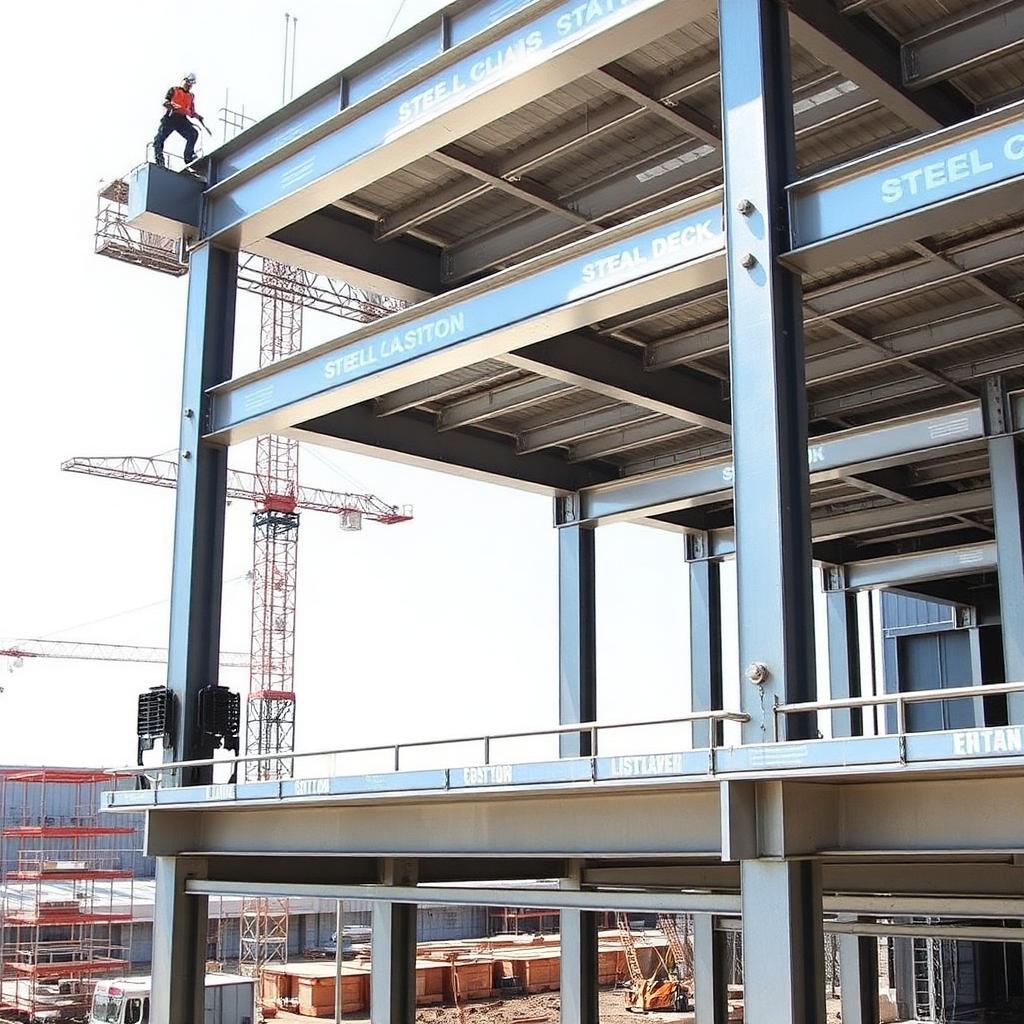
Cardinal Square — a 4-story steel-framed office building, designed end-to-end using AISC 360-22 LRFD + ASCE 7-22 over a 12-week studio.
Groups of 3–4 students. Each week advances the same building, so every submission depends on the last. AISC section citations are required on every check.
How to read this page: Each row below is one week. It names the AISC chapter you're operating in, the design task, the deliverable you upload in the submissions panel, and the specific metrics the instructor will use to grade it. Weights sum to 100% of the capstone portion of your course grade.
Before you start · Studio primer
What structural design actually is — and everything Cardinal Square asks you to decide
Read this primer before Week 1. It frames the vocabulary the whole studio runs on: load paths, material efficiency, building geometry, lateral and foundation systems, drift limits, the project life cycle, and who is accountable at each stage.
Part 01
Definition and core concepts
Structural design is the science and art of arranging structural elements so that every load reaching the building is carried safely and continuously down to the ground.
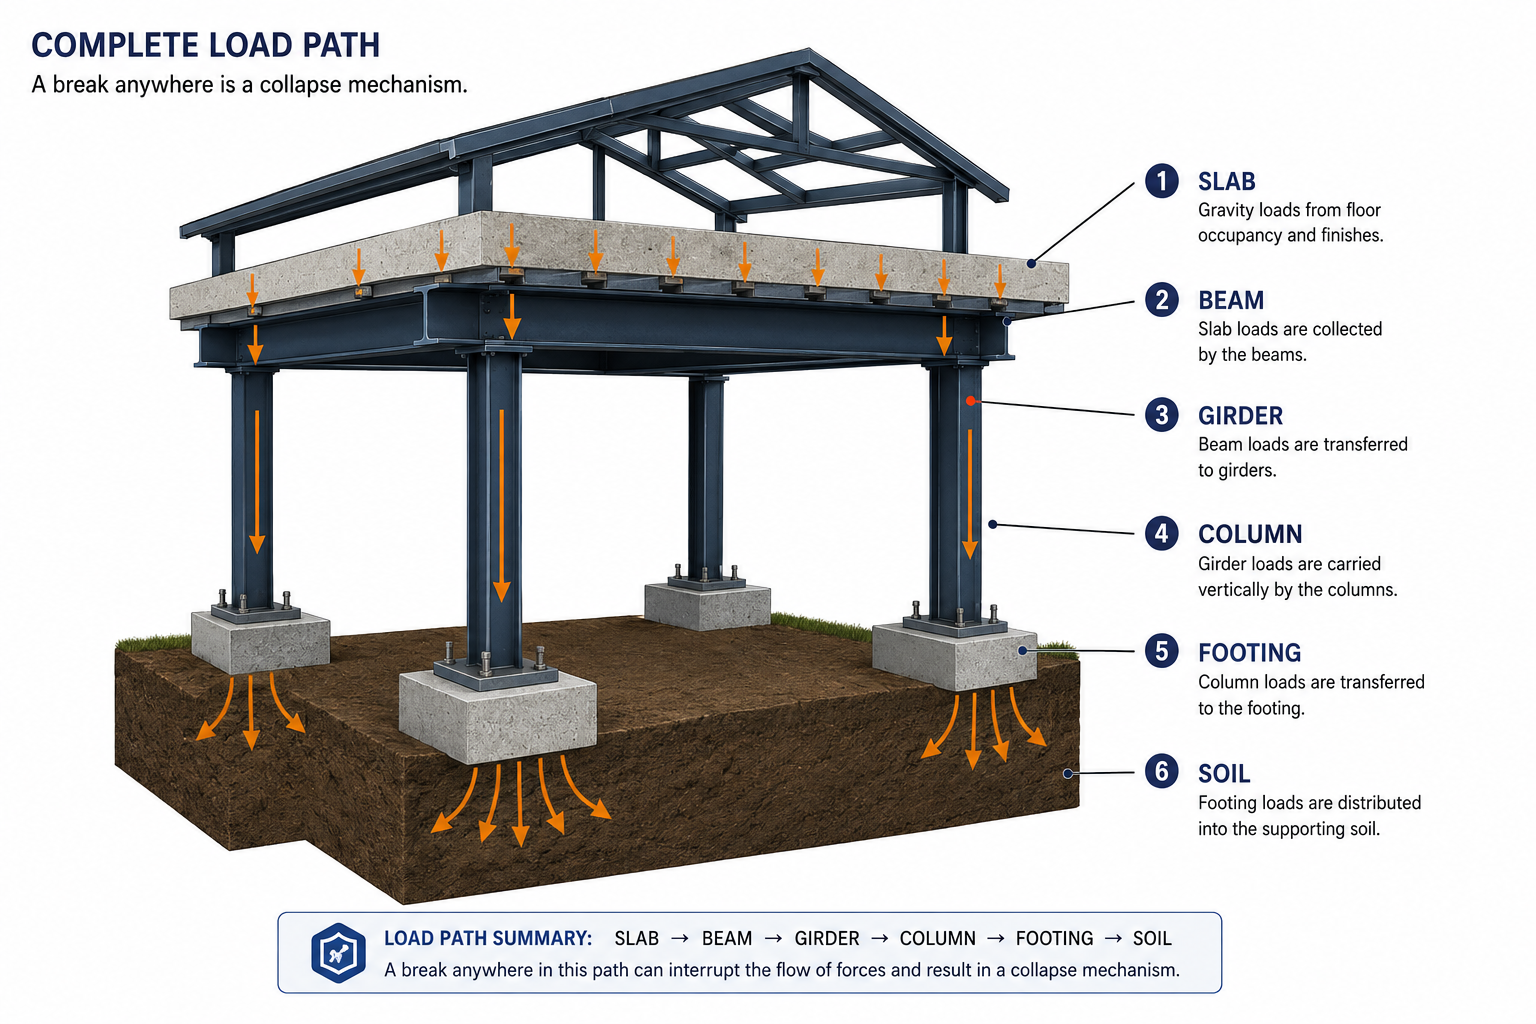
Load path: Every gravity, wind, and seismic force must trace an unbroken route to the foundation. Design is the act of choosing that route, then sizing each link.
Serviceability: Deflection, drift, vibration, and cracking limits that keep the building usable, not just standing.
Economy: The cheapest safe structure — measured in tonnage, fabrication hours, and schedule, not member count.
Aesthetics: Structure that coordinates with architecture: exposed framing, clear spans, and column-free zones where they matter.
A complete load path: slab → beam → girder → column → footing → soil. A break anywhere is a collapse mechanism.
Interactive · Load-path explorer
Click a member and follow the load to the ground
Gravity path: slab to filler beam to girder to column to base plate to footing to soil. The brace shows how lateral load joins that same path at the foundation.
Pick any member from the chips under the diagram. The member you choose turns orange, and every element that receives the load after it turns blue — that highlighted sequence is the load path.
Part 02
Importance of material efficiency
Efficiency means carrying the required demand with the least material, embodied carbon, and fabrication effort — while keeping every code margin intact.
Embodied carbon: Structure is typically 50–60% of a building's embodied carbon. Steel tonnage saved is carbon saved.
Member optimization: Drive utilization ratios into the 0.85–0.98 band. A beam at 0.45 is a beam you overpaid for.
Repetition beats theory: Fabrication and erection cost favour fewer distinct sections. Standardize across bays even at a small weight penalty.
Hidden cost of over-design: "Just in case" sizing inflates tonnage, foundations, and crane picks without adding meaningful reliability — β is already set by the code calibration in Chapter 2.
Efficient framing: shallow composite floors, repeated bays, and rolled shapes chosen for lb/ft, not just capacity.
Part 03
Building geometry and layout parameters
Geometry is decided before a single member is sized, and it locks in most of the structural cost.
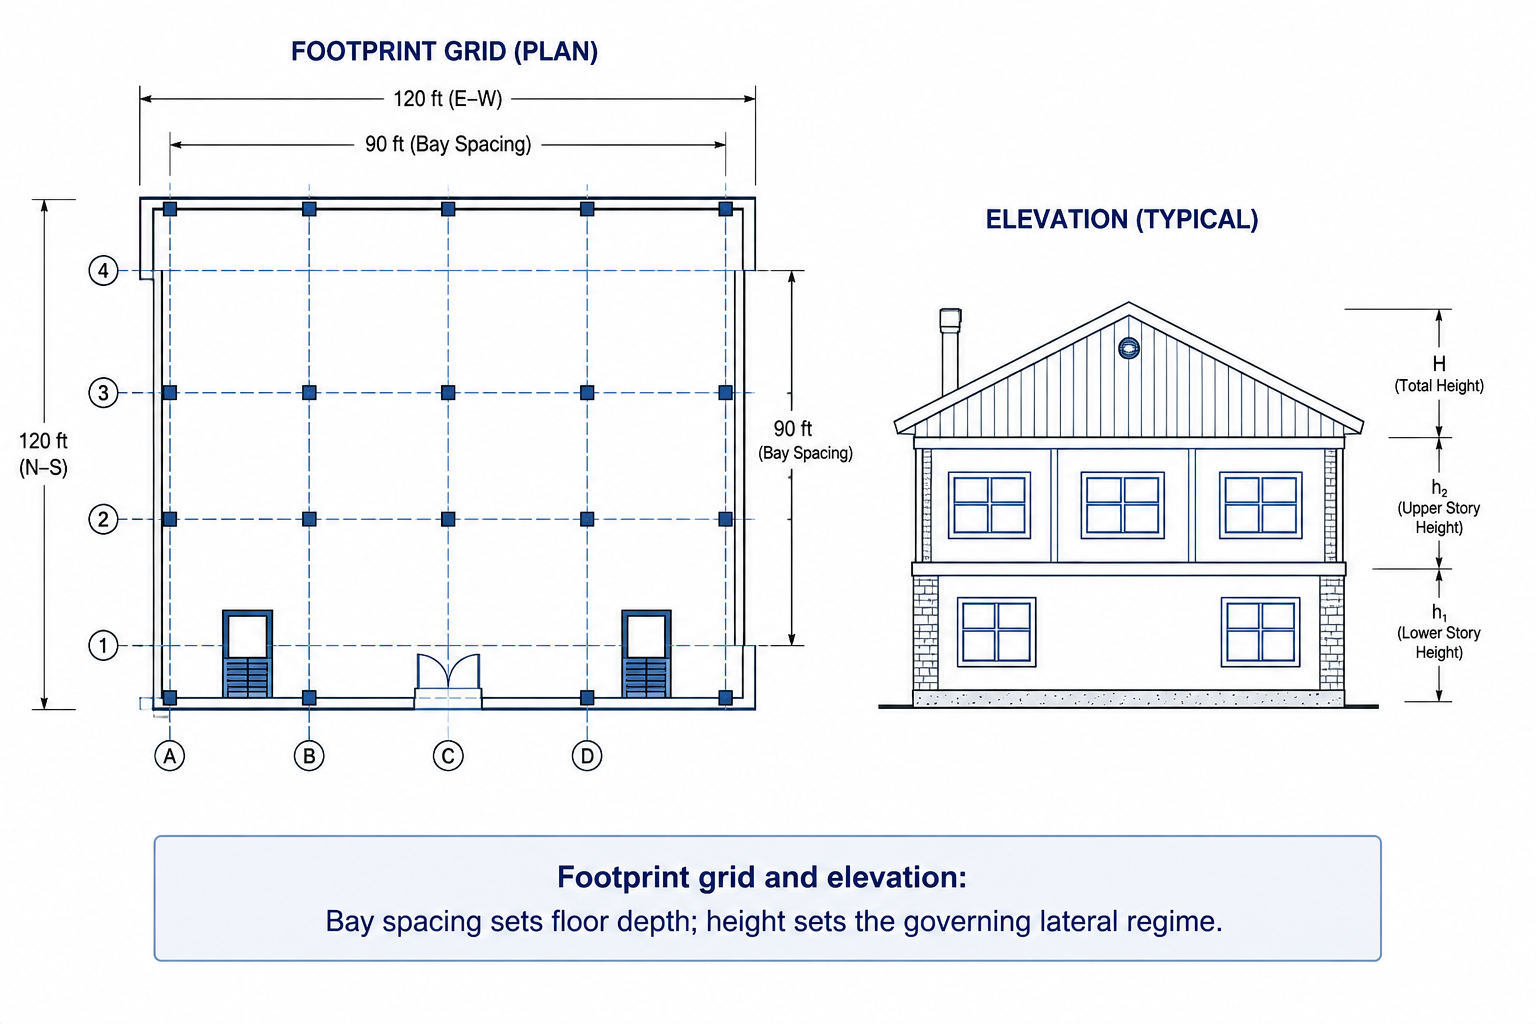
Footprint area: Sets total gravity load, tributary areas, lateral exposure surface, and foundation extent.
Building height: Decides whether wind or seismic governs, and drives overturning moments and column axial demand at the base.
Bay spacing: Larger bays give spatial flexibility but deepen the floor system and add framing weight; 25–35 ft is the usual economic band for composite steel.
Floor-to-floor height: Every extra inch of structural depth multiplies across all stories into façade area and column length.
Footprint grid and elevation: bay spacing sets floor depth; height sets the governing lateral regime.
Part 04
Structural and foundation systems
System selection is a lateral-load problem first and a gravity problem second.
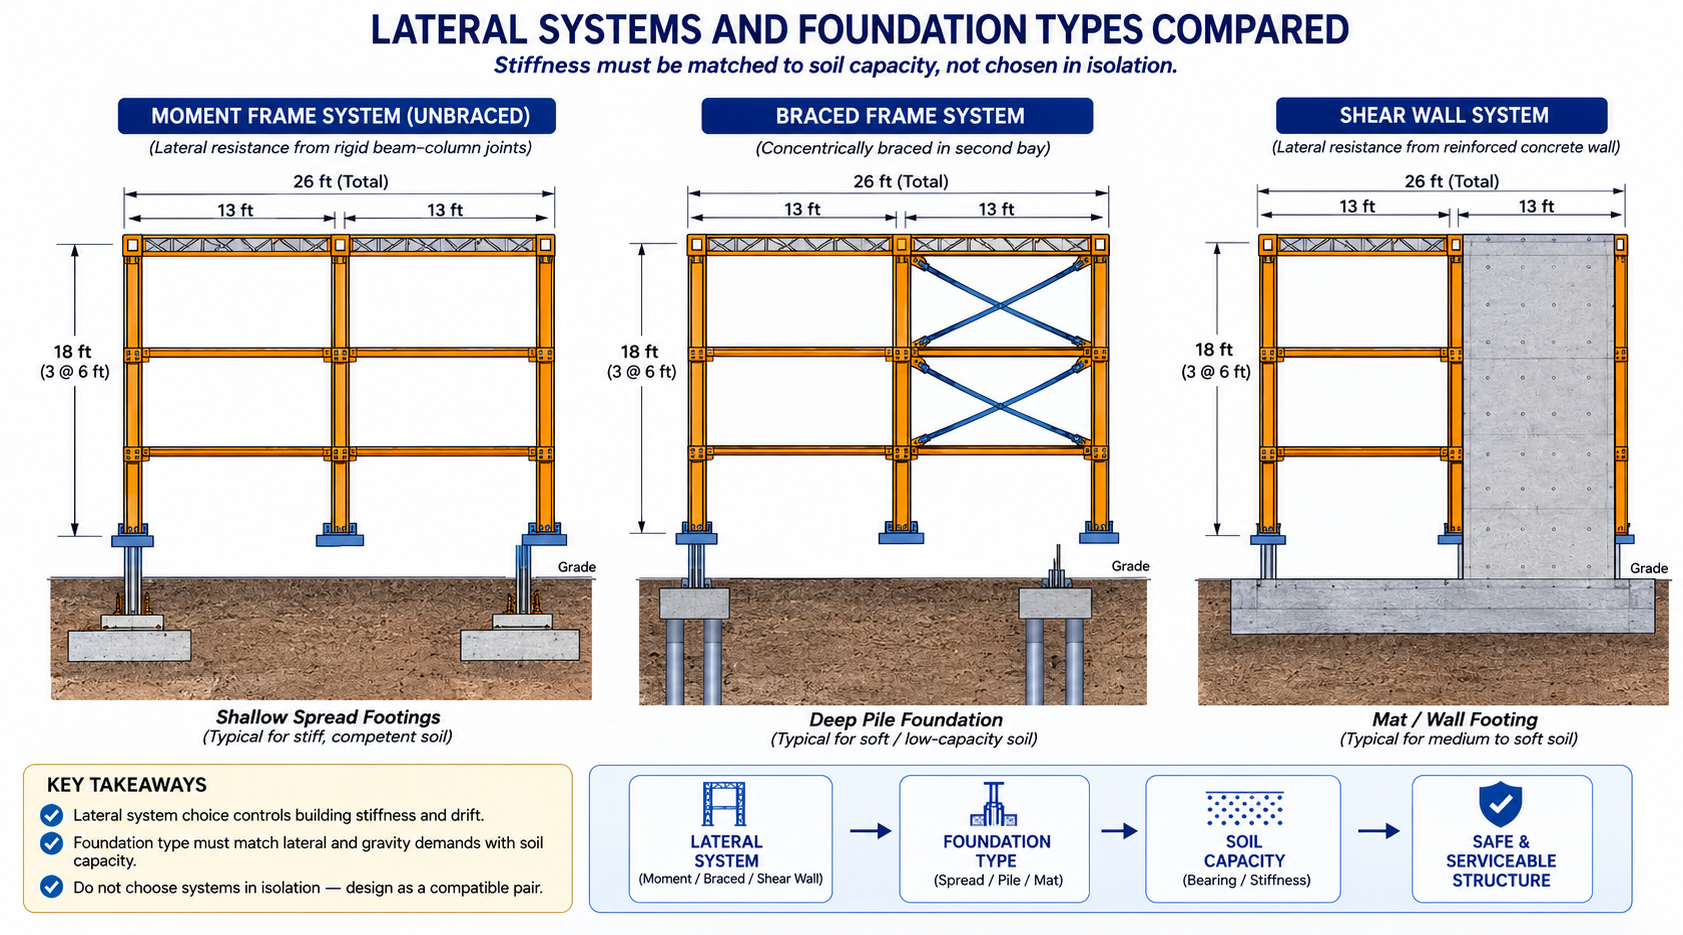
Moment frames: Open architecture, high ductility, expensive connections; drift usually governs member size.
Braced frames: Stiff and economical for low- to mid-rise; braces conflict with openings and façade planning.
Shear walls / cores: Very stiff, ideal around stairs and elevators; concentrates overturning into the foundation.
Diagrids & outriggers: Reserved for tall buildings where cantilever action dominates.
Shallow foundations: Spread footings or mats where allowable bearing pressure is adequate and settlement is tolerable.
Deep foundations: Piles or caissons when weak upper strata, high uplift, or large overturning demand transfer to competent soil or rock.
Drift control: Limit story drift (commonly H/400 service wind, and the ASCE 7-22 Table 12.12-1 seismic limits) to protect cladding, partitions, and occupant comfort.
Lateral systems and foundation types compared: stiffness must be matched to soil capacity, not chosen in isolation.
Part 05
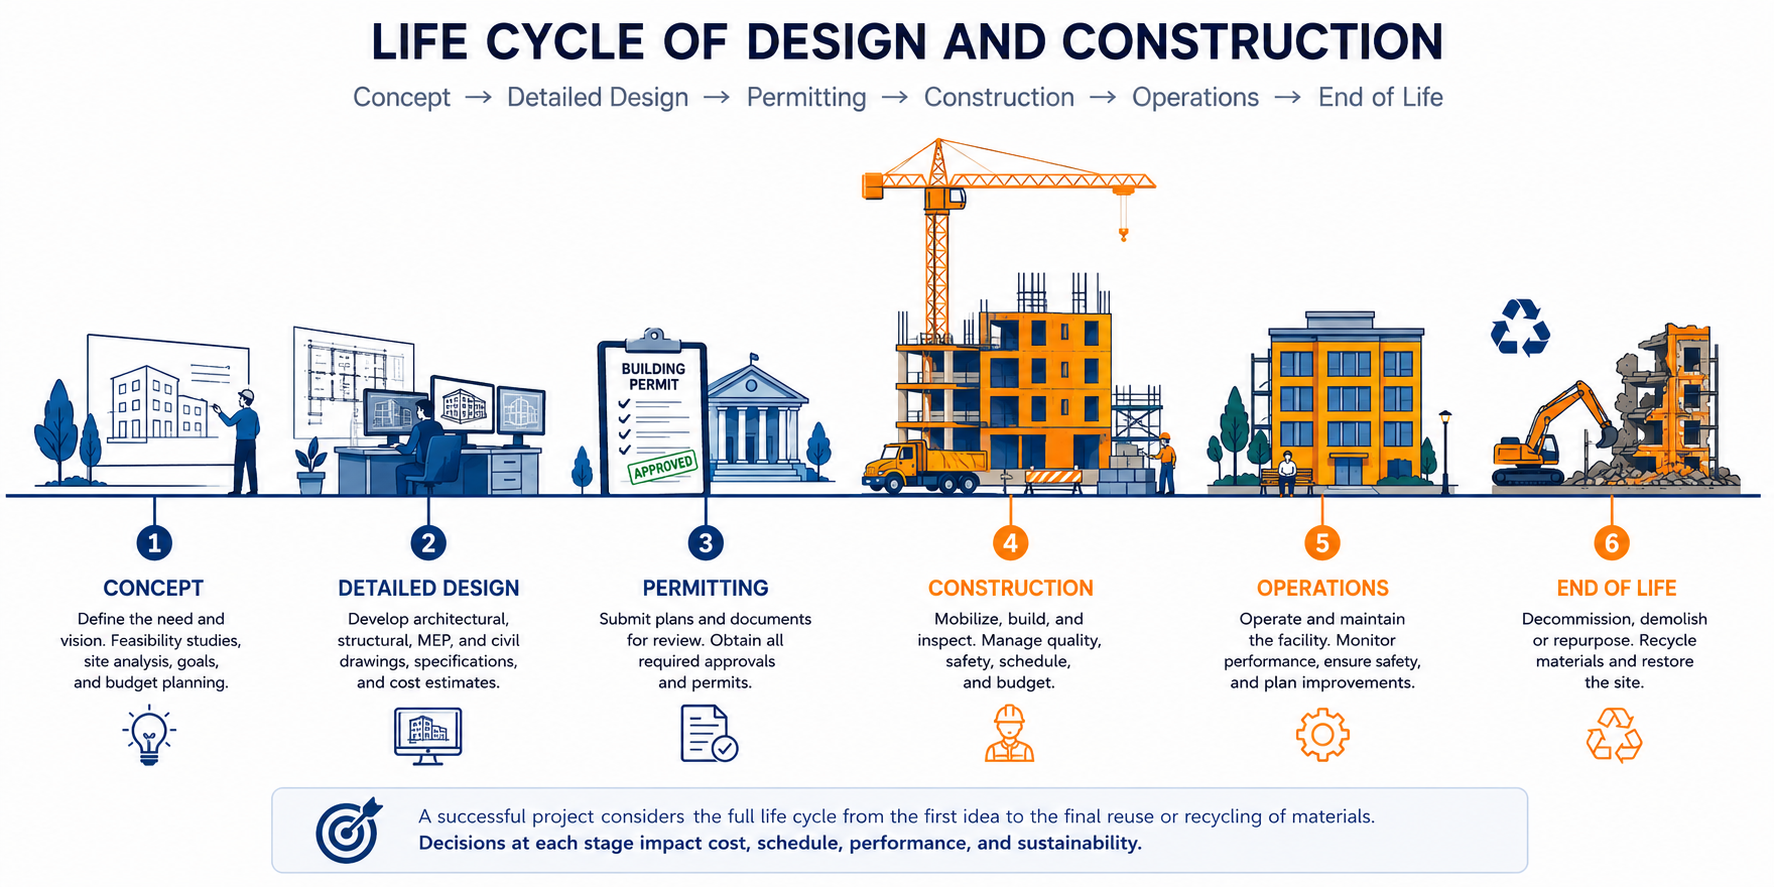
Life cycle of design and construction
Your twelve weekly submissions mirror the real project life cycle, stage for stage.
Conceptual & schematic: Architectural alignment, structural typology, preliminary member depths, and grid selection.
Detailed design & permitting: Full load derivation, finite element modeling, limit-state checks, code review, and stamped drawings.
Procurement & construction: Shop drawings, mill orders, erection sequencing, site logistics, inspection, and quality control.
Operations: Inspection intervals, corrosion protection, and monitoring of serviceability performance.
End of life: Adaptive reuse, deconstruction, and recycling — steel's recovery rate is the reason it scores well on life-cycle assessments.
Concept → detailed design → permitting → construction → operations → end of life.
Part 06
Stakeholder roles and responsibilities
A design only gets built when three parties agree: the engineer who signs it, the contractor who erects it, and the authority who permits it.
Structural engineer of record: Designs and seals the load-bearing system, owns code compliance, and answers RFIs during construction.
Architect: Sets geometry, occupancy, and finishes; negotiates structural depth and column locations.
Contractor: Owns means, methods, sequencing, and site safety; translates drawings into an erected frame.
Fabricator & erector: Produce shop drawings and set steel; their feedback drives connection economy.
Government / authority having jurisdiction: Enforces the building code, zoning, and special inspection through plan review and permitting.
Owner: Funds the project and sets performance expectations, budget, and schedule.
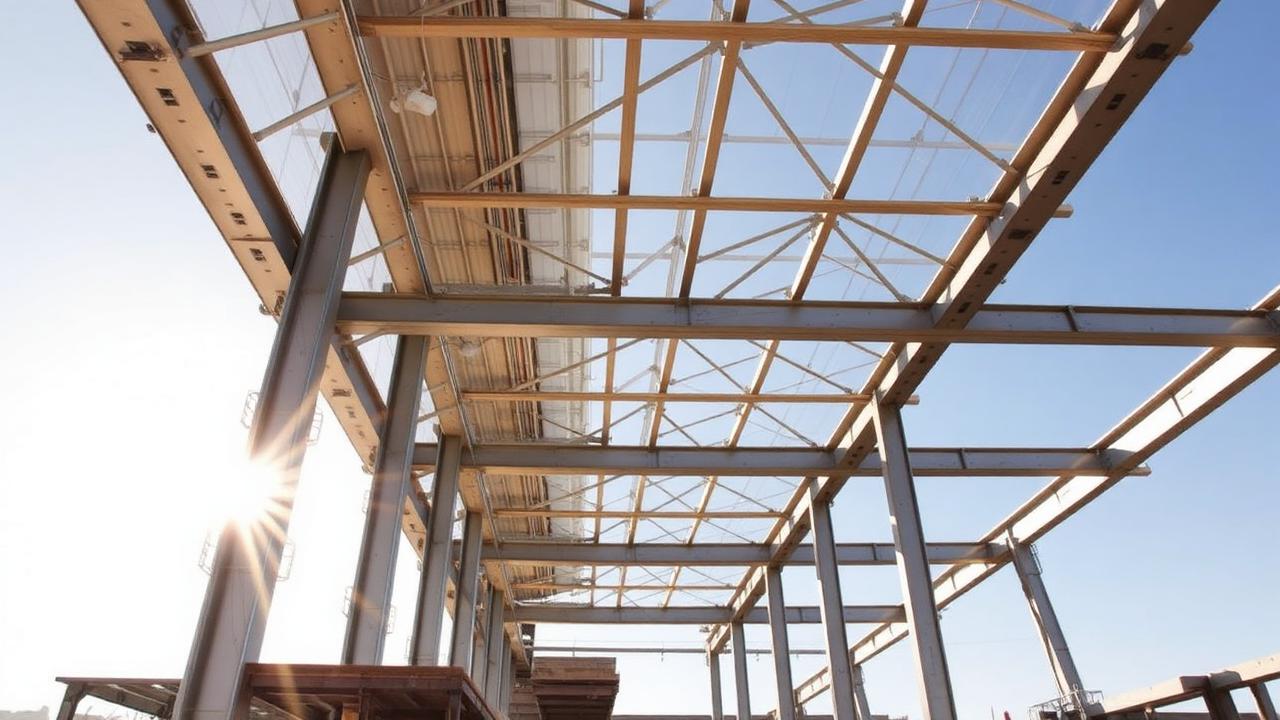
Design review on site: engineer of record, contractor, and building official resolving a detail together.
Week 1 studio setup — charter & shared file structure
Before S1 you must do two things: fill in and sign the group charter, and create the shared file structure your team will use for all twelve slots. Complete the fields below, download the filled Word document, sign it, then upload the signed PDF in step 3 below — it also files as page 2 of the S1 package.
1 · Group charter (fill in)
Group number
Section
Project Manager
Owns the schedule and the submission. Uploads S1–S12, keeps the calc index current, runs the weekly 30-minute coordination meeting, and signs the cover sheet.
Structural Analyst
Builds and maintains the analysis model (STAAD/SAP2000/ETABS/RISA), extracts demands, and reconciles software results with the hand check within 5%.
Design Engineer
Performs the limit-state checks with AISC 360-22 / ACI 318-19 citations, selects members, and reports utilization ratios.
Drafting & Documentation Lead
Owns the AutoCAD/Revit model, the drawing set (plans, sections, details), title blocks, and the sketch library.
Primary channel
Response time (hours)
Weekly meeting (day/time)
Location / link
Operating agreements (included in the document)
We will each contribute to every deliverable and no member will submit work they cannot explain at the final defense.
Every calculation is hand-checked by a second member before submission; the checker signs the peer-check line.
Every design check cites its AISC 360-22 or ACI 318-19 section.
Assumptions established in an earlier week (loads, materials, geometry) are reused, not re-derived.
Internal deadline is Friday 11:59 pm so the Project Manager can compile before the Sunday 11:59 pm deadline.
Conflicts are raised in the weekly meeting first; unresolved issues go to the instructor within 48 hours.
Roles rotate one step at the midterm gate (S7); the outgoing holder hands over files and open items in writing.
AI tools may be used for formatting and study support only — every design decision is authored and defended by the team.
Blank fields print as signature lines, so you can download it empty and complete it by hand.
2 · Shared file structure
Calc index, sketches, drawings, analysis models and references. The Project Manager creates it in the team drive in Week 1 and shares it with all members and the instructor.
CS-<Group#>-CardinalSquare/
├── 00_Admin/
│   ├── CS-<Group#>-Charter-signed.pdf
│   ├── Meeting-minutes/            # one dated file per weekly meeting
│   └── Role-rotation-handover.md   # completed at the S7 midterm gate
├── 01_Calc-Index/
│   ├── CS-<Group#>-Calc-Index.xlsx # master log: calc no. | member | limit state | AISC/ACI ref | checker | date
│   └── Calcs/
│       ├── S01_Framing-load-path/
│       ├── S02_Loads-LRFD/
│       └── ...                     # one folder per slot S01 … S12
├── 02_Sketches/
│   ├── Hand-sketches/              # scanned, dated, initialed
│   └── Figures/                    # exported diagrams used in the binder
├── 03_Drawings/
│   ├── CAD/                        # native .dwg / .rvt working files
│   ├── Plots/                      # issued .pdf sheets, named CS-<Group#>-S<n>-<sheet>.pdf
│   └── Templates/                  # title block, layer standard
├── 04_Analysis-Models/             # native STAAD / SAP2000 / ETABS / RISA files + result exports
├── 05_References/
│   ├── AISC-360-22-extracts/
│   ├── ASCE-7-22-extracts/
│   └── ACI-318-19-extracts/
└── 06_Submissions/                 # exactly what was uploaded, per slot: CS-<Group#>-S<n>.pdf (+ .dwg)
Calc index columns: calc no. · date · member / element · limit state · governing load combo · AISC/ACI section · result & utilization · author · checker · status.
3 · Submit the signed charter
Fill the fields above and download the charter as a Word document.
All four members sign it — typed signature in Word or ink on a printed copy.
Export or scan it to a single PDF named CS-<Group>-Charter-signed.pdf.
Any one member uploads it here — the whole team sees it instantly, and it also files into the S1 package.
Due Sun, Sep 6, 11:59 PM
Sign in to upload your team's signed charter.
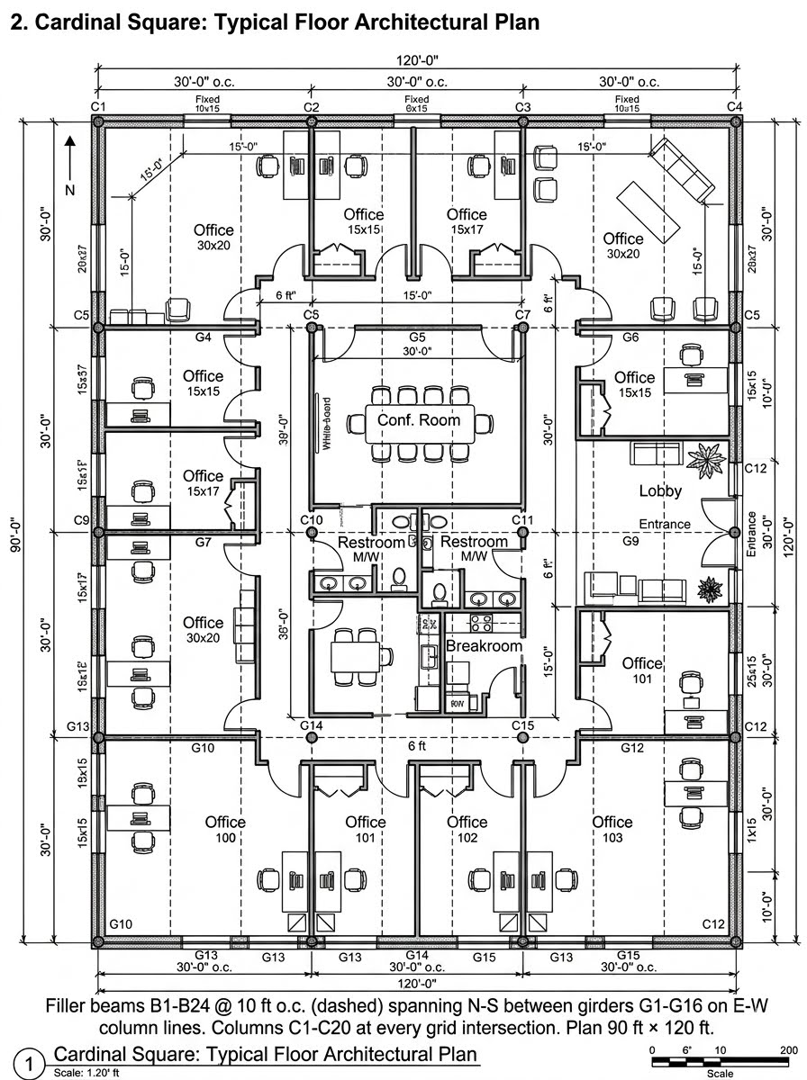
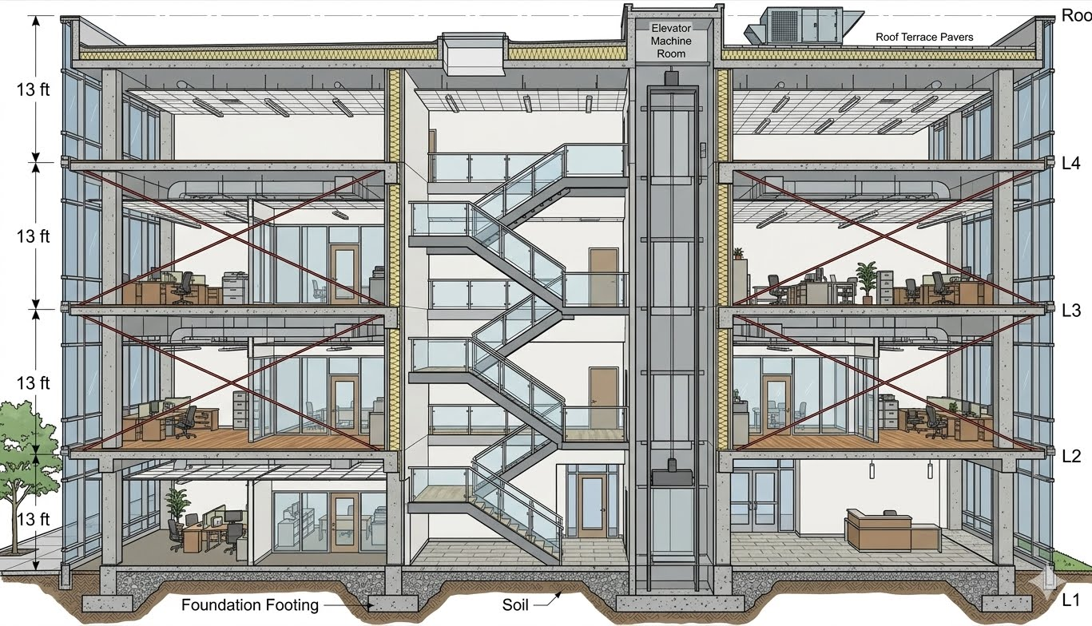
Cardinal Square — architectural plan & building section
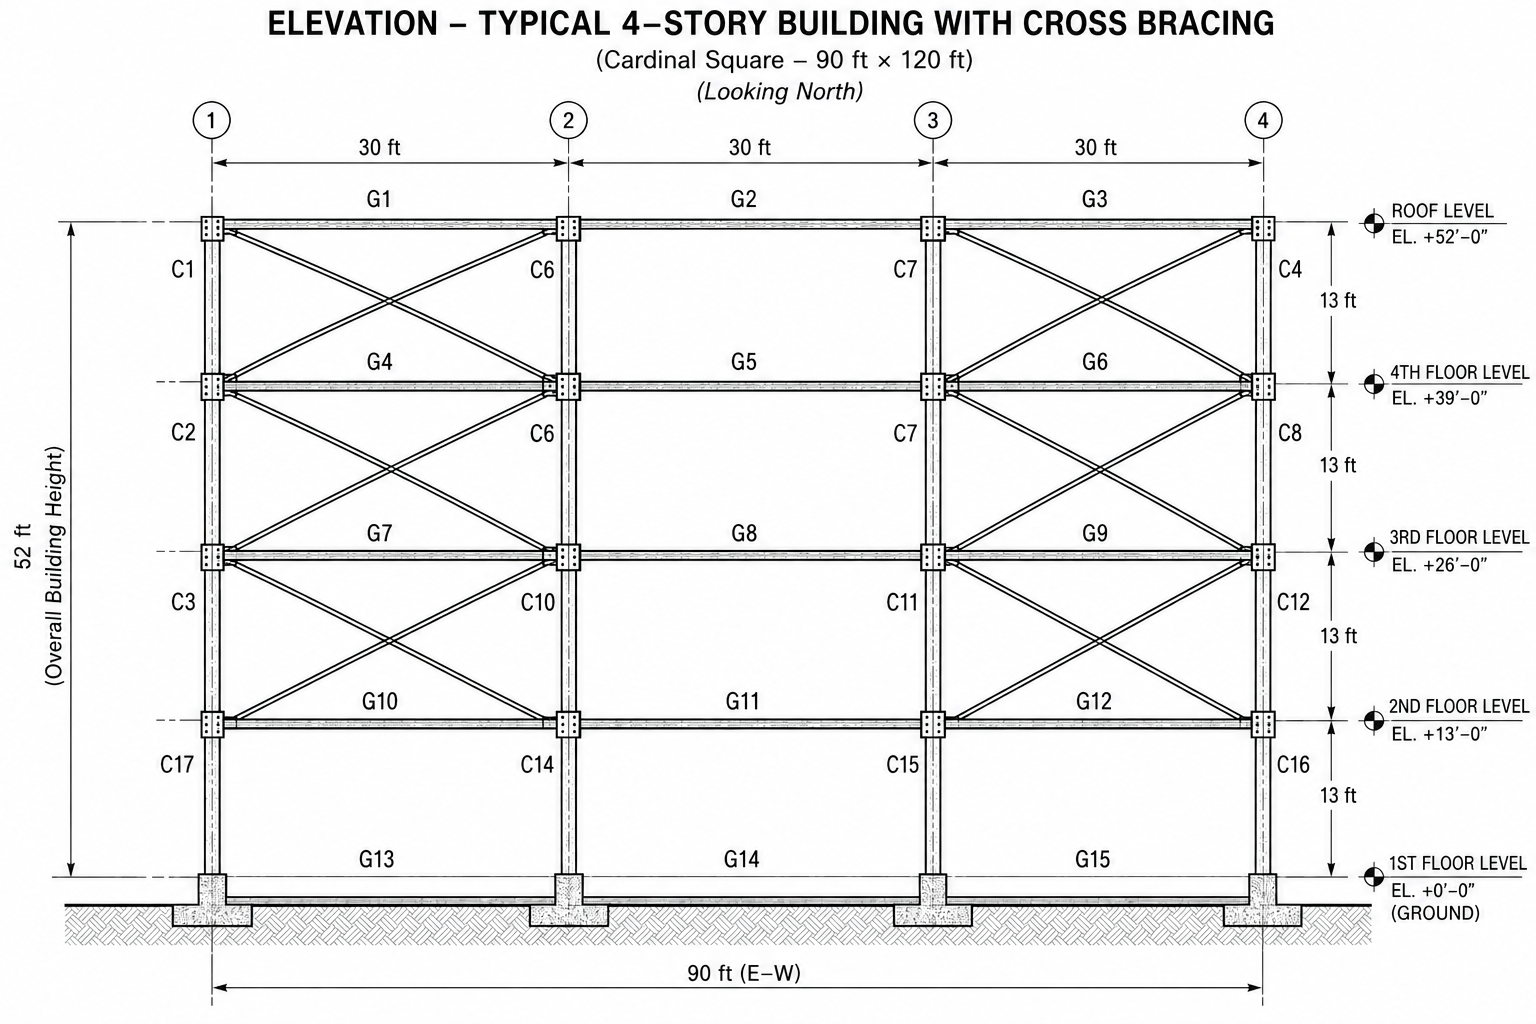
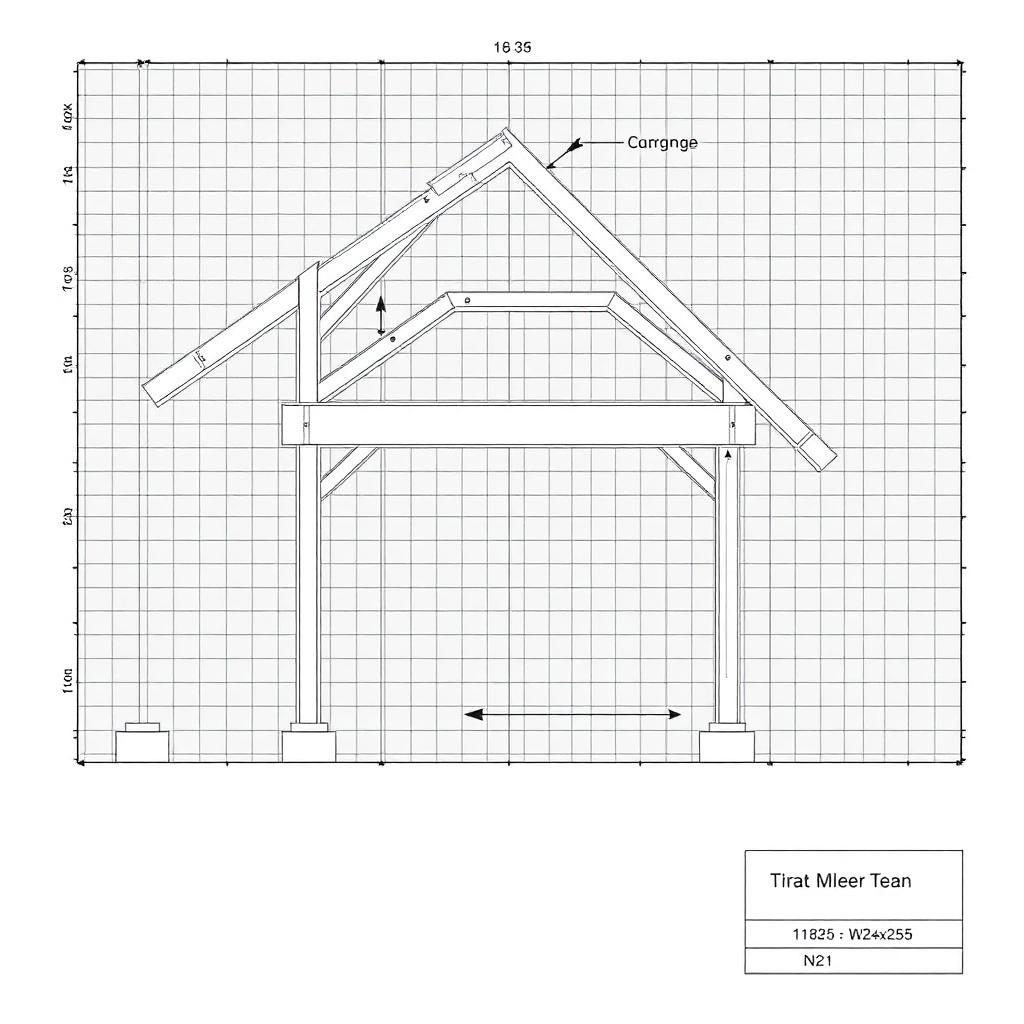
These two drawings are the architectural basis of the project: the typical floor plan (90 ft × 120 ft, 30 ft o.c. grid, filler beams B1–B24 at 10 ft o.c. spanning N–S between girders G1–G16, columns C1–C20) and the building section (4 stories at 13 ft). Every framing plan, load takeoff and member check must match this geometry.
Figure A — Typical floor architectural plan. Filler beams B1–B24 @ 10 ft o.c. span N–S between girders on the E–W column lines.Figure B — Building section: four stories at 13 ft, X-braced bays, stair/elevator core, roof plant and spread footings.
Cardinal Square — reference drawings
The four figures below define the building every group will design. Reference them in every weekly submission (S1–S12) so that loads, members, connections, and base plates all resolve to the same structure.
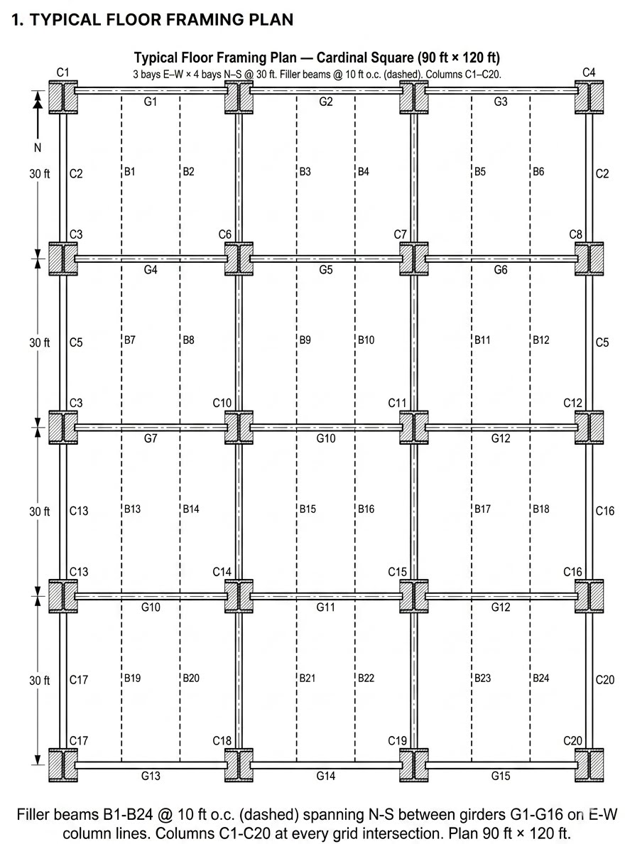
1. Typical Floor Framing Plan
Filler beams B1–B24 @ 10 ft o.c. spanning between girders G1–G16 on the column lines. Columns C1–C20 at every grid intersection. Plan 90 ft × 120 ft (3 bays × 4 bays @ 30 ft).
2. Braced Building Elevation
Four 13 ft stories over three 30 ft bays. HSS X-braces in the end bays form the lateral (CBF) system; interior bays are gravity-only with simple shear tabs.
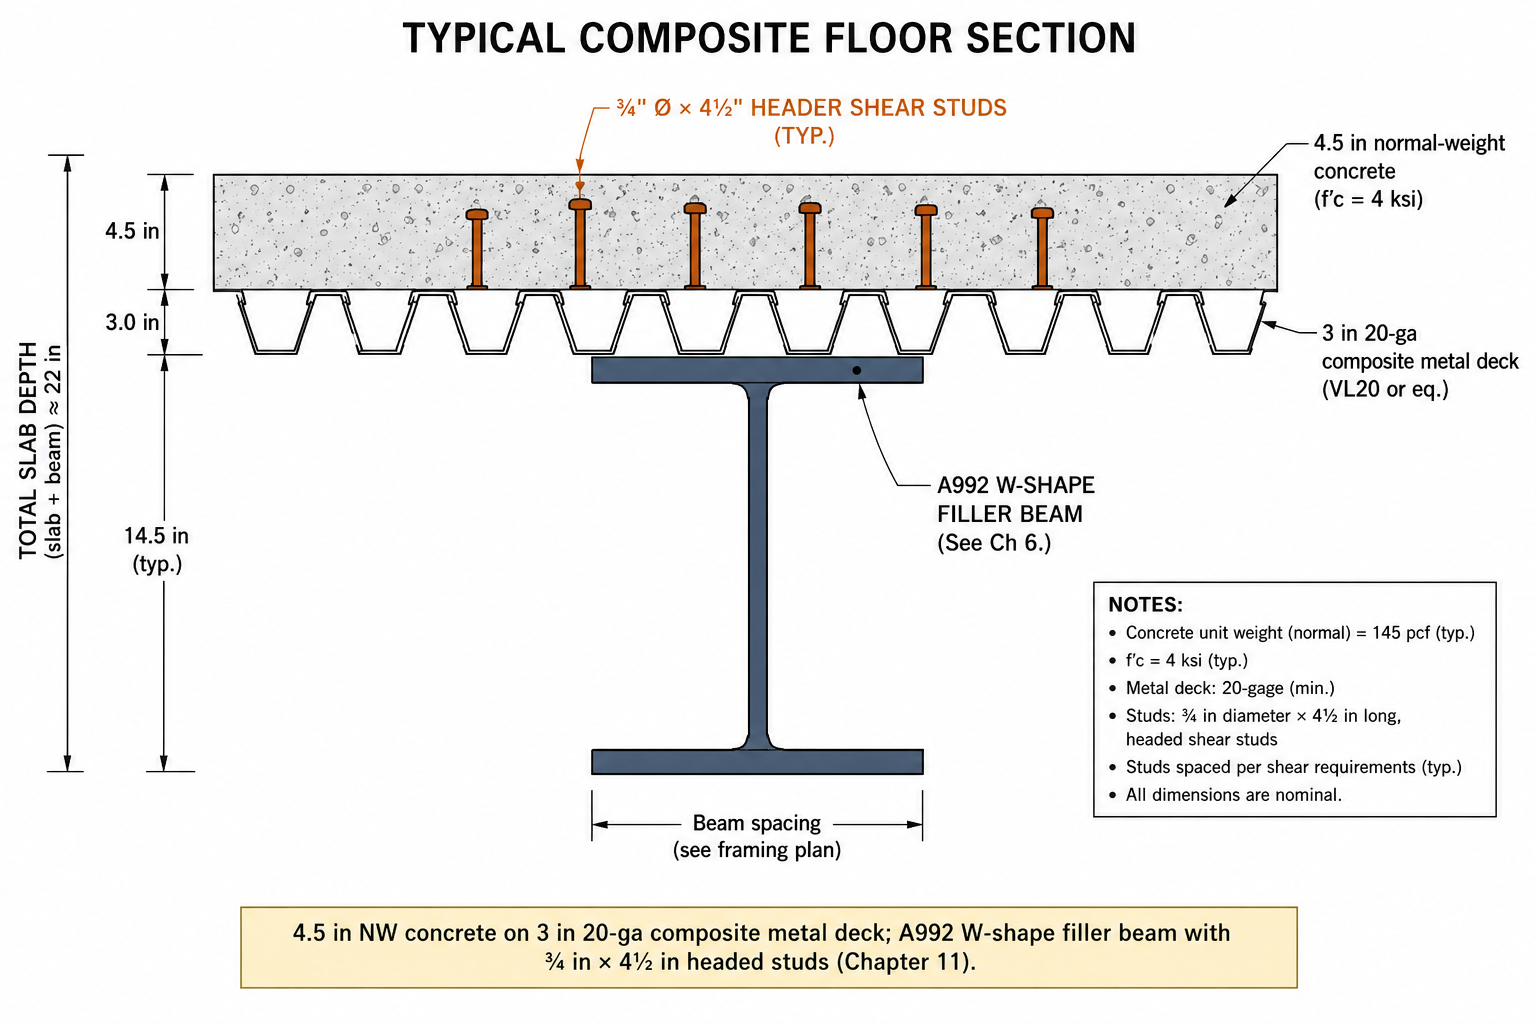
3. Typical Composite Floor Section
4.5 in NW concrete on 3 in 20-ga composite metal deck; A992 W-shape filler beam with ¾ in Ø × 4½ in headed shear studs (Chapter 11).
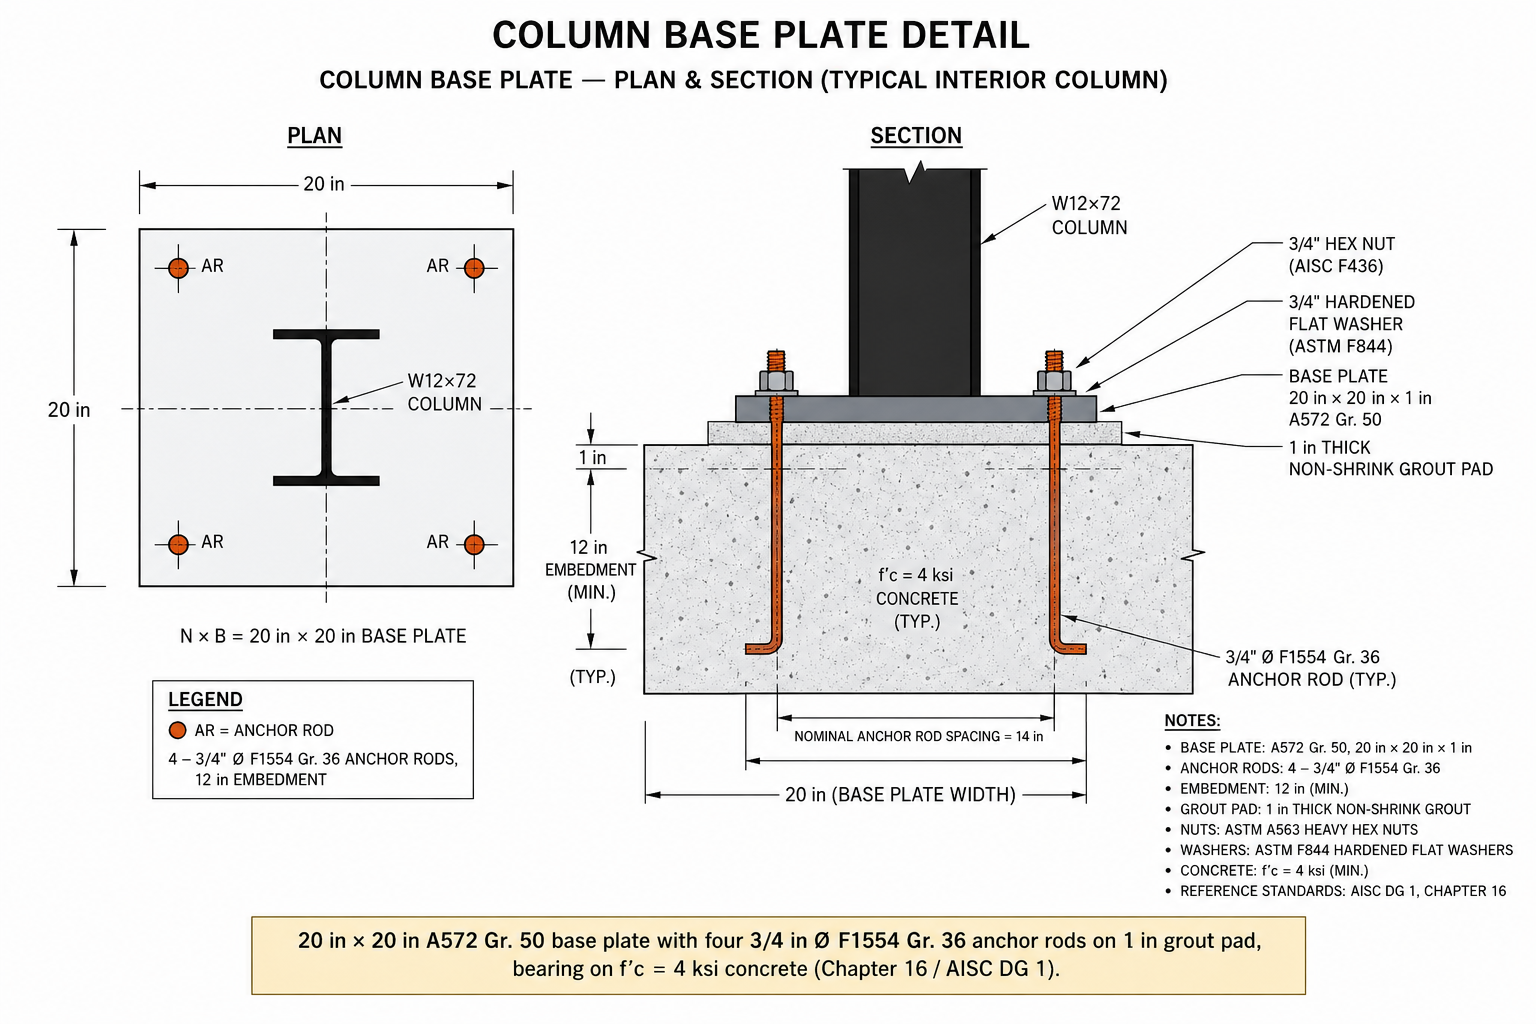
4. Column Base Plate Detail
20 in × 20 in × 1 in base plate with four ¾ in Ø F1554 Gr. 36 anchor rods on a 1 in grout pad, bearing on f′c = 4 ksi concrete (Chapter 16 / AISC Design Guide 1).
Group expectations
Groups of 3–4 students. Teams are assigned automatically from the class roster, and the four studio roles — Project Manager, Structural Analyst, Design Engineer, Drafting & Documentation Lead — rotate one step at the midterm gate (S7, Week 8, submitted Sunday Oct 25). You are emailed your team at the start of the semester and again when your role changes.
Week 1 (Aug 26 – Aug 30) is orientation — the brief, teams and software setup. Nothing is graded that week. The first deliverable, S1, is due Sunday Sep 6.
Every submission (S1–S12) is uploaded in the panel below and is due 11:59 pm on Sunday.
Late submissions: −5% per calendar day, no credit after 7 days.
All calcs hand-checked by a second group member before submission.
Every design check must cite the AISC 360-22 section (e.g. §F2.2, §E3, §J3.7).
Reuse results from prior weeks — do NOT re-derive loads mid-semester.
One shared Cardinal Square project across all chapters and 12 submissions.
Software you will use
This is a software-supported studio, but hand calculations come first. Every software result must be backed by a hand check that agrees within 5%, and the native analysis model is submitted with both gates.
Tool
Requirement
Structural analysis
STAAD.Pro, SAP2000, ETABS, or RISA-3D — one model carried the whole semester; the native model file (.std, .sdb, .edb, or .r3d) is submitted with S8 and S12.
Design calculations
Excel or Mathcad, hand-checked first. Software results must agree with the hand calc within 5%.
Drawings
AutoCAD or Revit for framing plans, elevations, and connection details (S-100 … S-500).
Documents
PDF only for grading — one file per slot, named CS-<Group>-<Slot>.pdf.
Weekly roadmap
S1 · Week 2 · Ch 1 — Framing & member types
Aug 31 – Sep 6, 2026
5% of capstone
Focus: Group formation, project kickoff, structural layout of Cardinal Square.
Group tasks
Teams of 3–4 are assigned automatically from the roster; confirm your four studio roles.
Sign the group charter and set up the shared file structure (calc index, sketches, references) using the charter + folder-tree templates in the studio setup panel.
Produce a framing plan of a typical floor + roof with all members labeled.
Trace the gravity load path: deck → filler beam → girder → column → base plate → footing.
Evaluation metrics
Framing correctness (grid, spans, bay sizes)
Member labeling & legend
Load path clarity and completeness
Drawing quality (title block, scale, dimensions)
Both deliverable formats issued: native .dwg and plotted .pdf
Signed group charter and shared file structure in place
Submission — S1 — Framing plan issued as BOTH the native CAD file (.dwg) and the plotted sheet (.pdf), plus a 1-page load-path narrative and the signed group charter. Upload CS-<Group>-S1.pdf (sheet + narrative + charter) and CS-<Group>-S1.dwg.
S2 · Week 3 · Ch 2 — Loads & LRFD combinations
Sep 7 – Sep 13, 2026
5% of capstone
Focus: ASCE 7-22 load takeoff and governing LRFD combos.
Group tasks
Tabulate D, L, Lr, S, W, E at roof and typical floor.
Apply live-load reduction (ASCE 7-22 §4.7) for columns and girders.
Report wu on a typical filler beam and Pu on a typical interior column.
Identify the governing combo for each member family.
Focus: Switch the floor system to reinforced concrete — materials memo and flexural design — and roll S1–S5 up into the Design Development binder.
Group tasks
Select f'c and fy; compute Ec and fr, and state the ACI 318-19 strength-design framework (φ factors, load factors §5.3).
Design a typical RC beam for Mu using the Whitney stress block: a, c, εt, φMn.
Check ρmin and ρmax (tension-controlled, εt ≥ 0.005) and select bar sizes with a cross-section sketch.
Compile the Design Development binder (S1–S5, indexed) and a 10-slide oral review.
Evaluation metrics
Correct Ec, fr and material justification (ACI 318-19 §19.2)
Whitney stress-block derivation shown from equilibrium, not table lookup
ρmin / ρmax and tension-controlled check verified
Bar selection, cover and spacing detailed to scale
All prior-week calcs cross-referenced, consistent and indexed in the binder
Submission — S6 — RC materials memo + flexural design calc, plus the compiled Design Development binder (S1–S5, single indexed PDF), drawing set and slides.
S12 · Week 13–15 · Final report, drawing set & oral defense
Nov 30 – Dec 11, 2026 (finals)
15% of capstone
Focus: Integrate every check into one calc book, drawing set, and defense.
Group tasks
Compile S1–S11 into a single indexed calc binder; resolve all inconsistencies.
Produce the drawing set S-100 through S-500 (plans, elevations, typical details).
Peer-check with a second group (swap and mark up) before submitting.
Present design philosophy, framing, governing checks, connections, base plate; each member owns one chapter in Q&A.
Evaluation metrics
Consistency of assumptions across all chapters
AISC section cited for every check
Drawing readability and title-block completeness
Individual mastery of the assigned chapter during Q&A
Submission — S12 — FINAL GATE: signed calc binder (PDF) + drawing set + slide deck + analysis model file. Oral defense during finals week (Dec 11).
Weekly submissions — upload here
One PDF per slot, uploaded by any member of your team — S1 additionally takes the native framing-plan CAD file (.dwg / .dxf), uploaded as a second file to the same slot — everyone on the team sees it immediately. Every slot, weekly or gate, is due 11:59 pm on Sunday. Late: −5% per calendar day, no credit after 7 days.
How grading works. Every weekly slot is checked for completeness and feedback is returned, but points are awarded at three moments: the rolling weekly checks (55%), the midterm gate S7 — the compiled Design Development binder (15%), and the final gate S12 — the signed calc binder, drawing set, and defense (25%). You do not wait until the end of the semester: each week's calc feeds the next.
Submissions paused after S3. The capstone studio is paused at S3 (Week 4) at your instructor's direction — uploads for S4 and later are disabled until further instruction. S1–S3 remain open for revisions, with normal late penalties.
How your upload will be graded
Your file — PDF, Word document, scanned handwriting or a photo — is read page by page like an experienced structural engineering instructor would. The scan is validated first, then your reasoning, structural model, calculations, diagrams, code basis and final answers are graded on process, not just the final number. Design work is additionally reviewed against AISC 360-22 and ACI 318-19. Partial credit applies, and one early mistake carried correctly forward is only penalized once.
Before you attach the file
Include every page, in order and right way up — a missing page cannot earn credit.
Keep margins in frame: nothing cropped at the edges, especially boxed final answers.
Scan or photograph in good, even light — no shadows, glare or blur; 300 dpi or a steady phone scan.
Write in dark pen; faint pencil is the most common 'UNREADABLE — INSTRUCTOR REVIEW REQUIRED' flag.
Include all diagrams, FBDs, shear/moment diagrams and section sketches — label them.
Number each question the same way the assignment does, and note anything you skipped.
Show units on every line and box your final answers.
Combine everything into ONE file (PDF preferred; Word, JPG or PNG accepted) under 20 MB.
Sign in to upload your team's capstone deliverables.
Overall grading rubric
Component
Weight
Weekly submissions (S1–S6, S8–S11)
55%
Midterm gate — Design Development (S7)
15%
Final gate — report & drawing set (S12)
20%
Final oral defense
5%
Peer & instructor evaluation
5%
Total
100%
Submission checklist (every week)
Cover sheet: project name, group #, week #, member names & signatures.
All calcs typeset (hand-written scans accepted only if legible + indexed).
AISC 360-22 section cited for every check (§F2.2, §E3, §H1-1a, §J3.7, …).
Governing limit state boxed and utilization ratio reported.
Assumptions consistent with prior weeks (loads, materials, geometry).
Peer-check sign-off line: reviewed by ____ on ____.
File named CS-<Group#>-<Slot>.pdf (e.g. CS-04-S6.pdf), uploaded in the submissions panel above.
Academic integrity
Every calculation must be traceable to the group. AI tools may be used for formatting, unit conversions, and study support, but every design decision, limit-state check, and final member selection must be justified by the group in the calc binder and defended orally at the final review.
Laboratory Program (Weeks 1–12)
Twelve professional-practice laboratories, each framed as a real engineering project rather than a textbook exercise. Every lab includes a client brief, AISC references, hand and software calculations, fabrication-ready deliverables, a QA/QC checklist, and an AI-assisted extension using industry tools (Tekla, Revit, IDEA StatiCa, RAM, SAP2000, STAAD.Pro).
Week
Theme
Industry Role
Wk 1
Hybrid HSS Moment Connection Detailing
Structural Detailer
Wk 2
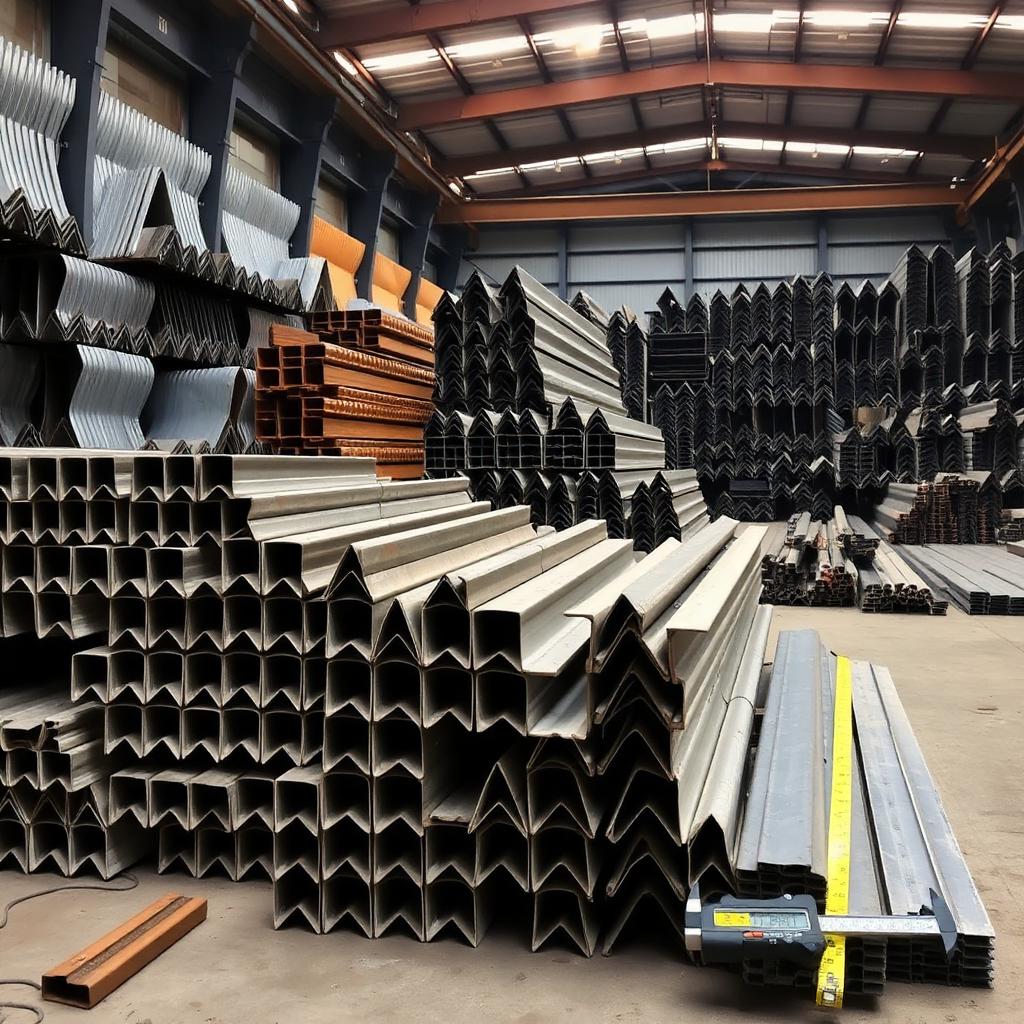
Structural Steel Shapes Investigation
Steel Inspector
Wk 3
Build the Strongest Bolted Connection
Connection Engineer
Wk 4
Weld Design and Fabrication
Welding Inspector (CWI-in-training)
Wk 5
Design a Tension Member
Structural Designer
Wk 6
Beam Design Challenge
Building Engineer
Wk 7
Steel Column Investigation
Stability Engineer
Wk 8
Beam-to-Column Connection Studio
Connection Specialist
Wk 9
Floor System Design
Building Designer
Wk 10
Steel Bridge Mini Project
Bridge Engineer
Wk 11
Structural Failure Investigation
Forensic Engineer
Wk 12
Consulting Firm Design Challenge (Capstone)
Consulting Structural Engineer
Laboratory 1 · Structural Detailer
Hybrid HSS Moment Connection Detailing
Already developed
Client brief — Client: a steel fabricator has procured a hybrid HSS column–to–W beam moment frame for a mid-rise office. The connection uses blind bolts through the HSS wall combined with a shop-welded stiffener ring and a field-welded flange plate. You are the detailer producing the fabrication and erection package.
Tracing the moment/shear load path through the joint
Constructability: erection sequence and fit-up tolerances
Tasks
Draw a 1:10 plan view of the joint region.
Draw a 1:5 elevation with all bolts and welds symbolized.
Draw two sections through the HSS at the flange plate and stiffener.
Overlay the moment couple + shear path in colored arrows.
Add a bill of materials with grades (A500 Gr. C HSS, A992 W, A325 bolts, E70XX).
AISC / code references
AISC 360-22 §K (HSS connections)
AISC 341-22 (if SMF)
AWS D1.1 §6 for weld details
Deliverables
Plan, elevation, and 2 sections (1 sheet)
Weld symbol schedule
Load-path overlay
Bill of materials
Software
Hand drafting
AutoCAD
Revit
Tekla Structures
QA/QC checklist
All welds have effective throat and length called out
Bolt edge distance ≥ 1.25 dₐ (Table J3.4)
Blind-bolt clearance verified against HSS wall thickness
Grading rubric
Drafting quality & title block
20%
AWS weld symbol accuracy
20%
Load-path clarity
20%
AISC/AWS citations
20%
Constructability commentary
20%
AI-assisted extension — Model the joint in Tekla or IDEA StatiCa Connection; export the CBFEM utilization plot and compare to hand checks.
Laboratory 2 · Steel Inspector
Structural Steel Shapes Investigation
Client brief — A shipment of 40+ steel members arrived at the fabricator's yard but the mill tags have fallen off. As the receiving inspector, you must measure each piece, back-calculate its AISC designation, and produce a professional inspection report before the material can be released to the shop floor.
Students learn
Reading calipers, tape, and micrometers
AISC Shapes Database v15 lookup workflow
Distinguishing W vs M vs S vs HP profiles
HSS vs Pipe (round vs square) identification
Estimating weight from area × 3.4 lb/ft/in²
Tasks
Measure d, bf, tf, tw, and root radius on each specimen.
Classify each as W / M / HP / S / WT / C / MC / HSS / Pipe / L / 2L.
Look up the closest AISC designation (Table 1-1 through 1-12).
Compute A, Ix, Sx, Zx from measured dimensions and compare to tabulated.
Flag any specimen whose measured dimensions fall outside ASTM tolerance.
AISC / code references
AISC Manual Part 1 (Dimensions & Properties)
ASTM A6/A6M (mill tolerances)
ASTM A992, A572, A500, A53
Deliverables
Measured sketch per specimen
AISC designation & properties table
Estimated weight per foot
Non-conformance list
Signed inspection report
Software
AISC Shapes Database (Excel)
Bluebeam / PDF markup
QA/QC checklist
Two-inspector rule: each measurement checked twice
Report deviations ≥ ASTM A6 tolerances
Photograph each specimen with tag number
Grading rubric
Measurement accuracy
25%
Correct AISC designation
25%
Property calculations
20%
Report presentation
20%
Non-conformance handling
10%
AI-assisted extension — Use a phone camera + a vision model to auto-suggest a candidate shape from a side-profile photo, then hand-verify with the AISC database.
Laboratory 3 · Connection Engineer
Build the Strongest Bolted Connection
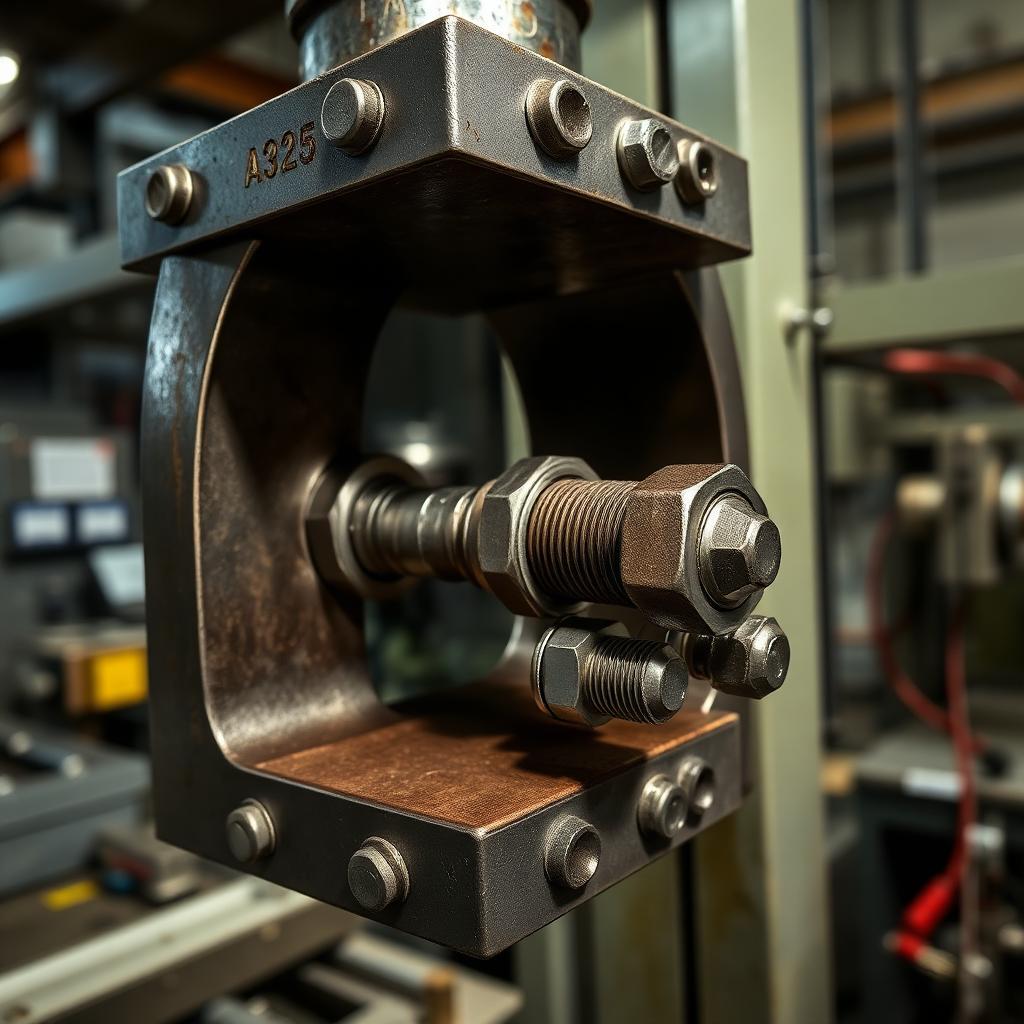
Client brief — Each team receives a fixed kit — two 3/8" plates, one gusset, 4 × A325-N 3/4" bolts, washers, and nuts. Design the strongest tension splice you can build while staying inside AISC 360-22 §J3 and RCSC spacing, edge distance, bearing, and tear-out rules. The connection is pulled to failure in a UTM.
Students learn
Bolt shear vs plate bearing vs tear-out vs block shear governance
RCSC pretension vs snug-tight installation
Effect of bolt pattern (2×2 vs 1×4 vs staggered) on capacity
Failure prediction vs observed failure mode
Tasks
Draw at least two candidate layouts with dimensions.
Compute φRn for each limit state; identify the governing failure.
Select and assemble the winning design; torque to snug-tight.
Pull to failure; log peak load and displacement.
Post-mortem: compare predicted vs actual failure mode.
AISC / code references
AISC 360-22 §J3 (Bolts)
AISC 360-22 §J3.10 (bearing at bolt holes)
AISC 360-22 §J4.3 (block shear)
RCSC Specification (2020)
Deliverables
Design calc package
Shop drawing of the assembly
Written failure prediction (signed before test)
Post-test comparison memo
Software
Excel calc sheet
AutoCAD detail
QA/QC checklist
Minimum edge distance ≥ Table J3.4
Minimum spacing ≥ 2⅔ dₐ (preferably 3 dₐ)
Threads-in-plane vs excluded stated on drawing
Grading rubric
Predicted vs actual limit state match
30%
Achieved peak load
20%
Calculation completeness
20%
Drawing quality
15%
Post-mortem depth
15%
AI-assisted extension — Build the layout in IDEA StatiCa Connection and compare CBFEM predicted failure load to the observed value.
Client brief — You are handed a set of shop drawings with sloppy or ambiguous weld callouts. Redraw them per AWS A2.4, size the welds per AISC §J2, then observe (or perform, if certified) fillet and groove welds and produce a visual inspection report per AWS D1.1 Table 6.1.
Students learn
AWS A2.4 symbol grammar (arrow/other side, tail, all-around, field)
Effective throat for fillet, PJP, and CJP welds
Minimum weld size (AISC Table J2.4) and maximum leg on plate edges
Every weld symbol has size, length, and pitch (if intermittent)
Minimum weld size verified against Table J2.4
Field welds flagged with the field-weld flag
Grading rubric
Symbol accuracy
25%
Weld sizing calcs
25%
Inspection thoroughness
25%
Report clarity
15%
Safety/PPE compliance
10%
AI-assisted extension — Use a phone + vision model to pre-screen welds for undercut/porosity, then confirm with hand inspection.
Laboratory 5 · Structural Designer
Design a Tension Member
Client brief — Client memo: a warehouse owner needs a new set of X-bracing for lateral wind resistance. Given Tu from the wind analysis, select a rod, HSS, double-angle, or plate, size the gusset, and verify all limit states.
Students learn
Gross yielding vs net rupture vs block shear governance
Shear-lag factor U (Table D3.1) for angles, WT, HSS
Gusset plate Whitmore section and buckling check
Sizing bolt patterns to satisfy spacing and edge distance
Tasks
Given Tu = 120 kip, propose two candidate sections (e.g. 2L4×3×3/8 and HSS4×4×3/8).
Check φTn for gross yielding (φ = 0.90) and net rupture (φ = 0.75).
Design the gusset: Whitmore width, gusset yielding, block shear.
Detail the bolt pattern and edge distances.
Predict controlling failure mode with a utilization chart.
AISC / code references
AISC 360-22 §D (Tension)
AISC 360-22 Table D3.1 (U)
AISC 360-22 §J4 (block shear)
Deliverables
Calc package with both trial sections
Shop drawing of brace + gusset
Utilization table (Fy vs Fu vs block shear)
Failure-mode prediction
Software
Excel
AutoCAD
IDEA StatiCa
QA/QC checklist
U selected from correct Table D3.1 row
Both yielding and rupture checked
Whitmore width drawn to scale
Grading rubric
Correct U selection
20%
Both limit states evaluated
20%
Gusset design completeness
25%
Drawing quality
20%
Failure-mode prediction
15%
AI-assisted extension — Model the gusset in IDEA StatiCa and compare Whitmore capacity to hand calc.
Laboratory 6 · Building Engineer
Beam Design Challenge
Client brief — Architect gives you: 30 ft span, 8 ft tributary width, D = 40 psf, L = 100 psf, and a ceiling clearance that limits total depth to 22 in. Select a W-shape, verify flexure, shear, and deflection, and produce a beam schedule row and shop drawing.
Compute wu (1.2D + 1.6L) and Mu = wuL²/8, Vu = wuL/2.
Pick a trial shape from Table 3-2; verify φbMn ≥ Mu.
Check shear φvVn (AISC §G2).
Check ΔL ≤ L/360 using unfactored L.
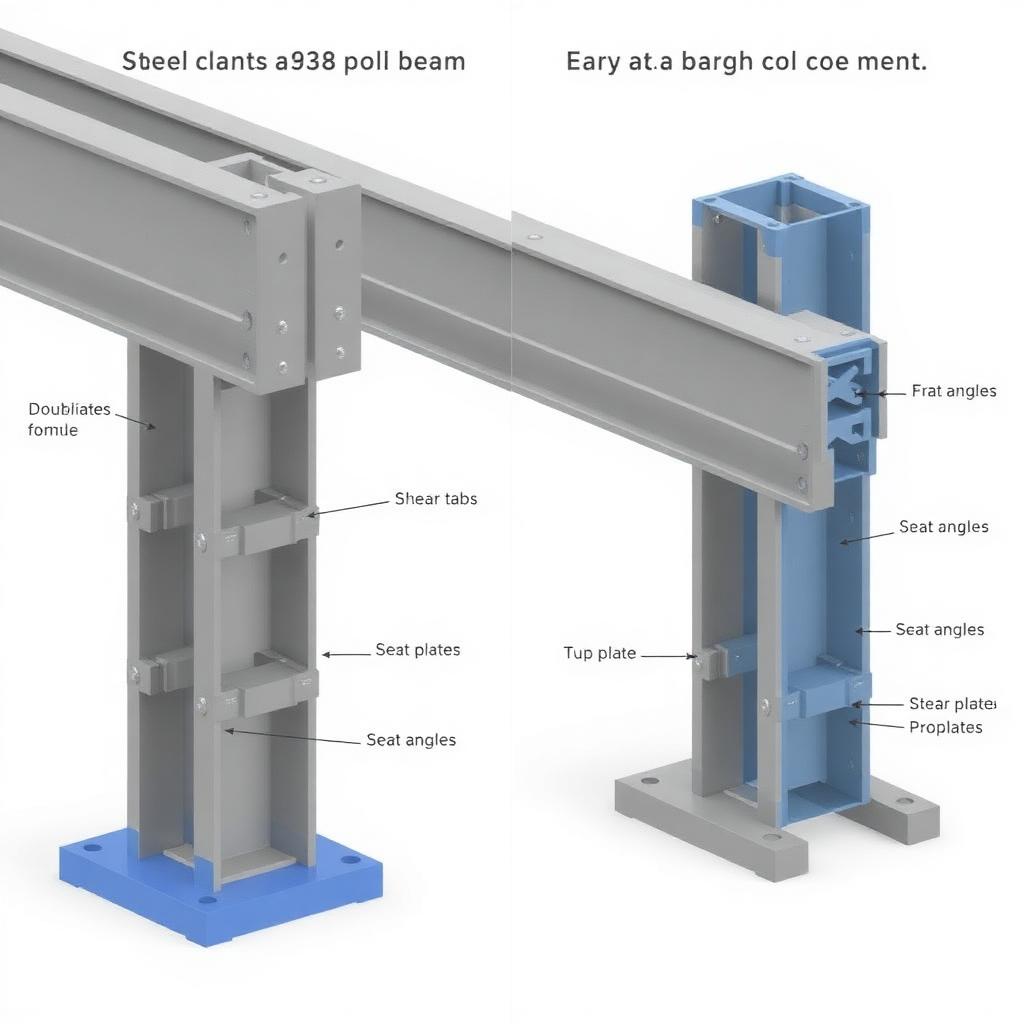
Detail: bearing plate at each support, shear-tab connection sizing.
AISC / code references
AISC 360-22 §F2 (compact I-shapes)
AISC 360-22 §G2 (shear)
AISC 360-22 §L3 (serviceability, deflection)
Deliverables
Beam calc sheet
Beam schedule row
Bearing plate calc
Shear connection calc
1-sheet construction drawing
Software
RAM Structural
SAP2000
AISC Steel Tools spreadsheets
QA/QC checklist
Lb < Lp confirmed or LTB explicitly checked
Deflection recomputed with cracked composite Ix if composite
Grading rubric
Load takeoff
15%
Flexure design
25%
Shear + deflection
20%
Detailing
20%
Drawing quality
20%
AI-assisted extension — Model the beam in RISA-3D and compare deflection to hand calc (∆5wL⁴/384EI).
Laboratory 7 · Stability Engineer
Steel Column Investigation
Client brief — A warehouse column has begun to bow visibly. Owner suspects overload. As the investigating engineer, back-calculate KL/r, elastic Euler load, AISC §E3 capacity, and base plate bearing to determine whether the column is over its factored capacity.
Students learn
Effective length K for the four ideal end conditions + alignment charts
Inelastic vs elastic buckling regime (KL/r vs 4.71√(E/Fy))
Base plate bearing (φc·0.85·f'c·√(A2/A1))
Distinguishing short, intermediate, long columns
Tasks
Measure the column geometry and end conditions on site.
Compute KL/r about both axes; identify governing axis.
Compute Pe = π²EI/(KL)² and Fcr per §E3 (E3-2 or E3-3).
Report φcPn and utilization Pu/φcPn.
Check base plate bearing and anchor rods.
AISC / code references
AISC 360-22 §E3 (compression)
AISC 360-22 Commentary Appx 7 (alignment charts)
AISC Design Guide 1 (base plates)
Deliverables
Site sketch with measurements
KL/r diagram both axes
φcPn calc
Base plate calc
Failure investigation report
Software
Excel
RISA-3D
STAAD.Pro
QA/QC checklist
Correct K discussion (0.65 vs 0.80 vs 1.0 vs 2.0)
Regime (inelastic vs elastic) explicitly identified
A2/A1 ≤ 4 checked for concrete pedestal
Grading rubric
Field data quality
15%
K + KL/r
20%
φcPn calc
25%
Base plate
20%
Report + recommendation
20%
AI-assisted extension — Model the column in RISA-3D and compare eigenvalue buckling load to hand Euler.
Laboratory 8 · Connection Specialist
Beam-to-Column Connection Studio
Client brief — Each team gets a different load case (shear-only, moment-only, or combined) and must choose an appropriate connection type — shear tab, double angle, seat angle, extended end plate, or bolted-flange plate moment — then produce shop drawings, a field-erection sequence, and a 3D model.
Students learn
When to pick shear-only vs moment connections
Rotation ductility of shear tabs vs stiffness of end plates
Perform AISC §J and §K checks on all limit states.
Produce shop drawing + field erection drawing.
Build a 3D BIM model of the joint.
Write a 1-page erection sequence.
AISC / code references
AISC 360-22 §J (Connections)
AISC 341-22 (if seismic)
AISC Manual Part 10 & 12 (connection design tables)
Deliverables
Decision matrix
Calc package
Shop + field drawings
3D BIM model (screenshots)
Erection sequence memo
Software
Tekla Structures
Revit
IDEA StatiCa
SDS/2
QA/QC checklist
Every bolt has grade + tensioning method
Erection stability considered (temp bracing)
Prying action checked for end plates
Grading rubric
Connection selection logic
20%
Calc completeness
25%
Drawing quality
20%
BIM model
15%
Erection sequence
20%
AI-assisted extension — Import the 3D joint into IDEA StatiCa Connection and validate hand checks against CBFEM.
Laboratory 9 · Building Designer
Floor System Design
Client brief — Client hands you an architectural floor plan (60 ft × 90 ft, 3 in composite deck, ceiling clearance 12 ft). Lay out the framing (beam spacing, girder direction, column grid), then produce a framing plan, member schedule, and reaction summary — the exact output a consulting firm delivers.
Students learn
Beam vs girder direction trade-offs (span efficiency vs depth)
Tributary width and load takedown to columns
Bay optimization (deep few vs shallow many)
Framing plan drafting conventions
Tasks
Propose two framing schemes; compute total tonnage for each.
Pick the winner and finalize beam/girder sizes.
Compute all beam and girder reactions at column faces.
Produce a framing plan (S-201) with member callouts.
Produce a beam and column schedule.
AISC / code references
AISC 360-22 §B & §F
AISC Design Guide 3 (Serviceability)
SDI composite deck manual
Deliverables
Scheme comparison memo
Framing plan (1 sheet)
Beam & column schedules
Reactions summary table
Software
RAM Structural
Revit
Tekla
Bluebeam
QA/QC checklist
Beam spacing within deck span capability
Depth checked against ceiling clearance
Column loads tally within 2 % of total tributary
Grading rubric
Framing logic + optimization
25%
Reactions accuracy
20%
Framing plan quality
25%
Schedules
20%
Presentation
10%
AI-assisted extension — Model both schemes in RAM Structural System and compare tonnage per square foot.
Laboratory 10 · Bridge Engineer
Steel Bridge Mini Project
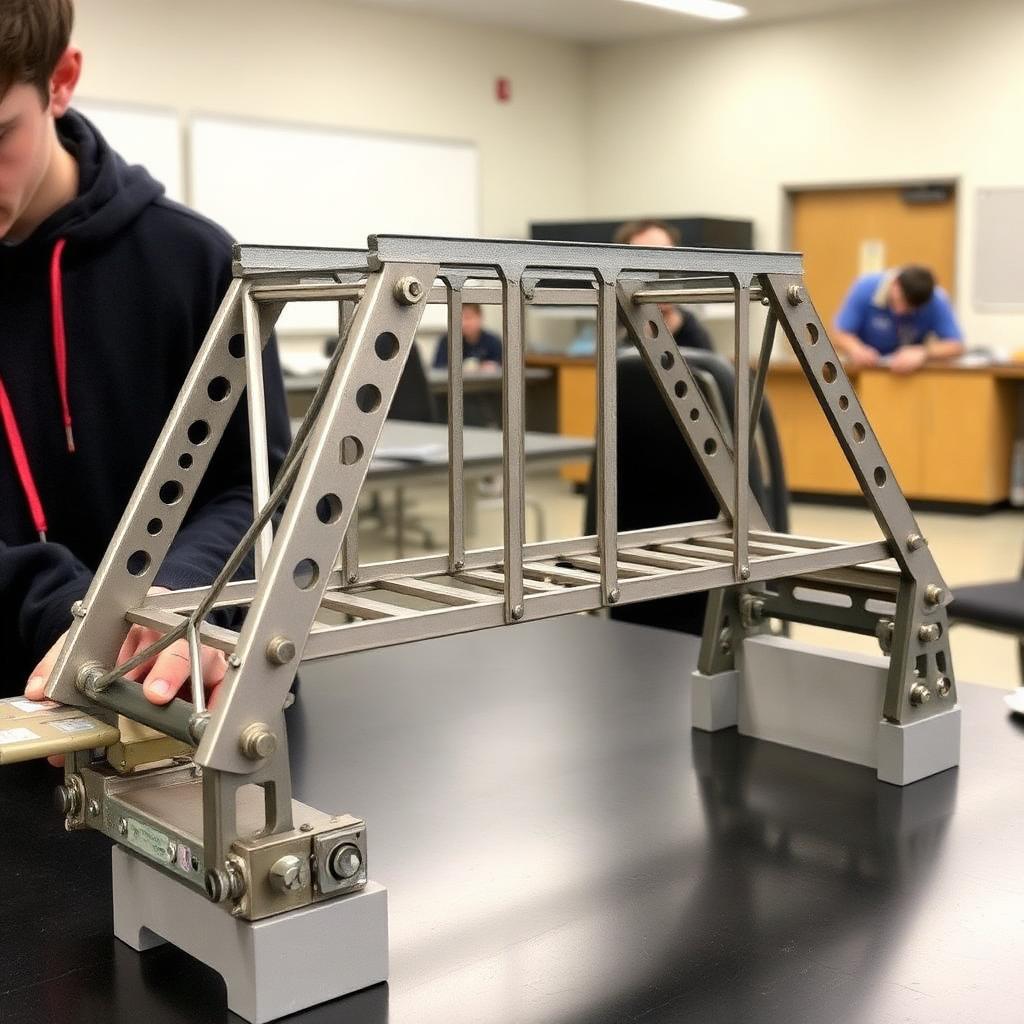
Client brief — Given a 20 ft simple-span pedestrian bridge, HL-93 pedestrian loading per AASHTO, and a fixed portal geometry, design the truss, gussets, bracing, and connections. Produce a complete fabrication drawing set — exactly like the ASCE Student Steel Bridge Competition.
Students learn
Truss analysis (method of joints/sections) refresher
Sizing tension vs compression chords + web members
Gusset plate design (Whitmore + buckling)
AASHTO LRFD load and resistance factors
Tasks
Analyze truss under HL-93 pedestrian load.
Size every member; check tension (Ch 4) and compression (Ch 5).
Design a typical panel-point gusset.
Design lateral bracing.
Produce fabrication drawings for one full truss + one gusset detail.
AISC / code references
AISC 360-22 §D, §E, §J
AASHTO LRFD §6
Deliverables
Truss analysis calc sheet
Member sizing table
Gusset detail
Bracing plan
Fabrication drawing set
Software
SAP2000
RISA-3D
AutoCAD
Tekla
QA/QC checklist
Compression chords checked for KL/r ≤ 120
Gusset plate slenderness at Whitmore section
AASHTO LRFD factors applied (not ASCE 7)
Grading rubric
Truss analysis
20%
Member sizing
20%
Gusset design
20%
Bracing
15%
Drawings
25%
AI-assisted extension — Model the truss in SAP2000, run buckling analysis, and compare Pcr to hand Euler.
Laboratory 11 · Forensic Engineer
Structural Failure Investigation
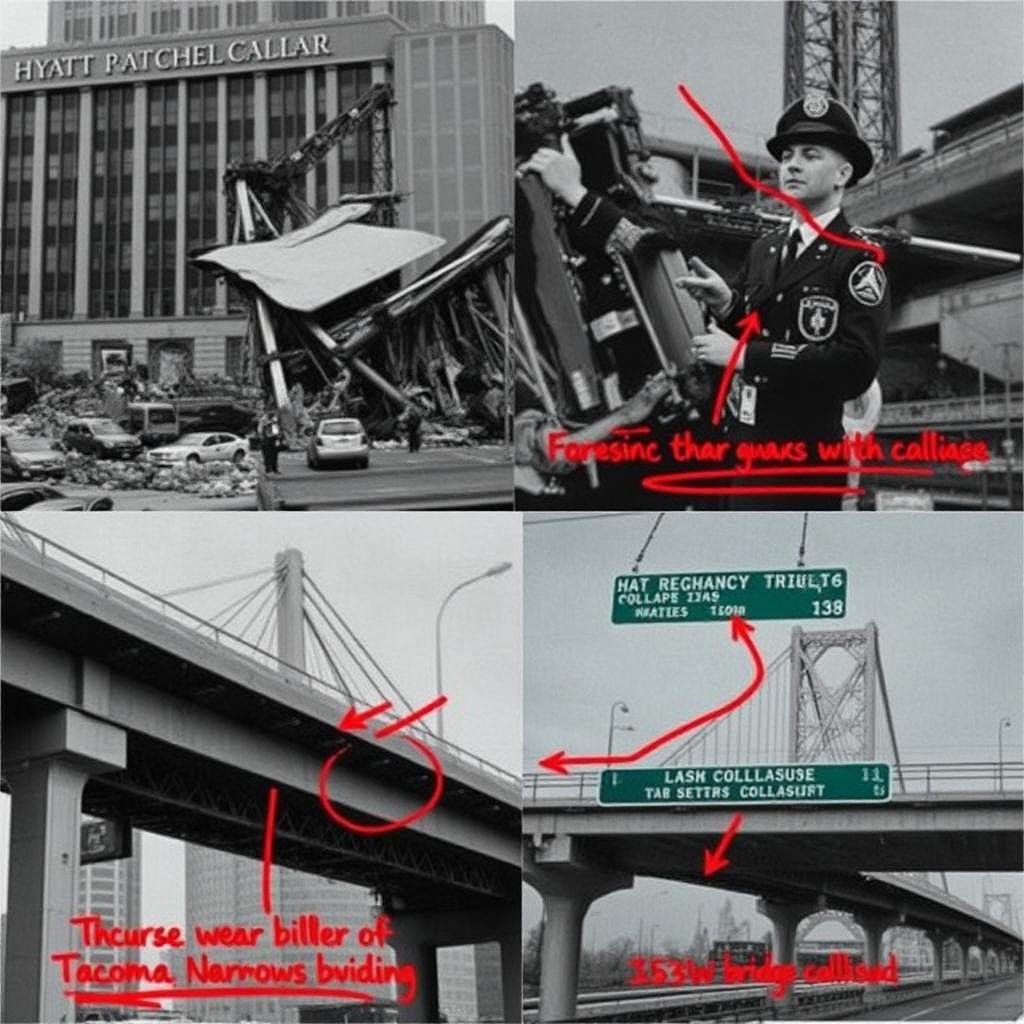
Client brief — Your team is assigned one historic failure (Hyatt Regency, FIU, Hartford Civic Center, Silver Bridge, Tacoma Narrows, Quebec Bridge, Sampoong, or I-35W). Reconstruct the failure, identify the AISC or code violation, and produce a forensic engineering report + red-lined drawing of the as-built vs the safe redesign.
Students learn
Root-cause analysis and fault-tree logic
Design-review process failures (Hyatt shop-drawing change)
Fatigue and fracture-critical members (Silver Bridge)
Aeroelastic flutter (Tacoma Narrows)
Progressive collapse triggers
Tasks
Reconstruct the geometry and loading at time of failure.
Compute the demand vs the as-built capacity — show the violation.
Propose a safe redesign; recompute capacity.
Produce red-lined drawing (as-built vs redesign).
Write forensic report with findings and recommendations.
AISC / code references
AISC 360-22 (relevant chapter for the failure mode)
ASCE Journal of Performance of Constructed Facilities
Deliverables
Reconstruction sketch
Demand vs capacity calc
Redesign calc
Red-lined drawing
Forensic report (10 pp)
Software
AutoCAD
STAAD.Pro / SAP2000 for reconstruction
QA/QC checklist
Cite the specific code section that would have caught the flaw today
Distinguish design error vs construction error vs review error
Grading rubric
Reconstruction accuracy
25%
Root-cause identification
25%
Redesign quality
20%
Red-lined drawing
15%
Report
15%
AI-assisted extension — Model the failure in SAP2000 and animate the collapse propagation; compare to eyewitness accounts.
Laboratory 12 · Consulting Structural Engineer
Consulting Firm Design Challenge (Capstone)
Client brief — Everything learned in Labs 1–11 comes together. Client delivers architectural drawings, owner requirements, a $/sf budget, and a construction schedule. Your team designs, details, models, draws, prices, and presents a complete steel-framed building — including a full calc package, connection details, framing plans, schedules, erection sequence, material takeoff, and cost estimate.
DD phase: member sizing, lateral analysis, seismic/wind base shears.
CD phase: connections, base plates, foundations reactions.
Shop drawings: full assembly + piece marks.
Erection sequence + material takeoff + cost estimate.
60-min professional presentation to a mock owner panel.
AISC / code references
AISC 360-22 (all chapters used in course)
AISC 341-22 (if seismic detailing)
ASCE 7-22 loads
AISC Design Guides 1, 3, 7, 11
Deliverables
Complete calc package
Framing plans (S-100…S-500)
Connection details
Column & beam schedules
Erection sequence
Material takeoff
Cost estimate
Constructability review memo
Presentation deck + dry-run video
Software
Revit + Tekla or SDS/2
RAM Structural System / ETABS
IDEA StatiCa
Bluebeam
Excel takeoff
QA/QC checklist
Every check cites AISC section
Loads consistent with ASCE 7
Connections designed for computed reactions (not rules of thumb)
Peer review by another team before submission
Grading rubric
Design completeness
20%
Calc quality + citations
20%
Drawing set
20%
Cost estimate + constructability
15%
Presentation
15%
Peer & owner-panel score
10%
AI-assisted extension — Full workflow: Revit model → export to Tekla → connections in IDEA StatiCa → analysis in ETABS → estimate in Excel → present with the model live.